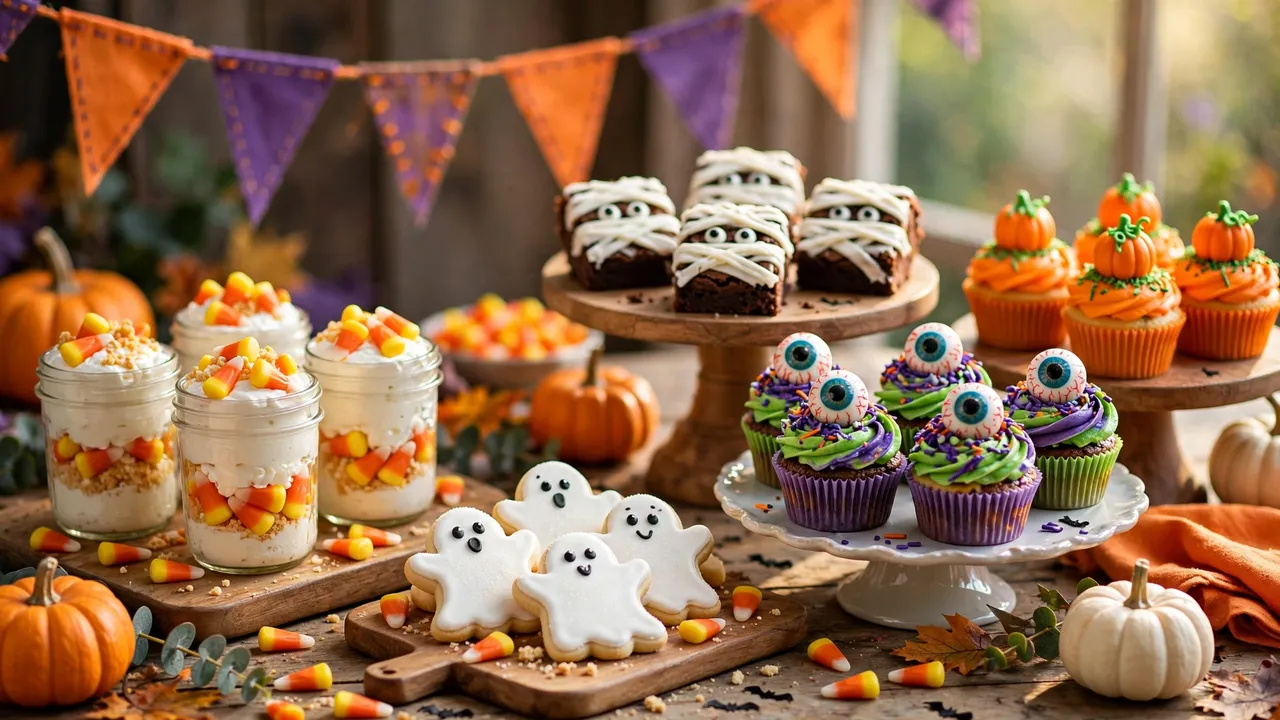
24 Adorable Halloween Desserts Kids Will Want to Try
If you're hunting for cute Halloween desserts for kids that are as fun to make as they are to eat, you've come to the right place. This collection rounds up 24 adorable treats — from ghostly meringue kisses to mummy-wrapped brownies — that turn any October gathering into a party kids will remember. Every recipe below is designed for little hands to help with: simple steps, pantry-friendly ingredients, and decorations that look impressive without fussy techniques. Whether you're planning a classroom party, a neighborhood trick-or-treat table, or just a cozy weekend baking session at home, these spooky-sweet desserts deliver big smiles with minimal stress. Scroll through, pick your favorites, and get ready to bake up some Halloween magic together.
Ghost Sugar Cookies

These adorable ghost-shaped sugar cookies are the perfect blank canvas for little decorators. Soft, buttery, and lightly vanilla-scented, they hold their shape beautifully in the oven. Kids will love piping on sleepy ghost faces with simple icing, and no two ghosts ever look alike — which is half the fun.
Ingredients
- 2 3/4 cups all-purpose flour
- 1 teaspoon baking soda
- 1/2 teaspoon baking powder
- 1 cup unsalted butter, softened
- 1 1/2 cups granulated sugar
- 1 large egg
- 2 teaspoons vanilla extract
- White royal icing for decorating
- Black gel food coloring
Instructions
- Whisk the flour, baking soda, and baking powder together in a medium bowl.
- Beat the butter and sugar until light and fluffy, then mix in the egg and vanilla.
- Gradually add the dry ingredients and mix just until a soft dough forms.
- Chill the dough for 30 minutes, then roll out and cut ghost shapes with a cookie cutter.
- Bake at 350°F for 9-11 minutes, until the edges are set but not browned.
- Cool completely, then pipe white icing and add sleepy eyes and mouths with black gel.
Monster Eyeball Cupcakes
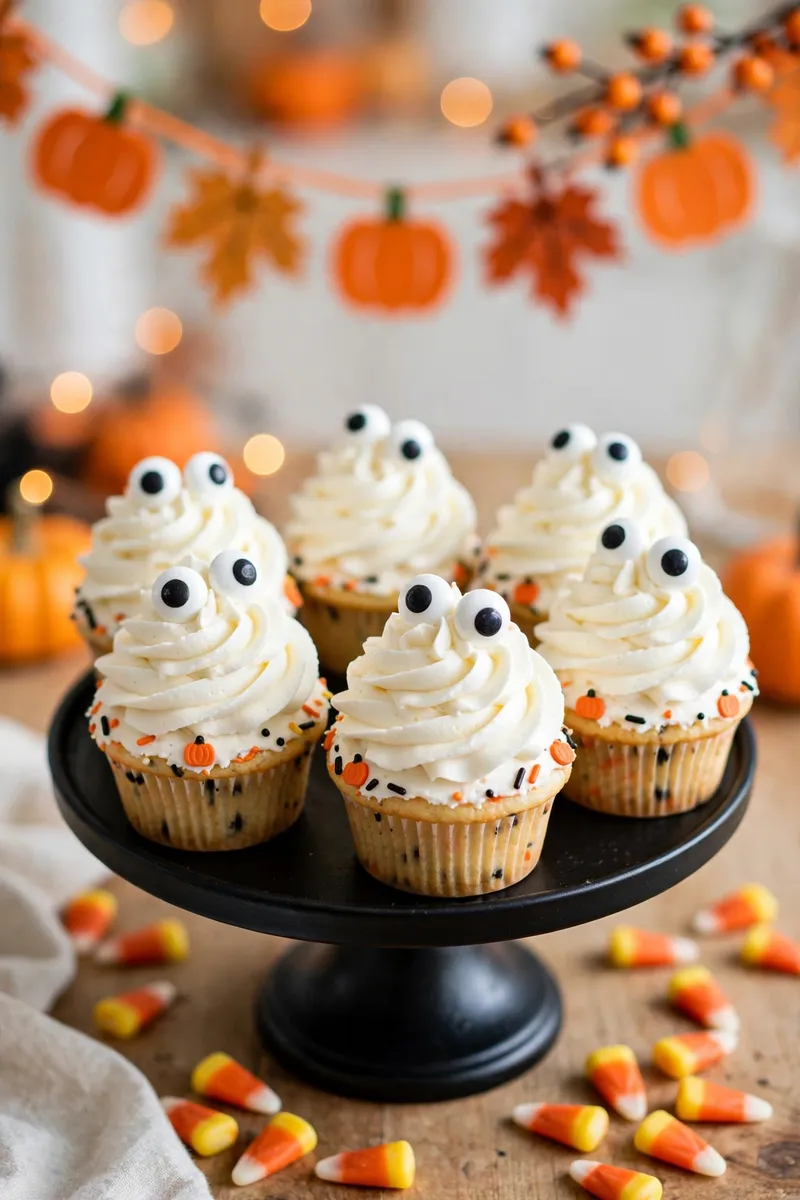
Warning: these cupcakes stare back. Fluffy vanilla cupcakes get a spooky upgrade with swirled frosting and candy eyeballs that wobble with every bite. They're a guaranteed hit at classroom parties because kids can't resist food with a face. The decorating is simple enough for beginners but looks bakery-worthy on the party table.
Ingredients
- 1 1/2 cups all-purpose flour
- 1 cup granulated sugar
- 1 1/2 teaspoons baking powder
- 1/2 cup unsalted butter, melted
- 2 large eggs
- 1/2 cup whole milk
- 2 teaspoons vanilla extract
- 1 can vanilla frosting
- Candy eyeball sprinkles
Instructions
- Preheat the oven to 350°F and line a 12-cup muffin tin with paper liners.
- Whisk the flour, sugar, and baking powder in a large bowl.
- Whisk the melted butter, eggs, milk, and vanilla, then fold into the dry ingredients.
- Divide the batter among the liners and bake for 18-20 minutes, until a toothpick comes out clean.
- Cool completely, then swirl frosting high on each cupcake.
- Press candy eyeballs into the frosting — one big eye or a silly cluster of small ones.
Mummy Brownie Bites
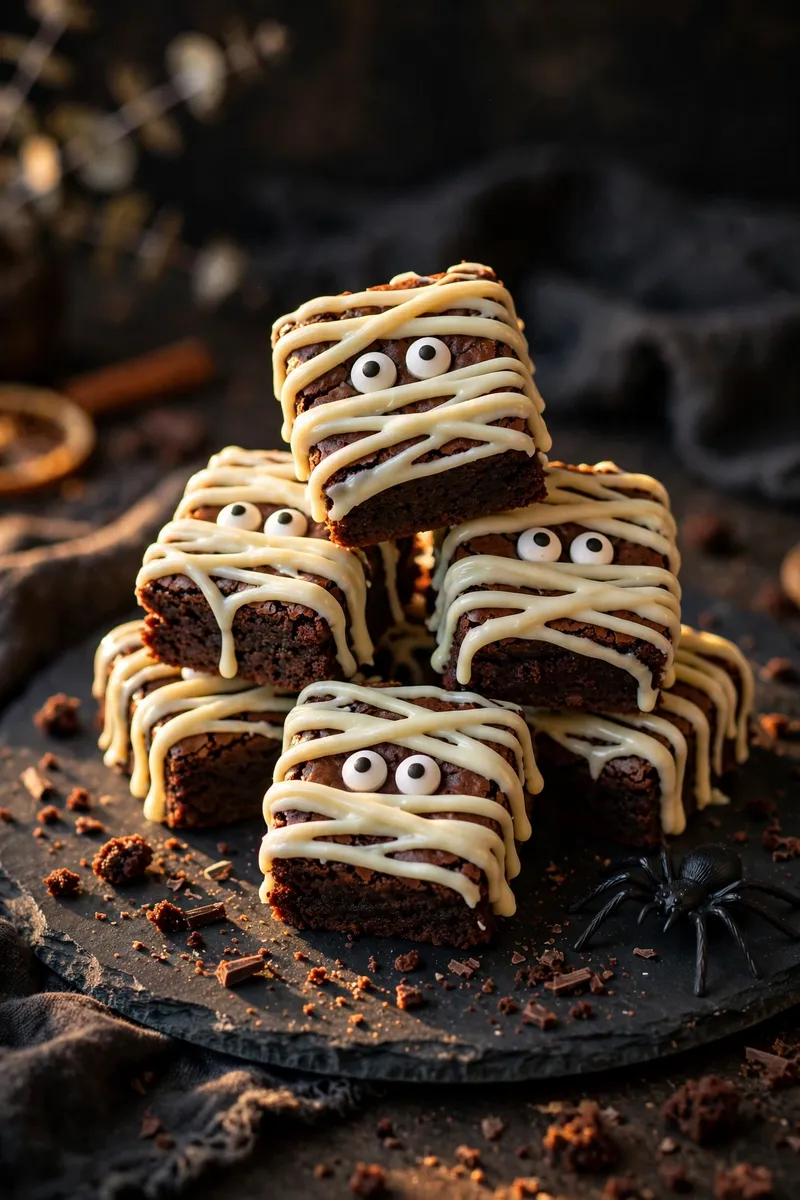
Fudgy brownie bites wrapped in zigzags of white chocolate become the cutest little mummies on the dessert table. The contrast of dark chocolate and white drizzle looks impressive but takes just minutes to pipe. Add candy eyes and these bite-sized treats practically sell themselves — kids reach for them first every single time.
Ingredients
- 1 box fudge brownie mix
- 2 large eggs
- 1/2 cup vegetable oil
- 1/4 cup water
- 1 cup white chocolate chips
- 1 teaspoon coconut oil
- Candy eyeballs
Instructions
- Prepare the brownie batter according to the box directions and bake in a mini muffin tin.
- Cool the brownie bites completely, then pop them out of the tin.
- Melt the white chocolate chips with the coconut oil until smooth.
- Drizzle the white chocolate back and forth across each bite to look like mummy wraps.
- Press two candy eyes onto each mummy while the chocolate is still wet.
- Let the chocolate set for 15 minutes before serving.
Tip: I always freeze the brownie bites for 10 minutes before drizzling — the cold surface helps the white chocolate set into crisp mummy lines instead of sliding off.
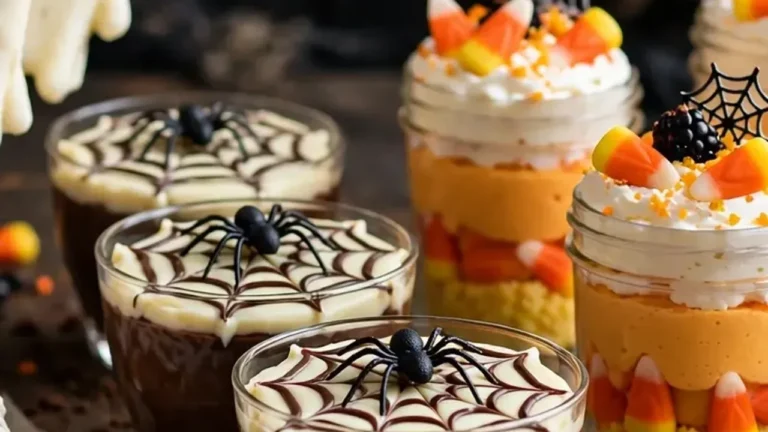
Candy Corn Parfaits
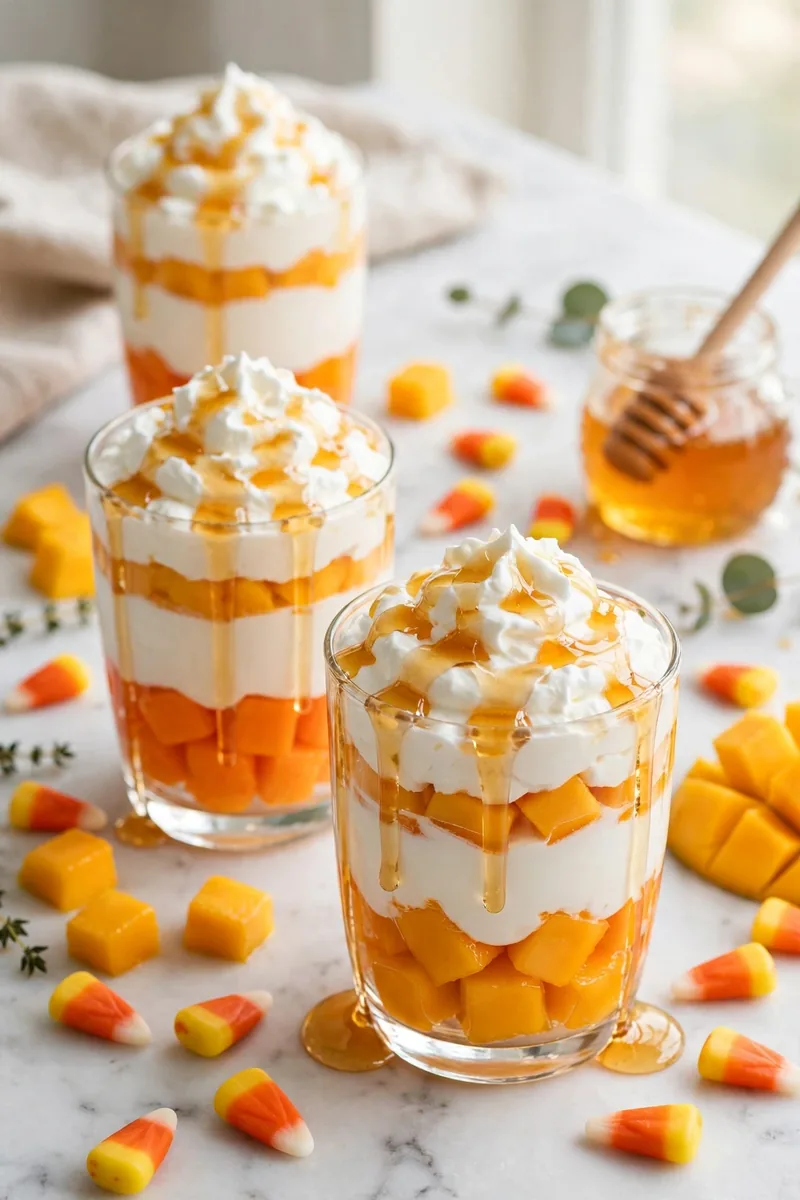
Layered like the classic candy, these no-bake parfaits stack orange and yellow pudding with fluffy whipped cream. Served in clear cups so the stripes show through, they look like edible candy corn. Kids love building their own layers, and there's zero oven time — perfect for a last-minute party addition.
Ingredients
- 2 boxes vanilla instant pudding mix
- 4 cups cold milk
- Orange gel food coloring
- Yellow gel food coloring
- 2 cups heavy whipping cream
- 1/4 cup powdered sugar
- Candy corn for topping
Instructions
- Whisk the pudding mixes with cold milk until thick, then divide into two bowls.
- Tint one bowl orange and the other yellow with gel food coloring.
- Whip the heavy cream with powdered sugar until soft peaks form.
- Layer yellow pudding, then orange pudding, then whipped cream in clear cups.
- Top each parfait with a few candy corn pieces.
- Chill for at least 1 hour before serving.
Spiderweb Chocolate Bark
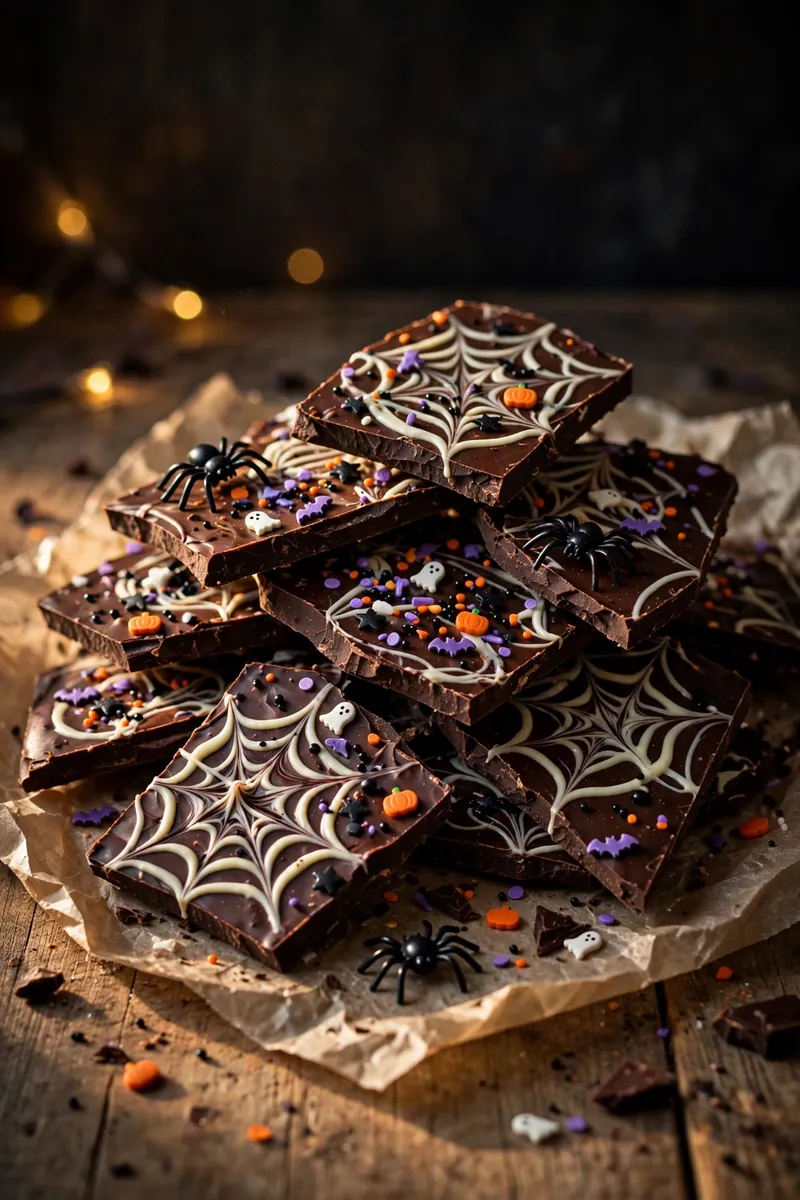
Melted chocolate swirled with white chocolate spiderwebs makes a bark that looks far fancier than it is. Break it into jagged pieces and watch kids hunt for the biggest web. It's a wonderful make-ahead treat since the bark keeps for days — if it lasts that long around little hands.
Ingredients
- 12 ounces semisweet chocolate chips
- 4 ounces white chocolate chips
- 1 tablespoon coconut oil, divided
- Halloween sprinkles
- Candy spiders
- Sea salt flakes, optional
- Parchment paper
Instructions
- Melt the semisweet chocolate with half the coconut oil and spread it on a parchment-lined baking sheet.
- Melt the white chocolate with the remaining coconut oil and drizzle it in spirals over the dark chocolate.
- Drag a toothpick through the spirals to create a spiderweb pattern.
- Scatter sprinkles and candy spiders over the top while the chocolate is wet.
- Chill until firm, about 30 minutes, then break into pieces.
Pumpkin Patch Cupcakes
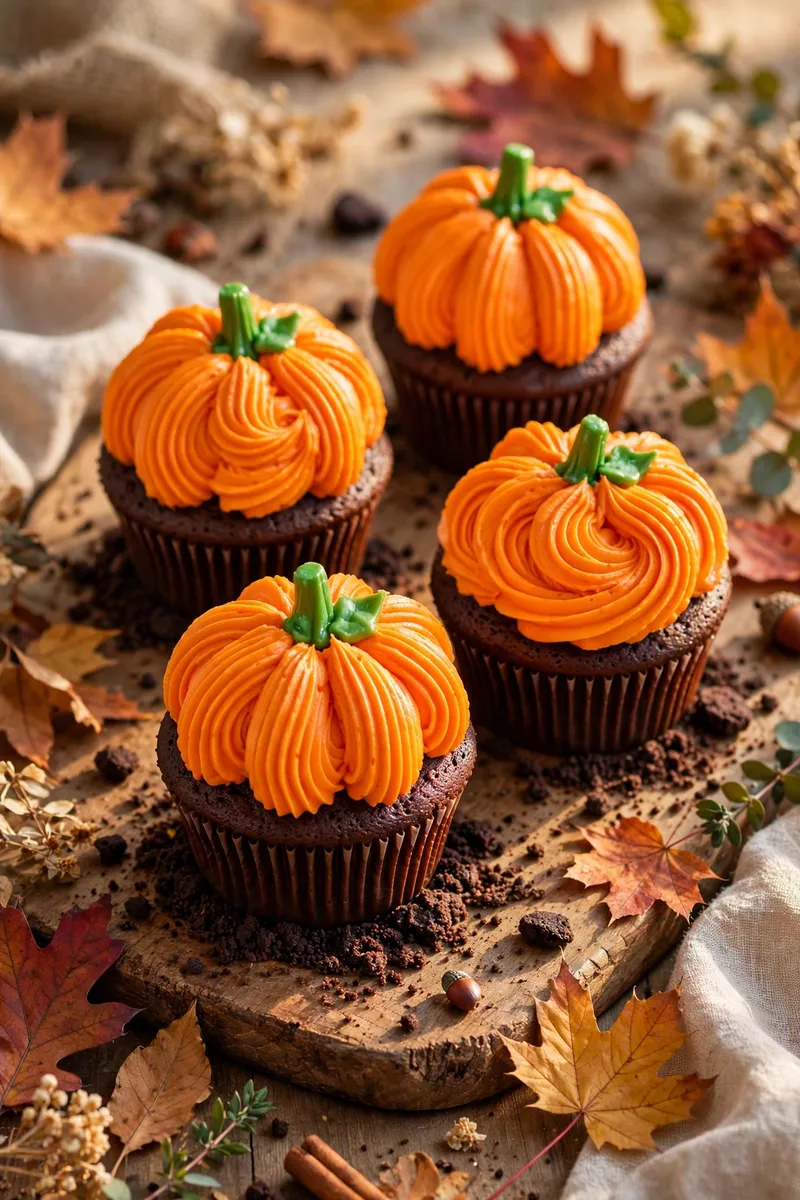
Chocolate cupcakes transform into a mini pumpkin patch with orange frosting swirls and pretzel-stem toppers. Crushed cookie "dirt" around each pumpkin makes the patch complete. These are a classroom party superstar — every cupcake looks like a tiny harvest scene, and kids gobble them up.
Ingredients
- 1 box chocolate cake mix
- Ingredients listed on the box
- 1 can vanilla frosting
- Orange gel food coloring
- Chocolate sandwich cookies, crushed
- Mini pretzel sticks
- Green fruit leather strips
- Cupcake liners
Instructions
- Bake the chocolate cupcakes according to the box directions and cool completely.
- Tint the vanilla frosting bright orange with gel food coloring.
- Pipe a tall swirl of orange frosting on each cupcake.
- Press a mini pretzel stick into the top as the pumpkin stem.
- Tie a small strip of green fruit leather around the stem as a leaf.
- Sprinkle crushed cookies around the base to look like garden dirt.
Witch Hat Cookies
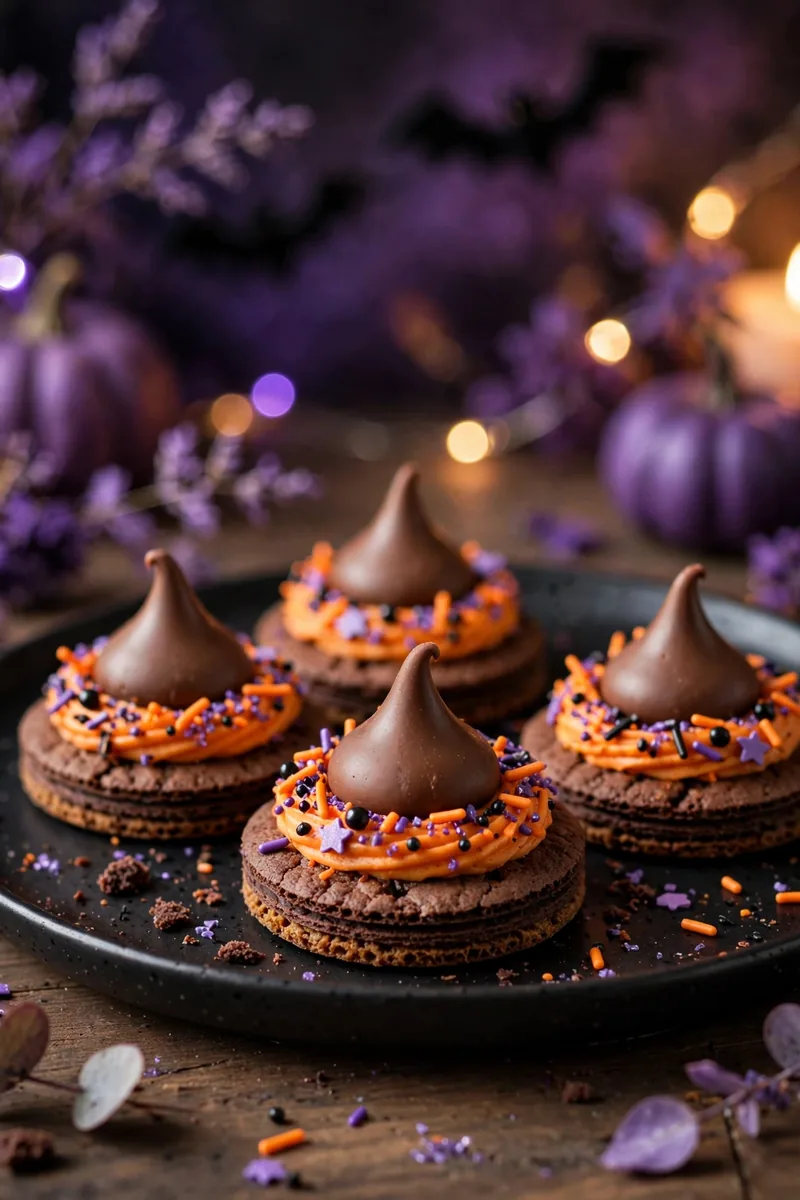
A fudge-striped cookie becomes a witch's hat with a chocolate kiss and a swirl of orange icing. These are almost too cute to eat — almost. Kids love assembling them because it's basically edible crafting, and the whole batch comes together in under 30 minutes with zero baking required.
Ingredients
- 24 fudge-striped shortbread cookies
- 24 chocolate kiss candies
- 1 can orange frosting
- Black decorating gel
- Purple sprinkles
- Wax paper
Instructions
- Pipe a ring of orange frosting on the flat side of each chocolate kiss.
- Press each kiss onto the chocolate side of a fudge-striped cookie.
- Pipe an orange band around the base of each kiss where it meets the cookie.
- Add a small black gel buckle square on the front of the band.
- Sprinkle with purple sprinkles and let set for 20 minutes.
Tip: I unwrap all the kisses ahead of time and line everything up assembly-line style — with kids helping, the hats come together in minutes and nobody gets stuck waiting.
Graveyard Dirt Cups

Chocolate pudding layered with crushed Oreos becomes a spooky graveyard when you add cookie tombstones and gummy worms. Served in individual cups, these are perfectly portioned for little hands and endlessly customizable. The best part? Kids can build their own graveyards exactly how they like them.
Ingredients
- 2 boxes chocolate instant pudding
- 4 cups cold milk
- 20 chocolate sandwich cookies, crushed
- 8 Milano cookies for tombstones
- Black decorating gel
- Gummy worms
- Whipped cream
- 8 clear plastic cups
Instructions
- Whisk the pudding with cold milk and chill for 5 minutes until set.
- Write "RIP" on each Milano cookie with black decorating gel.
- Spoon pudding into each cup, leaving room at the top.
- Sprinkle a thick layer of crushed cookies over the pudding as dirt.
- Push a tombstone cookie into each cup and add gummy worms crawling out.
- Top with a dollop of whipped cream and serve immediately.
Bat Wing Brownies
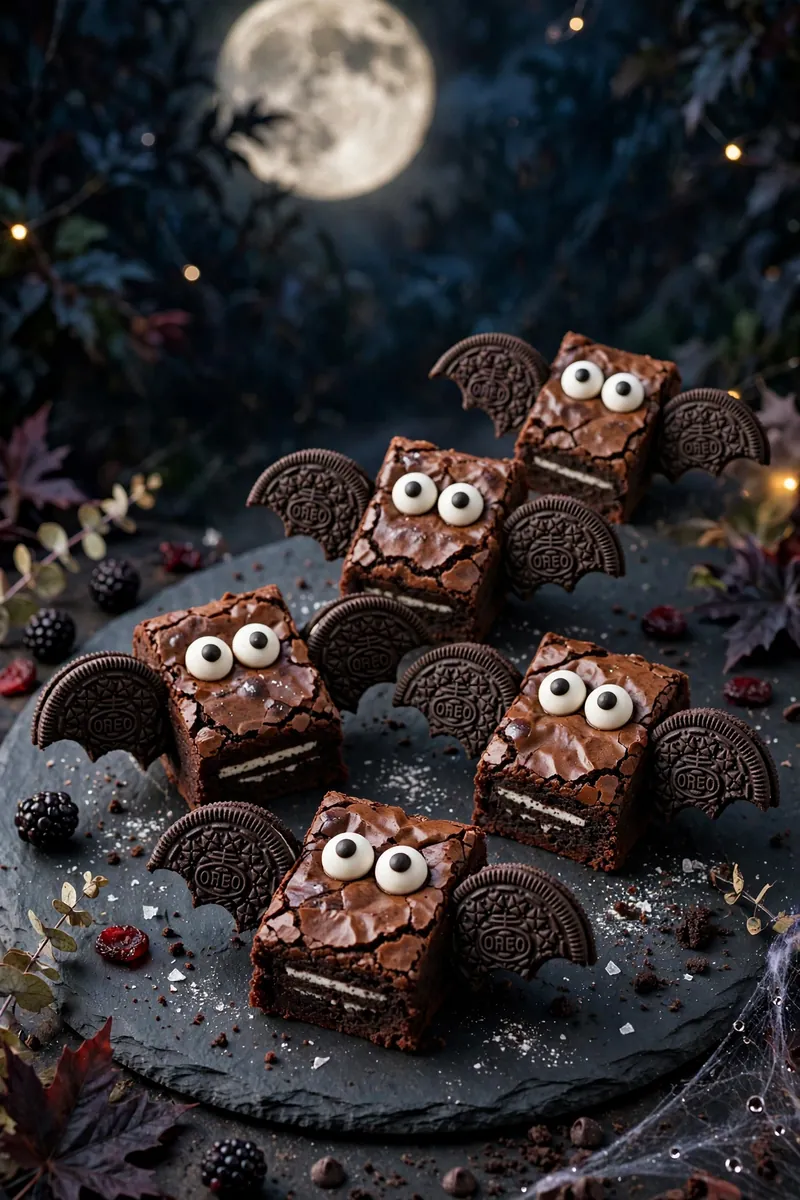
Fudgy brownies get a batty makeover with chocolate wings and candy eyes. The wings are just halved sandwich cookies, so the decorating is easy enough for young kids. These look delightfully spooky lined up on a platter — like a whole colony of bats ready to fly off to the party.
Ingredients
- 1 box fudge brownie mix
- Ingredients listed on the box
- 12 chocolate sandwich cookies, halved
- 1/2 cup chocolate frosting
- Candy eyeballs
- Mini marshmallows
- White decorating gel
Instructions
- Bake the brownies in a 9×13 pan according to the box directions and cool completely.
- Cut into 12 rectangles and spread a thin layer of frosting on each.
- Press a halved cookie into each side of the brownie as wings.
- Add two candy eyes near the top of each brownie.
- Pipe tiny white fangs with decorating gel under the eyes.
- Let the frosting set for 15 minutes before serving.
Ghost Meringue Kisses
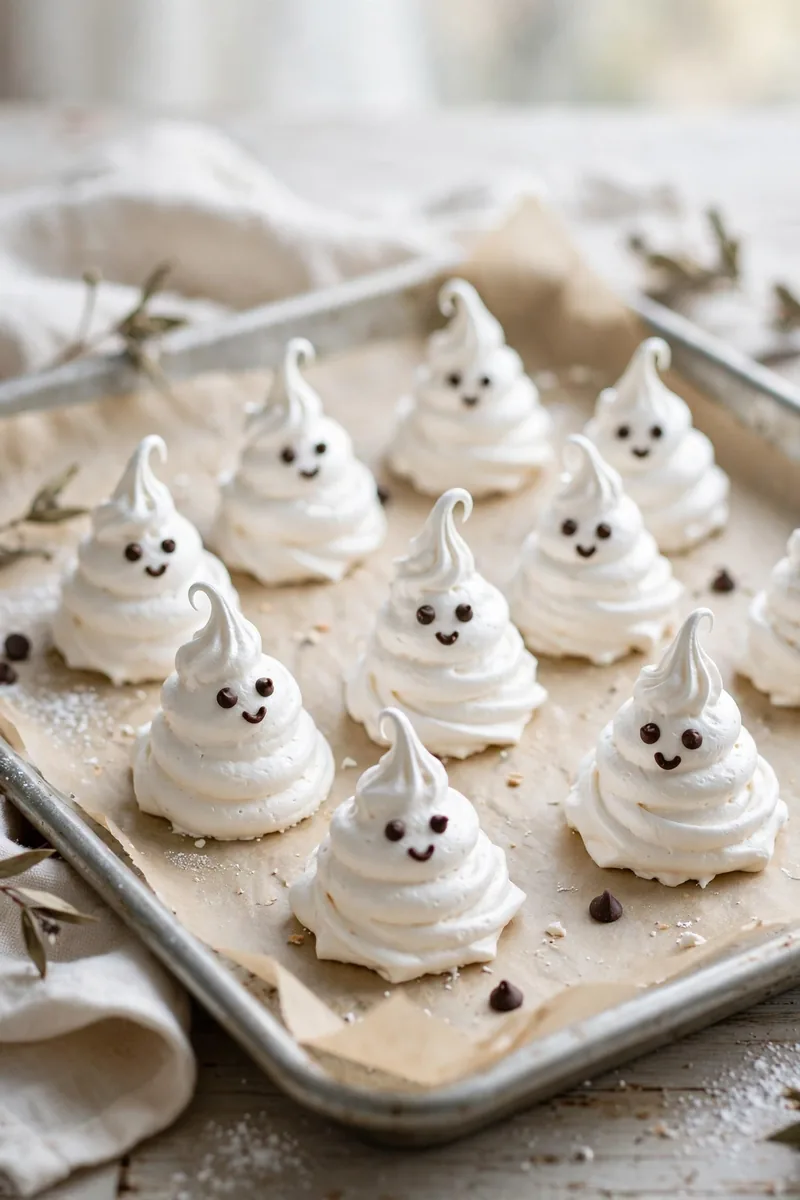
Crisp, airy meringues piped into ghost shapes melt in your mouth with a whisper of vanilla. They're naturally gluten-free and only need a few pantry staples. Kids adore dotting on chocolate chip eyes, and the finished ghosts look like they floated straight out of a storybook onto the cookie tray.
Ingredients
- 3 large egg whites, room temperature
- 3/4 cup granulated sugar
- 1/4 teaspoon cream of tartar
- 1 teaspoon vanilla extract
- Mini chocolate chips
- Parchment paper
Instructions
- Preheat the oven to 200°F and line a baking sheet with parchment.
- Beat the egg whites and cream of tartar until soft peaks form.
- Gradually add the sugar and beat until stiff, glossy peaks form, then mix in vanilla.
- Pipe tall ghost shapes with a round tip, pulling up at the top.
- Press two mini chocolate chips into each ghost as eyes.
- Bake for 1 1/2 hours until dry, then cool in the oven with the door cracked.
Candy Apple Monsters
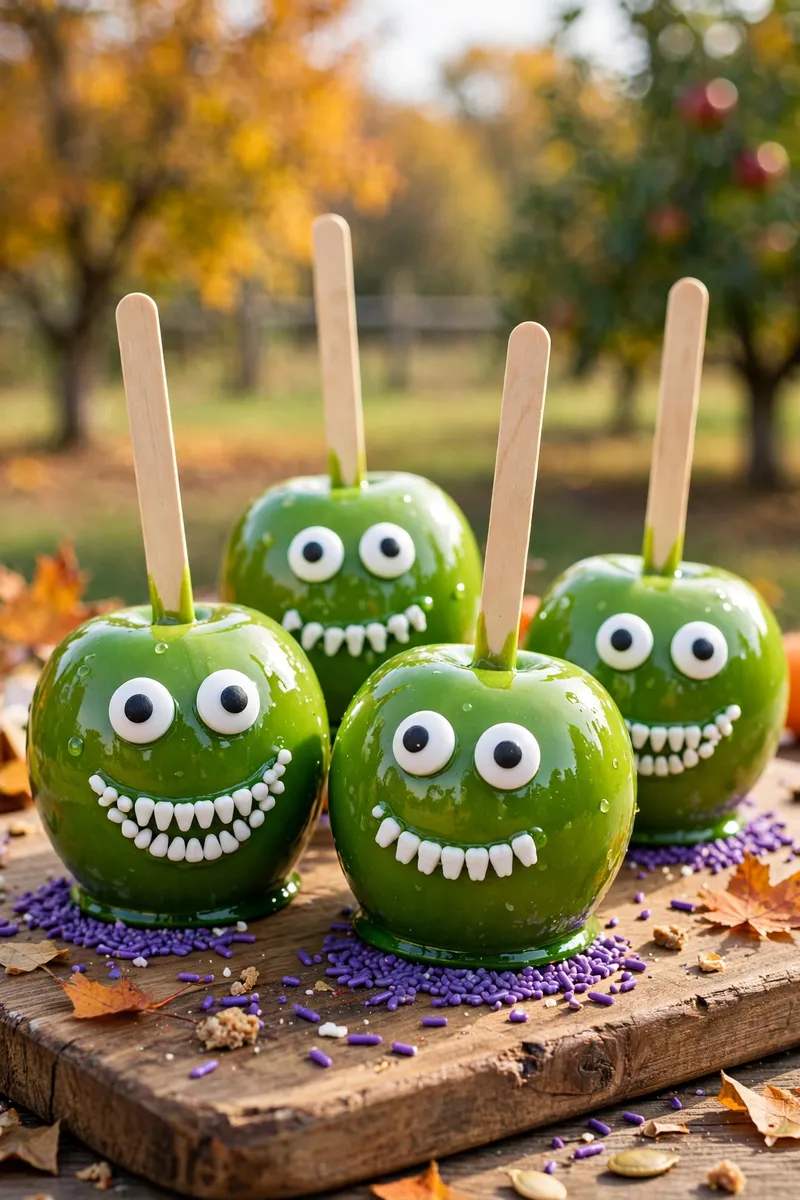
Tart apples dipped in bright green candy coating become friendly monsters with candy eyes and sprinkle teeth. The sweet-tart crunch is irresistible, and decorating them is the best part. Set up a monster-making station and let each kid design their own creature — no two monsters ever match.
Ingredients
- 6 small tart apples
- 6 wooden sticks
- 2 cups green candy melts
- 1 tablespoon coconut oil
- Candy eyeballs
- White sprinkles for teeth
- Purple sprinkles
- Wax paper
Instructions
- Wash and dry the apples thoroughly, then push a wooden stick into each top.
- Melt the green candy melts with coconut oil until smooth and dippable.
- Dip each apple, twirling to coat, and let the excess drip off.
- Set on wax paper and immediately press on candy eyes and sprinkle teeth.
- Add purple sprinkles while the coating is still wet.
- Let set for 20 minutes before serving.
Tip: I always chill the apples first — cold apples help the candy coating set fast and smooth instead of sliding into a puddle at the bottom.
Frankenstein Rice Krispies
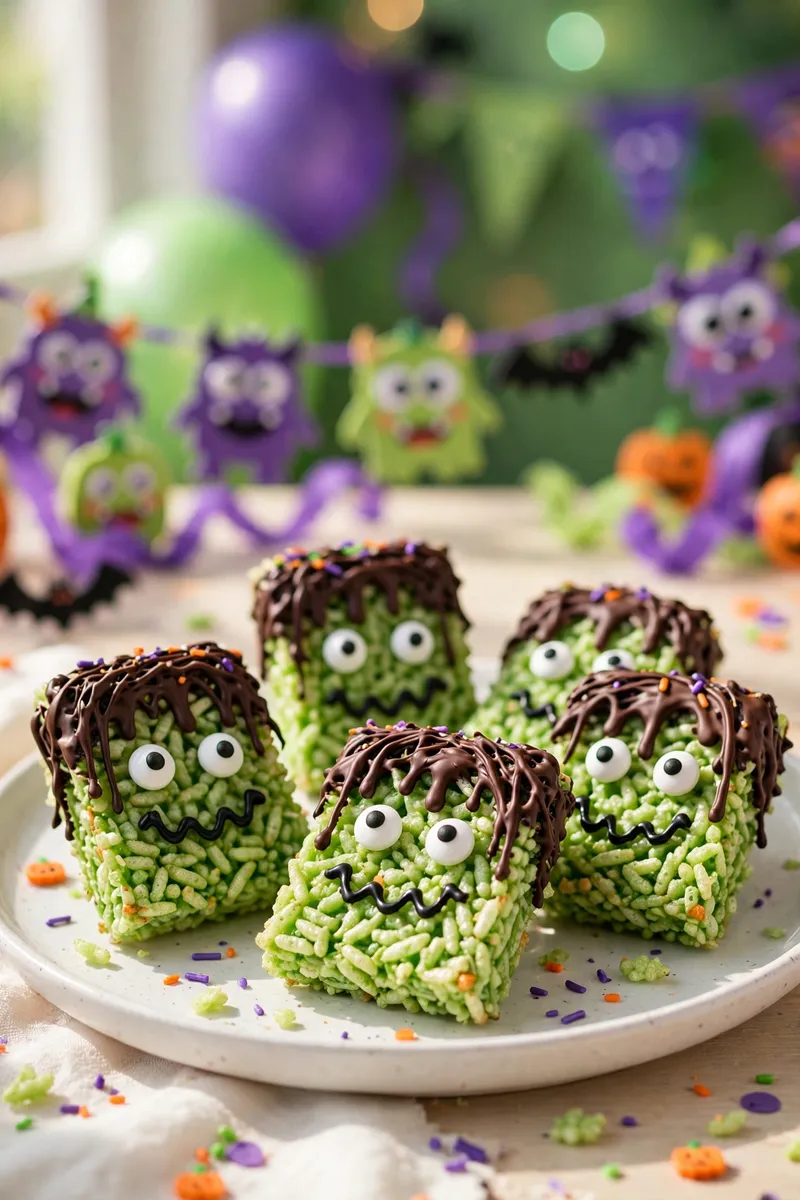
Gooey marshmallow treats tinted green and dipped in chocolate "hair" become the friendliest Frankenstein around. A jagged chocolate hairline and candy eyes finish the look. These are a no-bake lifesaver for busy parents — the whole batch takes 20 minutes and kids can help press the mixture into the pan.
Ingredients
- 6 cups crispy rice cereal
- 4 tablespoons butter
- 1 bag mini marshmallows
- Green gel food coloring
- 1 cup semisweet chocolate chips
- Candy eyeballs
- Black decorating gel
- Cooking spray
Instructions
- Melt the butter in a large pot, add marshmallows, and stir until smooth.
- Tint the mixture green with gel food coloring, then fold in the cereal.
- Press into a greased 9×13 pan and cool completely before cutting into rectangles.
- Melt the chocolate chips and dip the top of each rectangle for hair.
- Add candy eyes and pipe a zigzag smile with black gel.
- Let the chocolate set for 15 minutes before serving.
Vampire Donut Bites
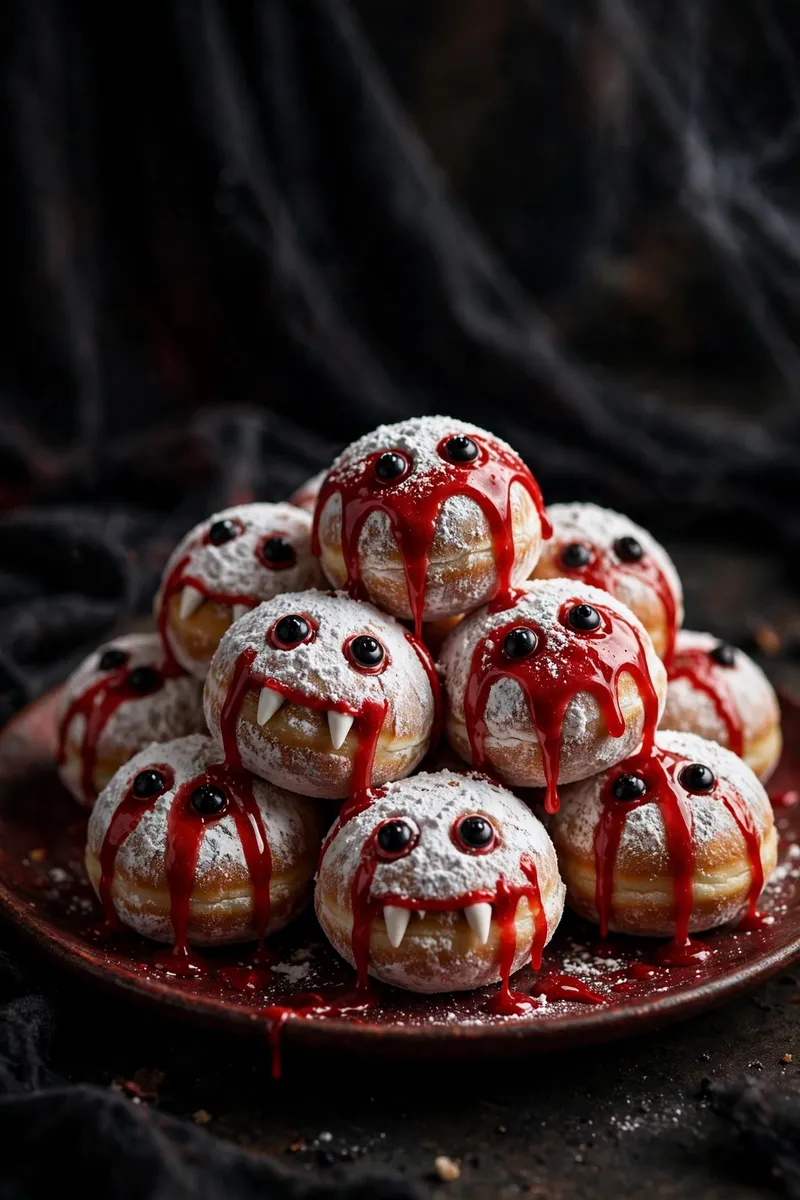
Mini powdered donuts get fangs and a drizzle of red "blood" glaze to become the cutest little vampires. They take minutes to assemble and disappear even faster. The contrast of white powdered sugar and bright red glaze looks dramatic on a platter — kids love the deliciously spooky effect.
Ingredients
- 1 bag mini powdered donuts
- 1 cup powdered sugar
- 2 tablespoons milk
- Red gel food coloring
- White candy fangs
- Black decorating gel
- Wax paper
Instructions
- Whisk the powdered sugar, milk, and red gel coloring into a thick glaze.
- Dip one side of each mini donut in the red glaze for a blood-dipped look.
- Press two white candy fangs into the bottom of each donut.
- Dot black gel eyes above the fangs.
- Let the glaze set on wax paper for 10 minutes before serving.
Spider Cookie Pops
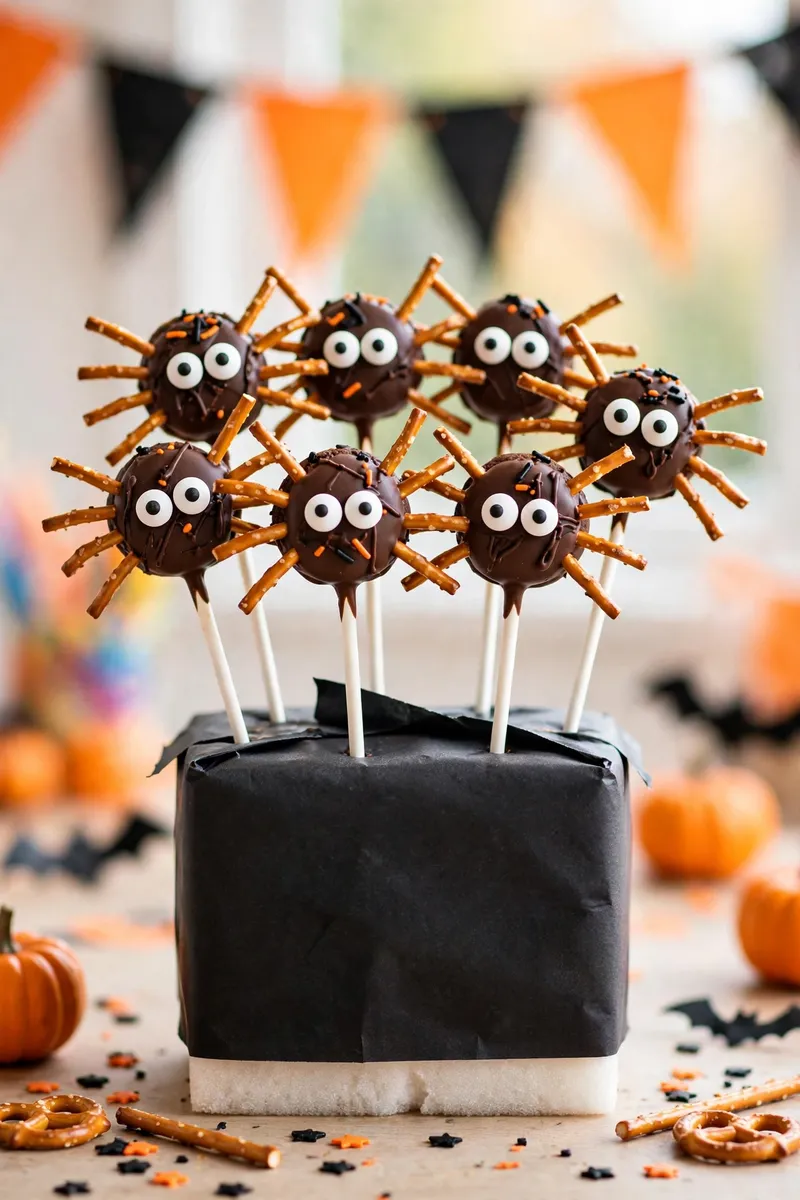
Chocolate cookies on sticks become eight-legged spiders with pretzel legs and candy eyes. They're part treat, part craft project — kids love sticking on the legs themselves. Arrange them standing up in a foam block and they look like a swarm of spiders ready to march across the dessert table.
Ingredients
- 12 chocolate sandwich cookies
- 12 lollipop sticks
- 1 cup chocolate candy melts
- 48 thin pretzel sticks
- Candy eyeballs
- Black licorice strings, optional
- Styrofoam block for display
- Wax paper
Instructions
- Melt the chocolate candy melts until smooth.
- Dip one end of each lollipop stick in chocolate and press into a cookie; let set.
- Dip each cookie pop fully in chocolate and set on wax paper.
- While wet, press four pretzel sticks into each side as legs.
- Add two candy eyes to the front of each spider.
- Let set completely, then stand upright in a foam block to serve.
Haunted Gingerbread Houses
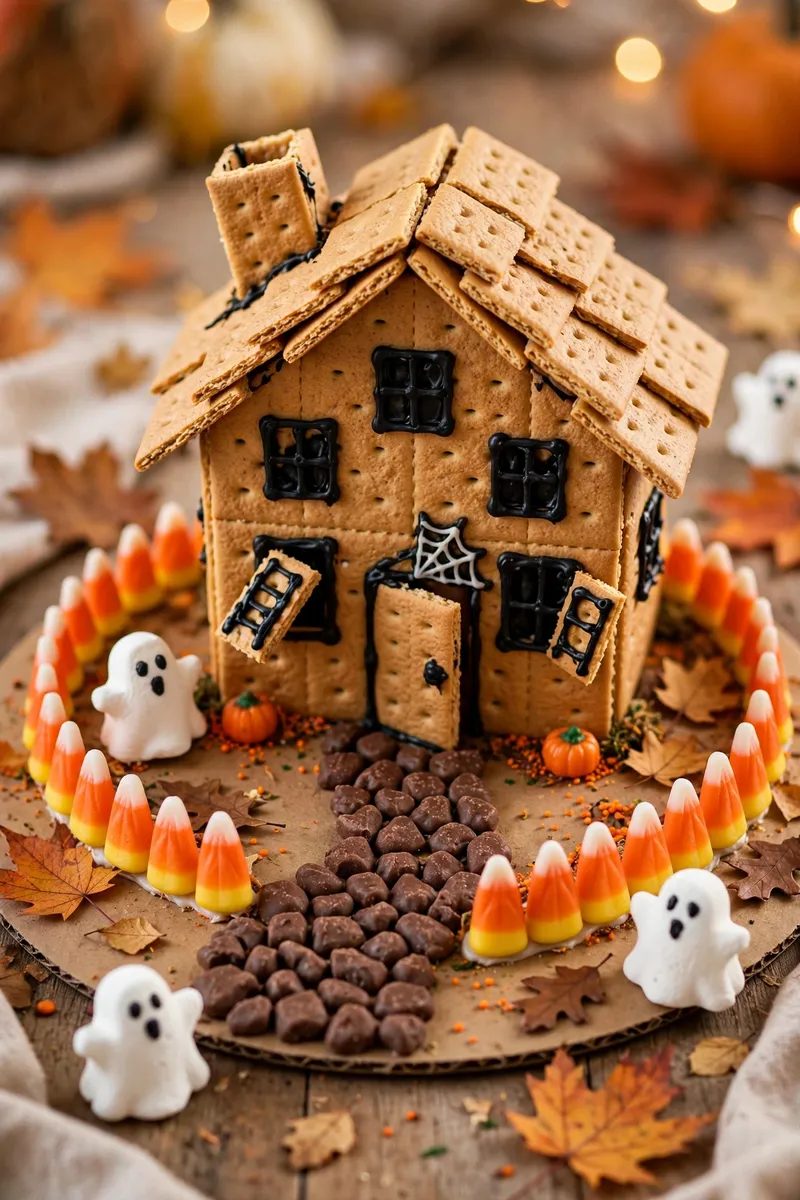
Graham cracker houses get a haunted makeover with black icing, candy corn fences, and ghost marshmallows in the yard. Building them is the main event — kids spend ages decorating. It's the perfect rainy October afternoon project, and the finished houses make adorable edible centerpieces.
Ingredients
- 1 box graham crackers
- 1 can white frosting
- Black gel food coloring
- Candy corn
- Ghost marshmallow peeps
- Chocolate rocks candy
- Gummy bats
- Pretzel sticks
- Small cardboard squares for bases
Instructions
- Tint half the frosting black with gel coloring, keeping the rest white.
- Use frosting to glue four graham crackers into walls on a cardboard base.
- Add two crackers as a peaked roof and let the structure set for 20 minutes.
- Pipe black icing windows, doors, and crooked shutters.
- Line the yard with a candy corn fence and chocolate rock path.
- Place ghost peeps and gummy bats around the house.
- Let everything set for 1 hour before displaying.
Tip: I always build the houses the night before and let kids decorate the next day — the frosting glue needs time to harden or the walls slide apart mid-decorating.
Black Cat Cupcakes
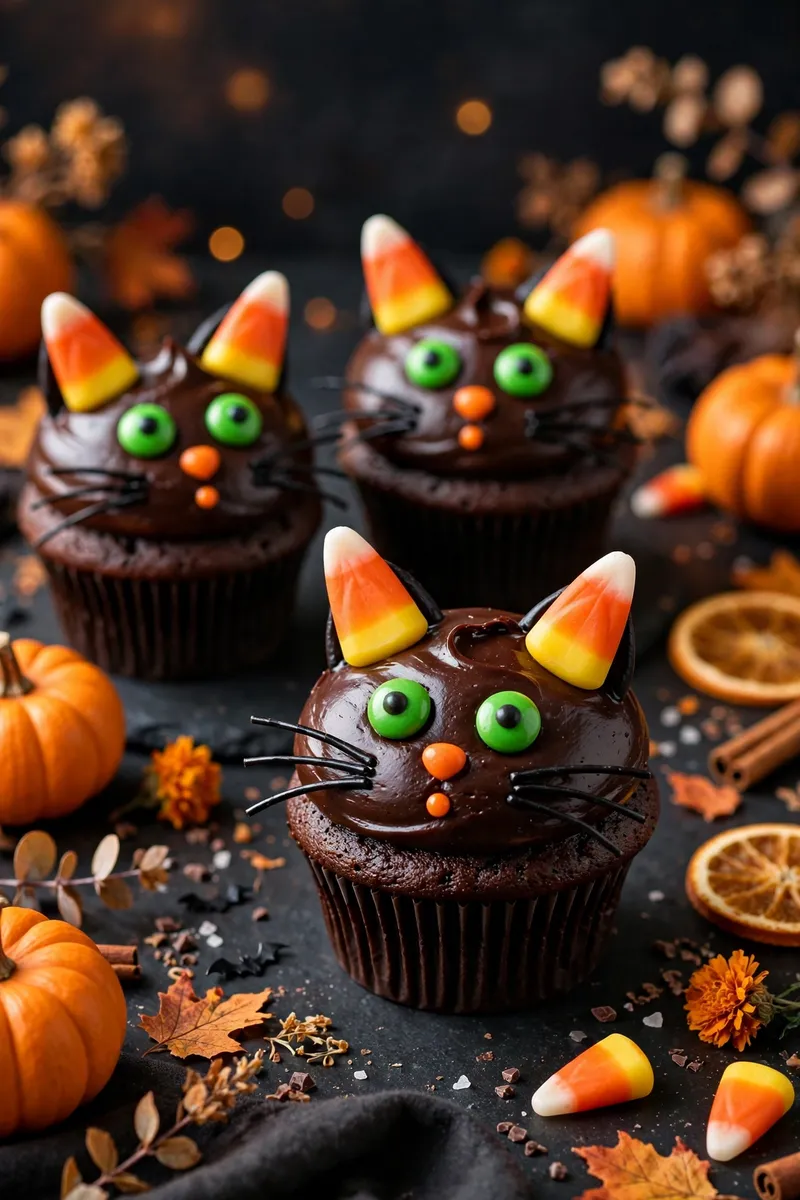
Chocolate cupcakes with pointed candy ears and yellow candy eyes become sleek little black cats. A swirl of black frosting makes the fur, and licorice whiskers finish the face. These are purr-fect for cat-loving kids — they look almost too cute to eat, but nobody hesitates for long.
Ingredients
- 1 box chocolate cake mix
- Ingredients listed on the box
- 1 can chocolate frosting
- Black gel food coloring
- Black candy melts for ears
- Yellow candy eyes
- Black licorice strings
- Pink heart sprinkles for noses
Instructions
- Bake the chocolate cupcakes and cool completely.
- Tint the chocolate frosting deep black with gel coloring.
- Pipe a tall swirl of black frosting on each cupcake.
- Press two triangle-shaped black candy melts into the top as ears.
- Add yellow candy eyes, a pink heart nose, and licorice whiskers.
- Chill for 15 minutes to set the frosting before serving.
Pumpkin Spice Truffles
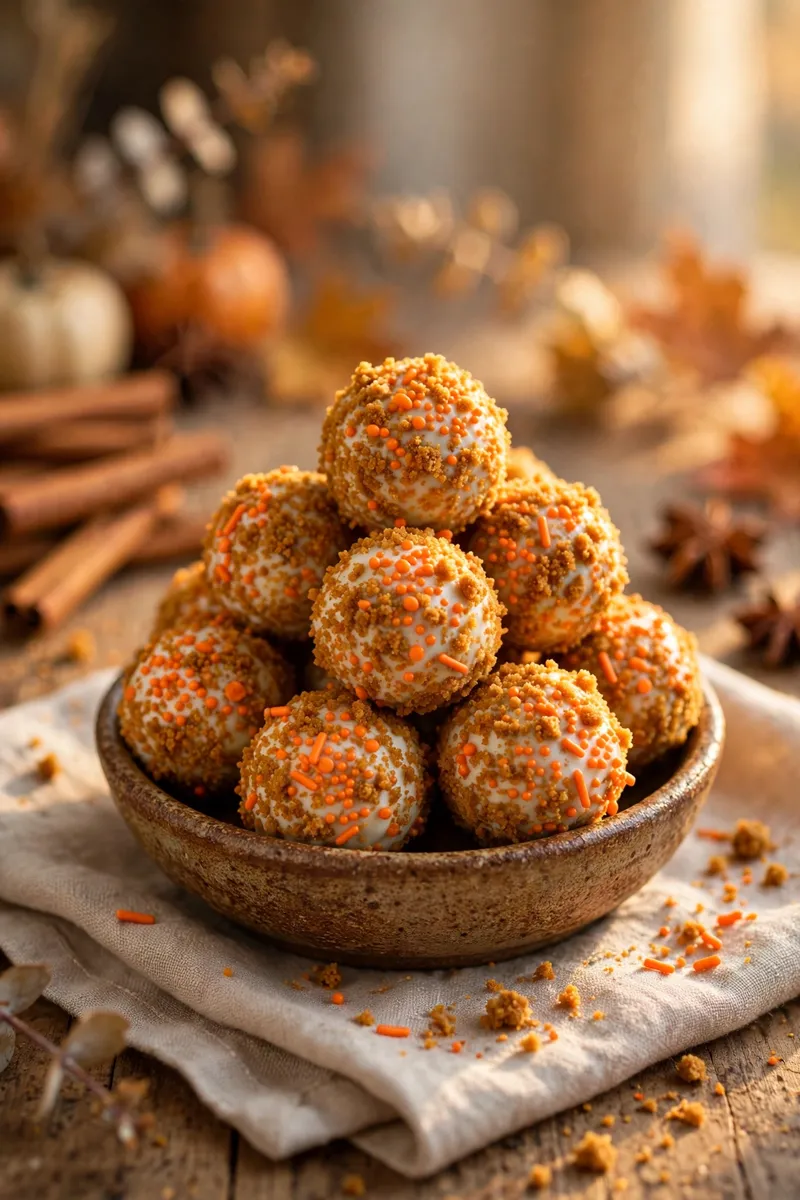
Creamy pumpkin-spice filling rolled in white chocolate tastes like fall in truffle form. The warm spices and silky centers make them feel fancy, but they're secretly simple. Roll them in crushed gingersnaps for extra crunch — adults sneak these off the kid table too.
Ingredients
- 8 ounces cream cheese, softened
- 1/2 cup pumpkin puree
- 2 cups powdered sugar
- 1 teaspoon pumpkin pie spice
- 2 cups gingersnap crumbs, divided
- 12 ounces white chocolate chips
- 1 tablespoon coconut oil
- Orange sprinkles
Instructions
- Beat the cream cheese, pumpkin, powdered sugar, and spice until smooth.
- Fold in 1 cup of gingersnap crumbs and chill the mixture for 1 hour.
- Roll into 1-inch balls and freeze for 20 minutes.
- Melt the white chocolate with coconut oil until smooth.
- Dip each truffle, then roll in remaining crumbs or top with sprinkles.
- Chill until set, about 30 minutes, and keep refrigerated.
Ghost Banana Pops
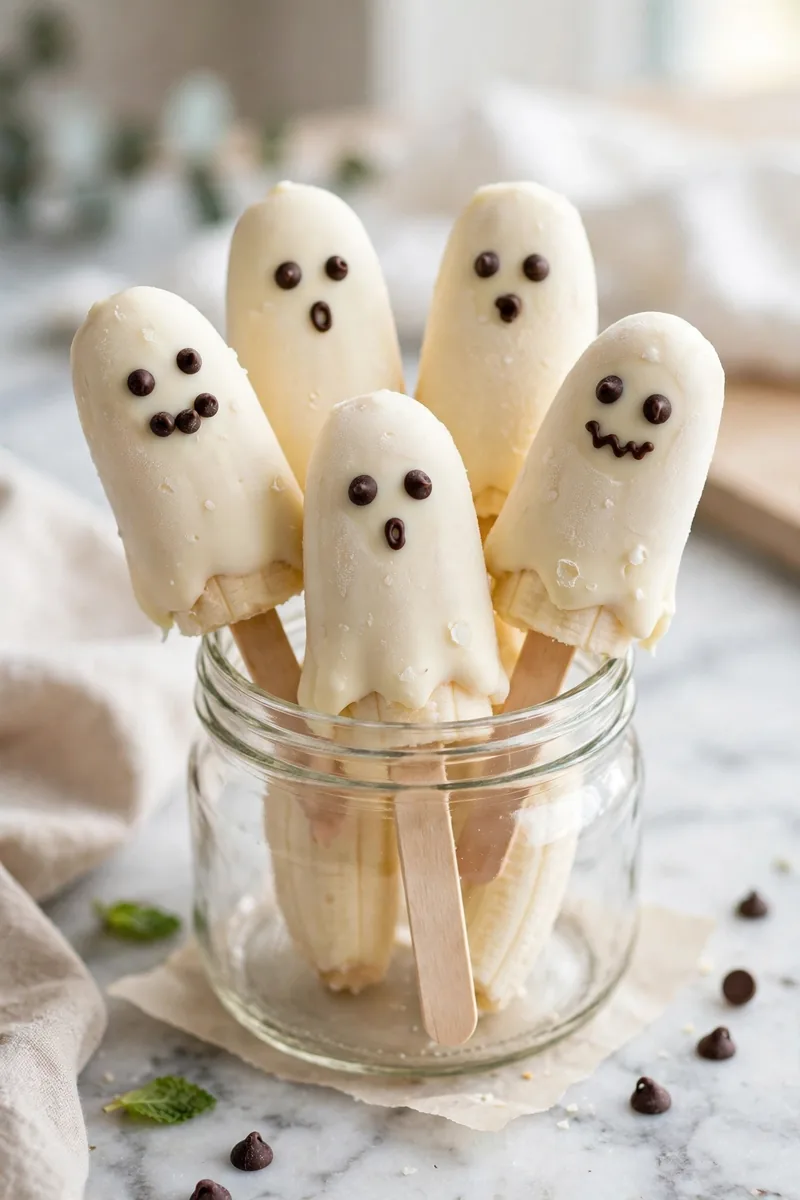
Frozen bananas dipped in white chocolate become the healthiest ghosts at the party. The creamy frozen banana tastes like ice cream, so kids never miss the sugar overload. They're a wonderful allergy-friendly option too — naturally gluten-free and easy to make dairy-free with the right chocolate.
Ingredients
- 4 ripe bananas
- 8 popsicle sticks
- 2 cups white chocolate chips
- 1 tablespoon coconut oil
- Mini chocolate chips
- Wax paper
Instructions
- Peel the bananas, cut in half, and push a popsicle stick into each half.
- Freeze on wax paper for at least 2 hours until solid.
- Melt the white chocolate with coconut oil until smooth.
- Dip each frozen banana, letting the excess drip off, and set on wax paper.
- Quickly press on mini chocolate chip eyes and mouths before the coating sets.
Monster Popcorn Balls
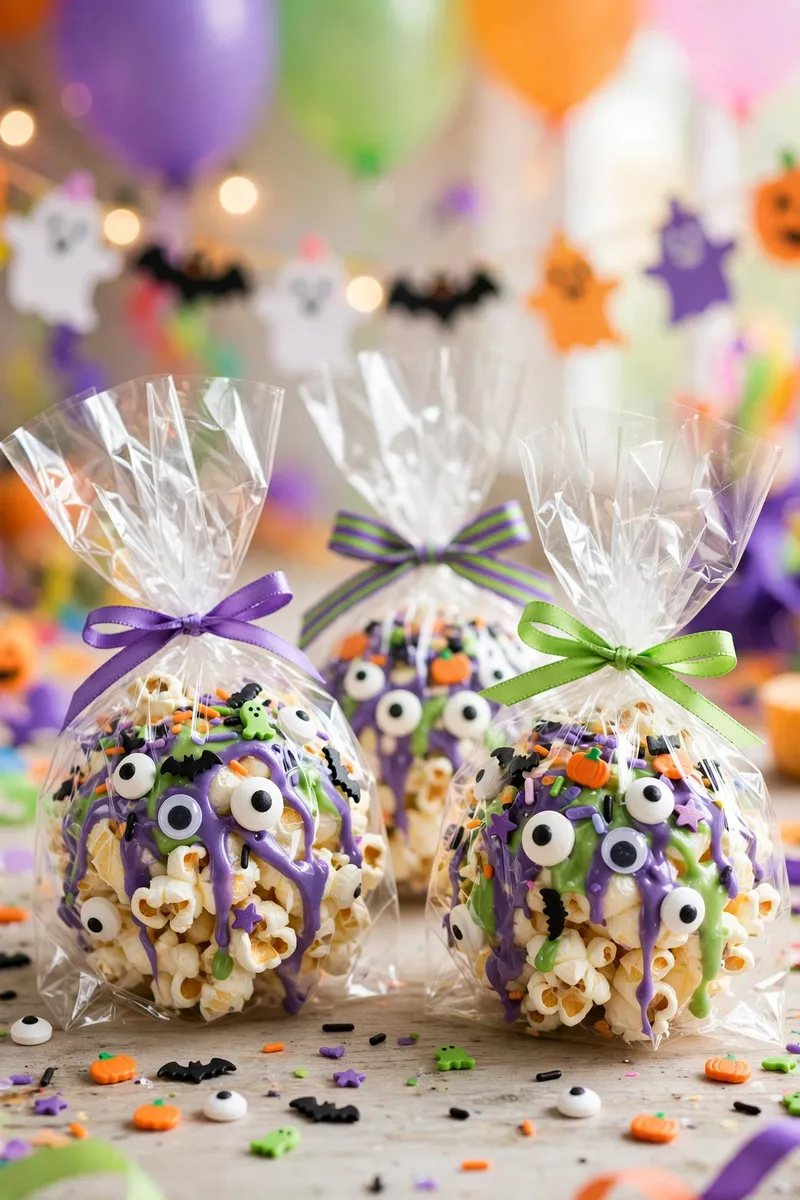
Sticky marshmallow popcorn balls get a monster makeover with bright candy melts and googly eyes. They're delightfully messy to make, which kids consider a feature, not a bug. Wrap them individually in cellophane and they double as adorable party favors guests can take home.
Ingredients
- 10 cups popped popcorn
- 4 tablespoons butter
- 1 bag mini marshmallows
- Purple and green candy melts
- Candy eyeballs
- Halloween sprinkles
- Cooking spray
- Cellophane bags and ribbon
Instructions
- Melt the butter and marshmallows in a large pot until smooth.
- Pour over the popcorn and stir quickly to coat every piece.
- With greased hands, shape the mixture into 12 balls.
- Drizzle with melted purple and green candy melts.
- Press on candy eyes and sprinkles while the coating is wet.
- Wrap in cellophane and tie with ribbon once set.
Tip: I keep a bowl of water nearby for sticky fingers — a quick dip between balls keeps the shaping easy and the mess under control.
Mummy Pretzel Rods
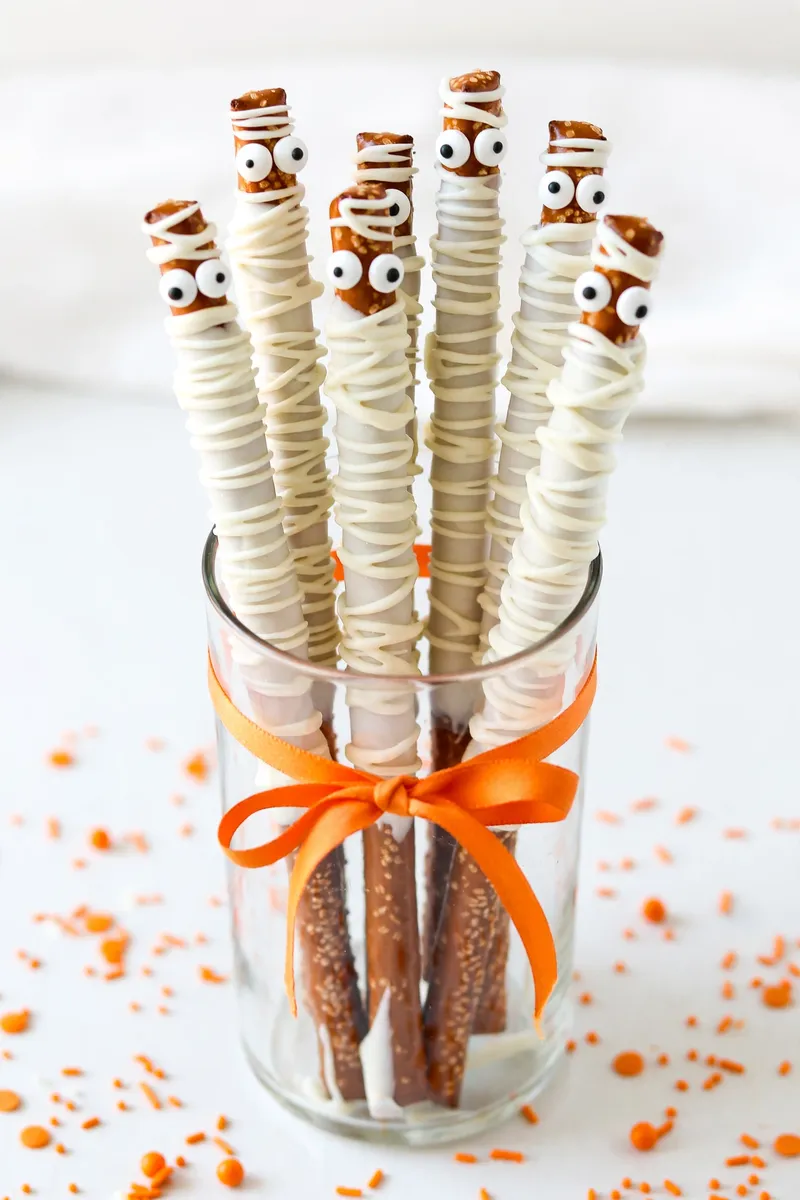
Salty pretzel rods dipped in white chocolate and wrapped in drizzle become crunchy little mummies. The sweet-salty combo is dangerously snackable. These are one of the fastest treats on this list — a whole batch takes 20 minutes, and kids can wrap every single mummy themselves.
Ingredients
- 12 pretzel rods
- 2 cups white chocolate chips
- 1 tablespoon coconut oil
- Candy eyeballs
- Orange sprinkles
- Wax paper
Instructions
- Melt the white chocolate chips with coconut oil until smooth.
- Dip each pretzel rod two-thirds of the way into the chocolate.
- Lay on wax paper and drizzle more chocolate back and forth for mummy wraps.
- Press two candy eyes near the top of each rod.
- Add orange sprinkles and let set for 15 minutes.
Candy Corn Fudge
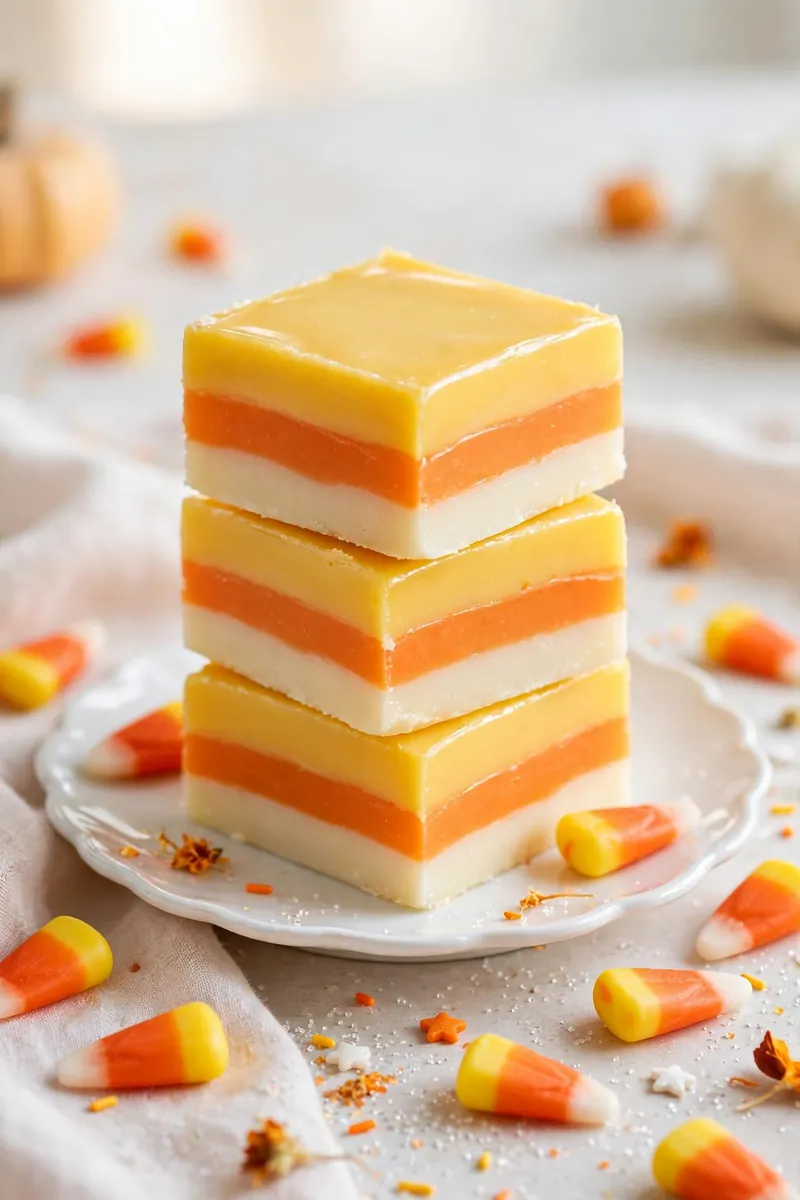
Creamy layered fudge in candy corn colors looks like it came from a candy shop. The yellow, orange, and white layers are just tinted white chocolate fudge — no baking needed. Cut into small squares and it becomes the prettiest bite on the whole dessert table, guaranteed.
Ingredients
- 3 cups white chocolate chips, divided
- 1 can sweetened condensed milk, divided
- 2 tablespoons butter, divided
- Yellow gel food coloring
- Orange gel food coloring
- 1 teaspoon vanilla extract
- Cooking spray
- Parchment paper
Instructions
- Line an 8×8 pan with parchment and coat lightly with cooking spray.
- Melt 1 cup chips with 1/3 can condensed milk and 2 teaspoons butter; tint yellow and spread in the pan.
- Repeat with orange coloring for the middle layer, chilling 15 minutes between layers.
- Make the final white layer with vanilla and spread on top.
- Chill the fudge for 2 hours until completely firm.
- Lift out and cut into small squares to serve.
Witch Finger Cookies
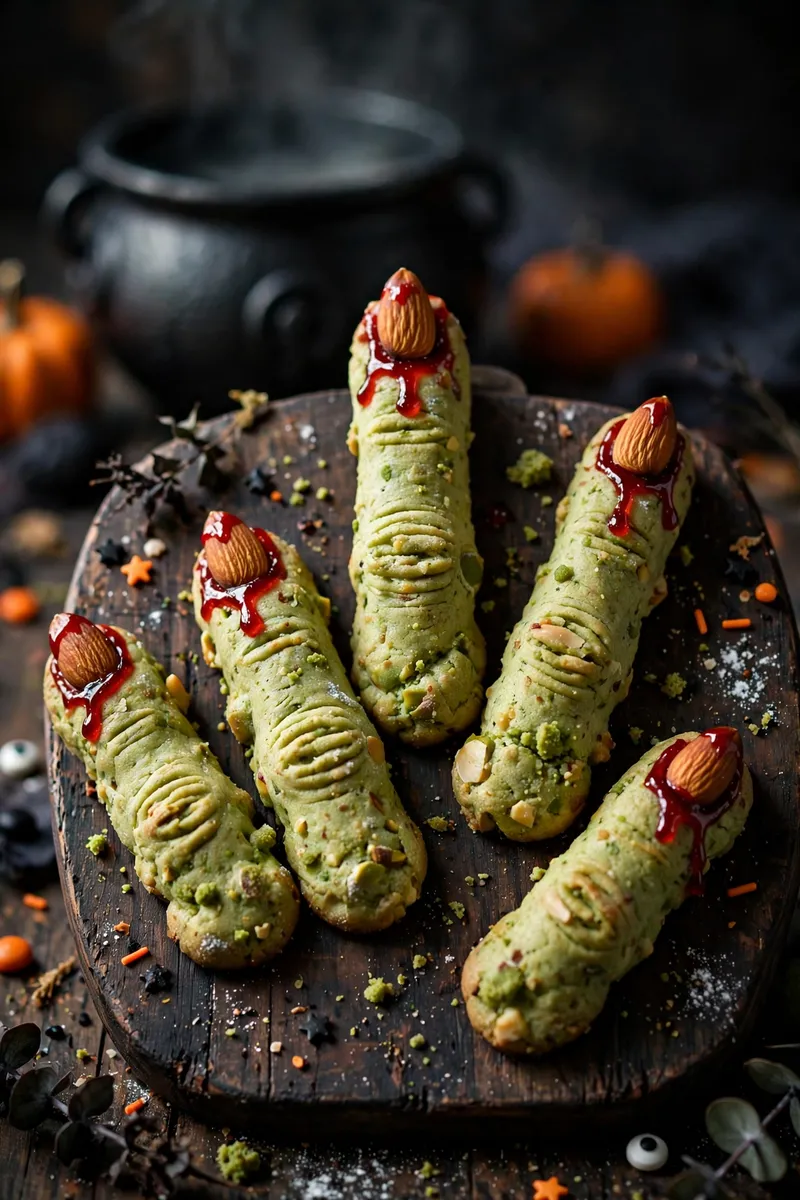
Buttery almond cookies shaped into knobby fingers with almond "nails" are creepy in the best way. Kids shriek with delight when they see the platter — then devour them. The green tint is optional, but it takes the spooky factor from fun to fantastic with one drop of coloring.
Ingredients
- 1 cup unsalted butter, softened
- 1 cup powdered sugar
- 1 large egg
- 1 teaspoon almond extract
- 2 3/4 cups all-purpose flour
- Green gel food coloring, optional
- 24 whole blanched almonds
- Red decorating gel
Instructions
- Beat the butter and powdered sugar until fluffy, then mix in the egg and almond extract.
- Tint the dough pale green if desired, then mix in the flour until a firm dough forms.
- Roll tablespoon-sized pieces into finger shapes with a knobby knuckle.
- Press an almond onto the tip of each finger as a nail.
- Bake at 325°F for 20-22 minutes until set but not browned.
- Add a thin line of red gel around each nail for a spooky effect.
Eyeball Cake Pops
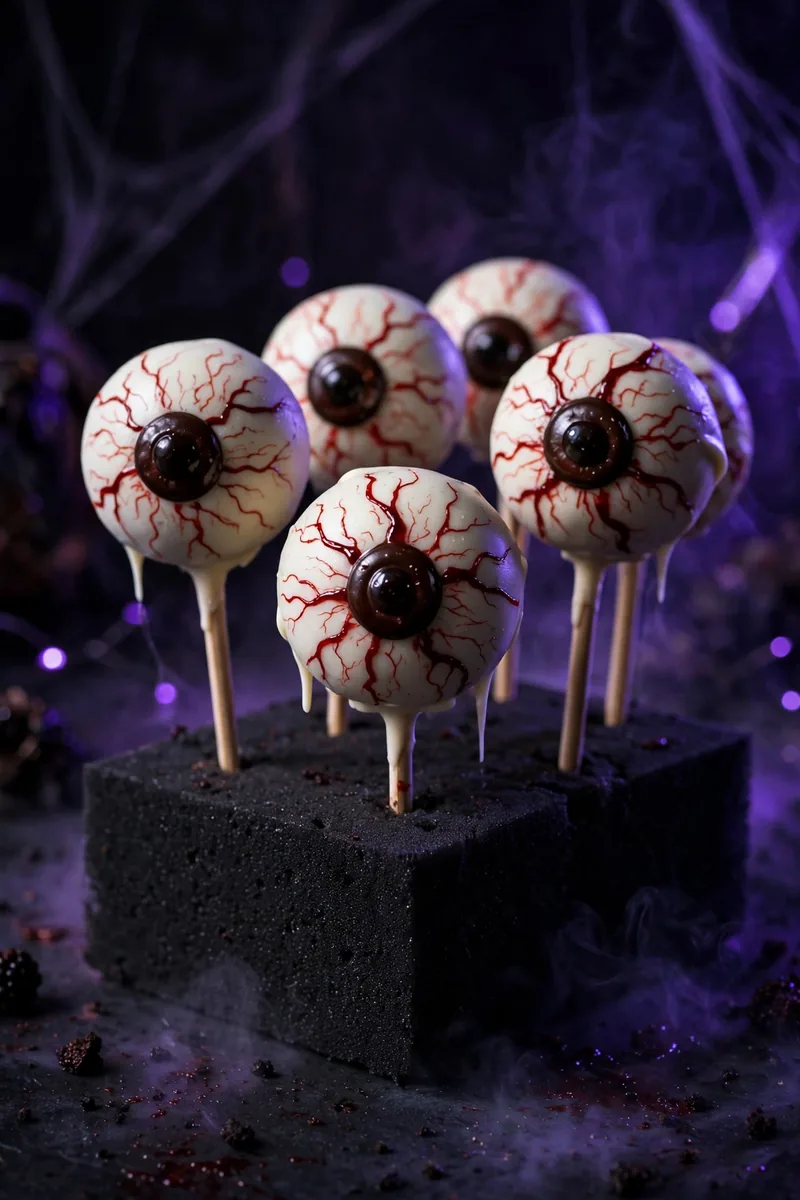
Moist cake mixed with frosting, rolled into balls, and decorated as bloodshot eyeballs — these are gloriously gross. Kids are fascinated by them, and they're easier than they look. The red veining is just piped gel, and every eyeball comes out perfectly creepy with almost no skill required.
Ingredients
- 1 box vanilla cake mix
- Ingredients listed on the box
- 1/2 cup vanilla frosting
- 2 cups white candy melts
- 24 lollipop sticks
- Blue candy melts for irises
- Black decorating gel
- Red decorating gel
Instructions
- Bake the cake, cool completely, and crumble it into fine crumbs.
- Mix with just enough frosting to hold together, then roll into 24 balls.
- Push a lollipop stick into each ball and freeze for 20 minutes.
- Dip each pop in white candy melts and let the excess drip off.
- While wet, add a colored candy melt dot as the iris.
- Pipe a black pupil in the center and red veins radiating outward.
- Let set upright in a foam block for 15 minutes.
Tip: I dip the lollipop sticks in melted candy before pushing them into the cake balls — that little bit of "glue" keeps the pops from sliding off mid-dip.
Spooky Hot Chocolate

Rich hot chocolate topped with ghost marshmallows and a drizzle of orange syrup is the coziest way to end a Halloween night. Serve it in mugs with striped straws and watch kids' eyes light up. It's the perfect warm-up after trick-or-treating on a chilly October evening.
Ingredients
- 4 cups whole milk
- 1 cup semisweet chocolate chips
- 1/4 cup cocoa powder
- 1/4 cup sugar
- 1 teaspoon vanilla extract
- Ghost-shaped marshmallows
- Orange sanding sugar
Instructions
- Warm the milk in a saucepan over medium heat until steaming.
- Whisk in the chocolate chips, cocoa powder, and sugar until smooth.
- Stir in the vanilla and remove from the heat.
- Pour into mugs and top with ghost marshmallows.
- Sprinkle with orange sanding sugar and serve warm.
Conclusion
These cute Halloween desserts for kids prove that spooky season baking can be simple, joyful, and completely kid-friendly. From ghostly cookies to mummy-wrapped brownies, there's something here for every little monster's sweet tooth — and plenty of recipes easy enough for kids to help make. Save your favorites to your Halloween board on Pinterest so they're ready when party time rolls around, and share this roundup with a fellow parent who needs easy party ideas. Want even more spooky inspiration? Pair these treats with these playful Halloween food ideas for a full party spread your little ghouls will love. Happy baking — and happy haunting!