23 Chilling No-Bake Halloween Treats for Party Nights
Throwing a spooky party doesn't mean you have to spend hours in the kitchen. These no bake Halloween treats for parties are the answer when you want maximum fright with minimum effort. Every recipe on this list skips the oven completely, so you can whip up creepy-cute desserts in minutes instead of slaving over a hot stove. From ghostly banana pops to spiderweb pudding cups, these treats look like they took all afternoon but come together fast. They're perfect for classroom parties, neighborhood bashes, and last-minute guests. Kids love helping with the decorating, and adults appreciate how impressive these look on a party table. Best of all, most use simple store-bought ingredients you can grab in one trip. So put on your costume, crank up the spooky playlist, and get ready to serve up the easiest Halloween spread ever.
Ghost Banana Pops
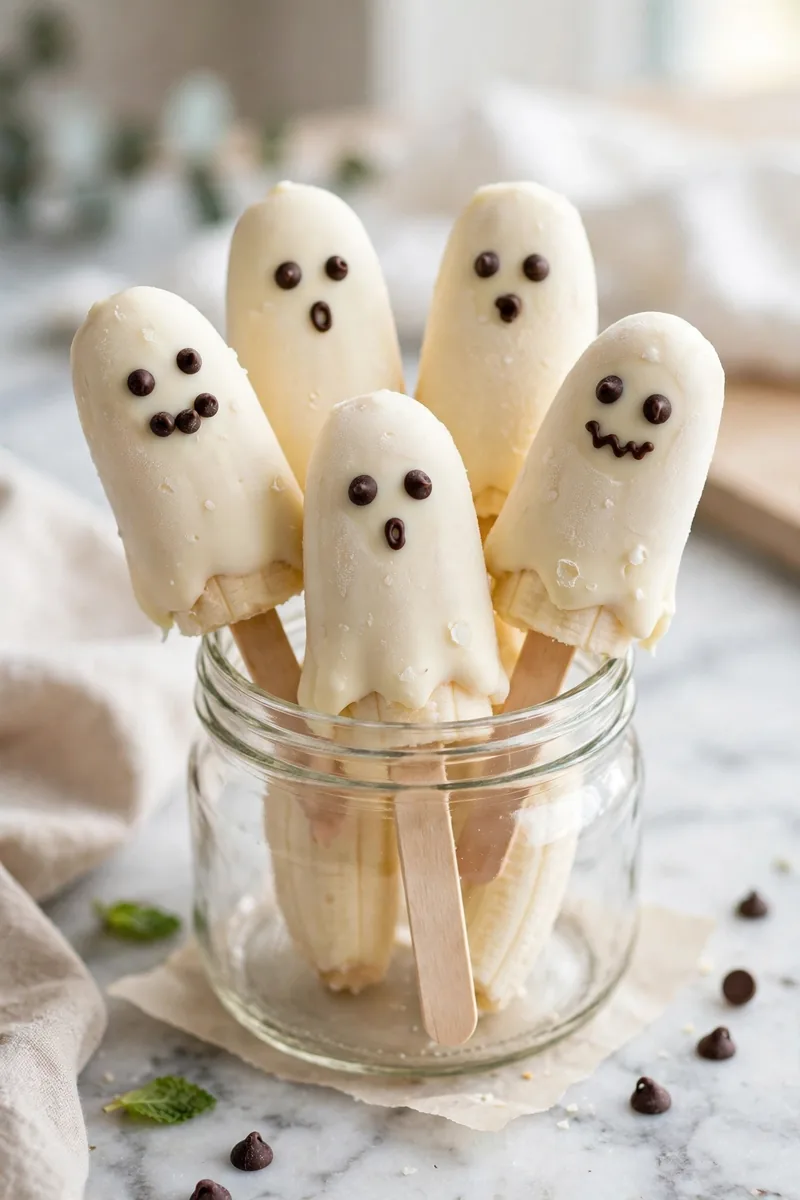
These adorable little ghosts are almost too cute to eat, and they couldn't be simpler to make. Frozen bananas get dipped in creamy white chocolate and decorated with mini chocolate chip faces. Kids go crazy for them at parties, and little hands can happily help decorate. Serve them straight from the freezer for the very best texture.
Ingredients
- 4 ripe but firm bananas
- 2 cups white chocolate chips
- 1 tablespoon coconut oil
- 48 mini chocolate chips
- 8 wooden popsicle sticks
- 1 teaspoon vanilla extract
- Wax paper for lining
Instructions
- Peel the bananas, cut each in half crosswise, and insert a popsicle stick into the cut end of each half.
- Place the banana halves on a wax paper lined baking sheet and freeze for at least 2 hours until completely solid.
- Melt the white chocolate chips with the coconut oil in the microwave, stirring every 30 seconds until smooth, then stir in the vanilla.
- Dip each frozen banana half into the melted white chocolate, letting the excess drip off, and return to the baking sheet.
- Before the coating sets, press two mini chocolate chips on as eyes and one below as a mouth to make a ghost face.
- Freeze for 20 more minutes until the chocolate is firm, then serve immediately or store in a freezer bag.
Mummy Pretzel Rods
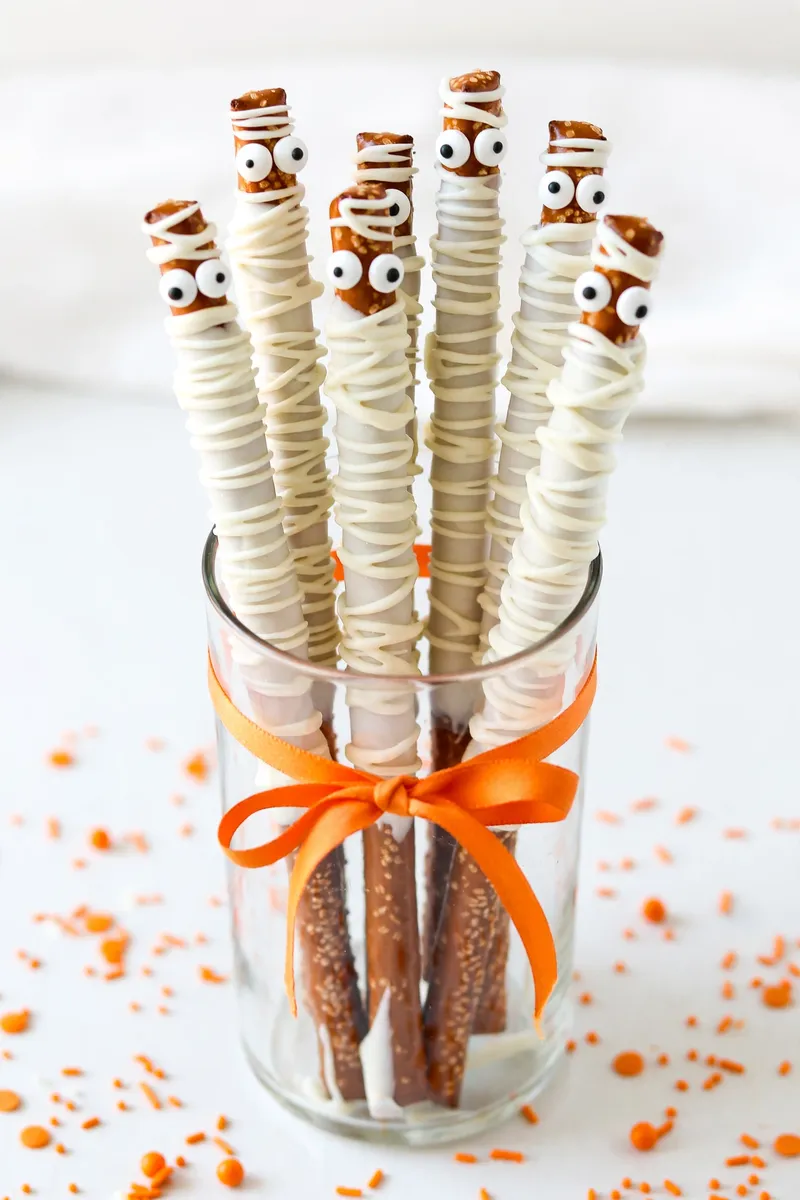
Crunchy, salty, and wrapped up like tiny mummies, these pretzel rods disappear fast at any Halloween gathering. White chocolate drizzle creates the classic mummy bandages, while candy eyes peek through the wrapping for maximum spooky effect. The sweet and salty combination is completely addictive. They also make fantastic party favors when bundled in little cellophane bags with orange ribbon.
Ingredients
- 12 large pretzel rods
- 2 cups white chocolate chips
- 2 tablespoons vegetable shortening
- 24 candy eyeballs
- Orange sprinkles, optional
- Wax paper for lining
- Cellophane bags for gifting, optional
Instructions
- Line a large baking sheet with wax paper and lay out the pretzel rods with space between them.
- Melt the white chocolate chips with the shortening in a microwave-safe bowl, stirring every 30 seconds until completely smooth.
- Hold each pretzel rod over the bowl and use a spoon to drizzle the melted chocolate back and forth to create mummy bandage stripes.
- While the chocolate is still wet, press two candy eyeballs near the top of each rod so they peek through the bandages.
- Add a pinch of orange sprinkles to a few rods for extra color, then let the chocolate set at room temperature for 30 minutes.
- Stand the finished mummies upright in a tall glass or jar to serve, or wrap individually as party favors.
Monster Apple Bites
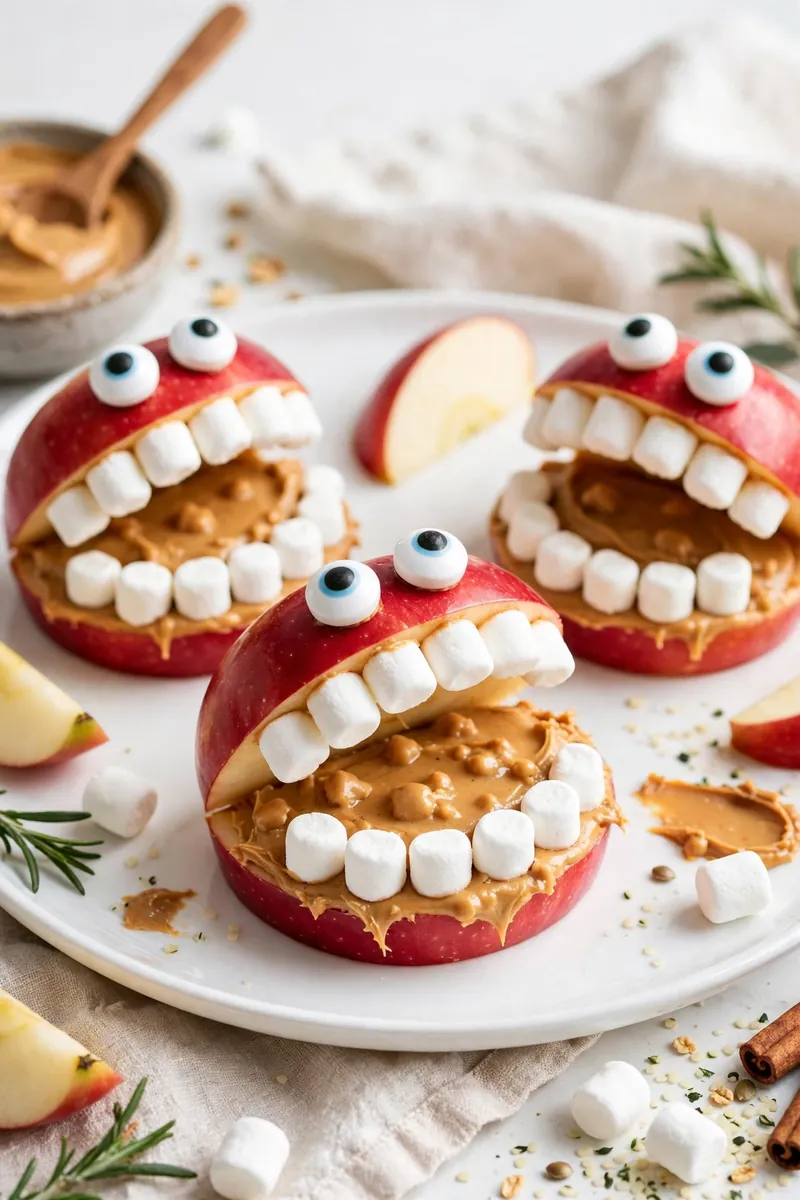
These silly monster mouths turn ordinary apple slices into the hit of the dessert table. Crisp apple wedges get stuffed with peanut butter and studded with marshmallow teeth and candy eyes. They're a lighter option among all the candy-heavy choices, and kids love assembling their own monsters with different silly expressions.
Ingredients
- 3 large red or green apples
- 1/2 cup creamy peanut butter
- 2 tablespoons honey
- 1 cup mini marshmallows
- 24 candy eyeballs
- 1 tablespoon lemon juice
- 1/4 cup sunflower seeds
Instructions
- Core the apples, cut each into 8 wedges, and toss them in lemon juice to prevent browning.
- Stir the peanut butter and honey together in a small bowl until smooth and spreadable.
- Spread a thick layer of the peanut butter mixture on one side of each apple wedge.
- Press 4 to 5 mini marshmallows in a row along the peanut butter to create a row of teeth.
- Top each wedge with a second peanut butter coated apple slice, pressing gently to sandwich the teeth inside the monster mouth.
- Stick two candy eyeballs on top of each apple sandwich with a dab of peanut butter and sprinkle sunflower seeds around the plate to serve.
Tip: I like using a mix of red and green apples for a fun color contrast on the platter — the green ones look extra monstrous!
Spiderweb Pudding Cups
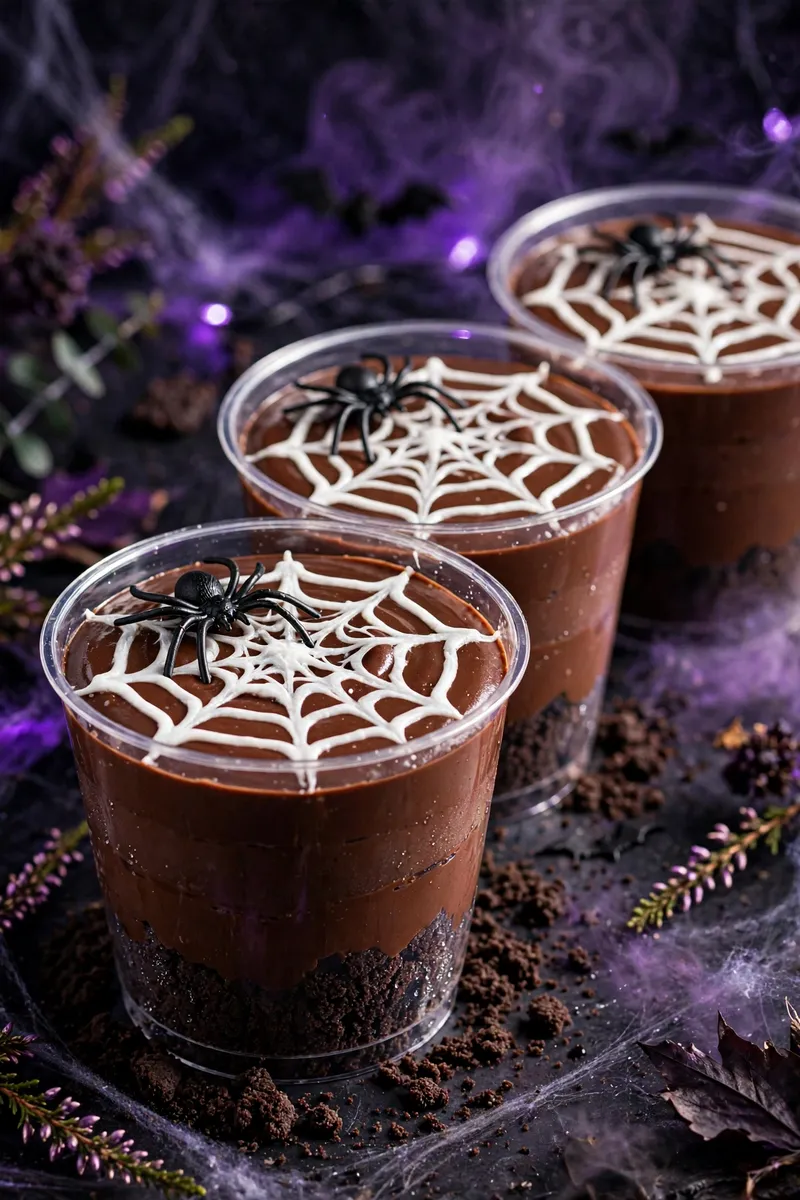
Chocolate pudding becomes a haunted masterpiece with just a swirl of marshmallow spiderweb on top. These individual cups are rich, creamy, and perfectly portioned for party guests. The spiderweb design looks impressively artistic but takes seconds with a toothpick. Top each cup with a plastic spider ring for a fun party favor that doubles as decoration.
Ingredients
- 2 boxes (3.9 oz each) instant chocolate pudding mix
- 4 cups cold whole milk
- 1 cup marshmallow fluff
- 2 tablespoons water
- 1 cup crushed chocolate cookies
- 12 plastic spider rings
- 12 clear plastic cups (5 oz)
Instructions
- Whisk both boxes of pudding mix with the cold milk in a large bowl for 2 minutes until thickened, then refrigerate for 10 minutes.
- Spoon 2 tablespoons of crushed chocolate cookies into the bottom of each plastic cup to create a dirt layer.
- Divide the chocolate pudding evenly among the cups, filling each about three-quarters full.
- Warm the marshmallow fluff with the water in the microwave for 15 seconds, stir until pourable, and spoon a circle on top of each pudding cup.
- Drag a toothpick from the center outward in spokes, then connect the spokes with curved lines to draw a spiderweb pattern.
- Chill the cups for at least 1 hour, then top each with a plastic spider ring right before serving.
Candy Corn Parfaits
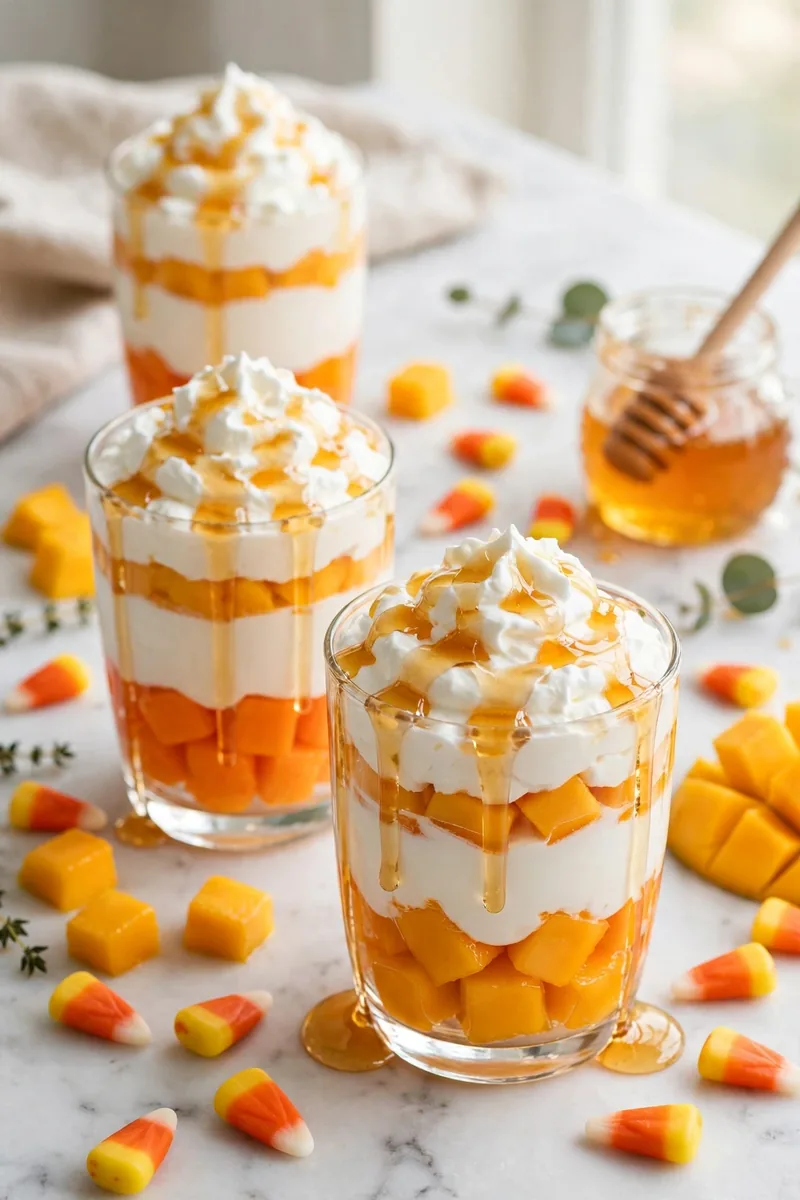
All the colors of fall candy corn, none of the fuss. These layered parfaits stack orange gelatin, creamy vanilla pudding, and whipped topping into a dessert that looks exactly like the iconic Halloween candy. Served in clear cups, the stripes show off beautifully, and they’re make-ahead friendly for a stress-free party day.
Ingredients
- 1 box (3 oz) orange gelatin
- 1 cup boiling water
- 1 cup cold water
- 1 box (3.4 oz) instant vanilla pudding mix
- 2 cups cold milk
- 2 cups whipped topping, divided
- 12 clear plastic cups (5 oz)
- Candy corn for garnish
Instructions
- Dissolve the orange gelatin in the boiling water, stir in the cold water, and pour evenly into the bottom of each cup for the orange layer.
- Refrigerate the cups for at least 2 hours until the gelatin is completely set.
- Whisk the vanilla pudding mix with the cold milk for 2 minutes, fold in 1 cup of the whipped topping, and spoon over the set gelatin.
- Chill for another 30 minutes until the pudding layer firms up slightly.
- Top each parfait with a generous dollop of the remaining whipped topping to create the white candy corn tip.
- Garnish with two or three pieces of candy corn and refrigerate until ready to serve.
Pumpkin Cheesecake Balls
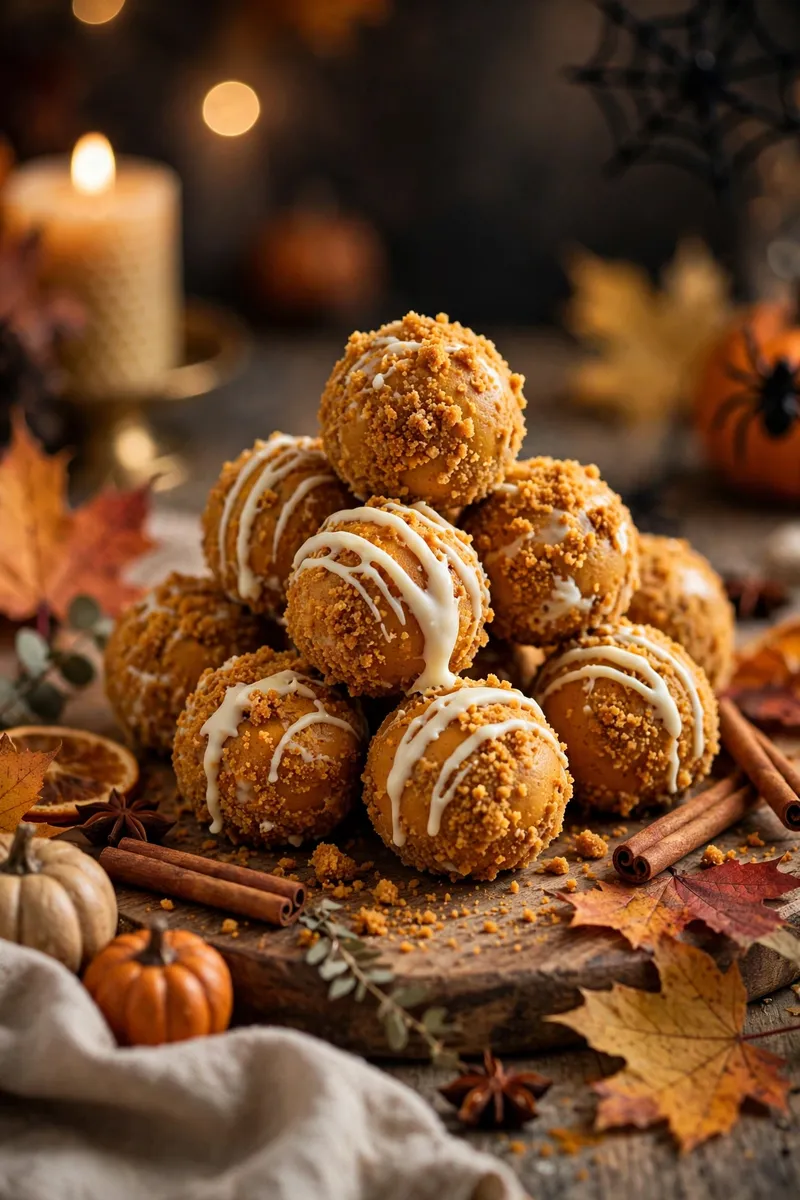
All the cozy flavor of pumpkin cheesecake rolled into bite-size truffles that need zero baking. Cream cheese, pumpkin puree, and warm spices blend into a rich filling that's coated in crushed gingersnaps. They're elegant enough for an adult Halloween dinner party but fun enough for kids. Keep them chilled until serving so they hold their perfect round shape.
Ingredients
- 8 oz cream cheese, softened
- 1/2 cup pumpkin puree
- 1 cup powdered sugar
- 1 teaspoon pumpkin pie spice
- 1 teaspoon vanilla extract
- 2 cups gingersnap cookie crumbs
- 1/2 cup white chocolate chips, melted, for drizzle
Instructions
- Beat the softened cream cheese in a large bowl with an electric mixer until completely smooth and fluffy.
- Add the pumpkin puree, powdered sugar, pumpkin pie spice, and vanilla, beating until the mixture is thick and well combined.
- Cover the bowl and refrigerate for 1 hour until the mixture is firm enough to roll.
- Scoop tablespoon-sized portions and roll into smooth balls between your palms.
- Roll each ball in the gingersnap cookie crumbs until fully coated, pressing gently so the crumbs stick.
- Drizzle with melted white chocolate, refrigerate for 30 minutes to set, and serve chilled.
Witch Hat Cookies
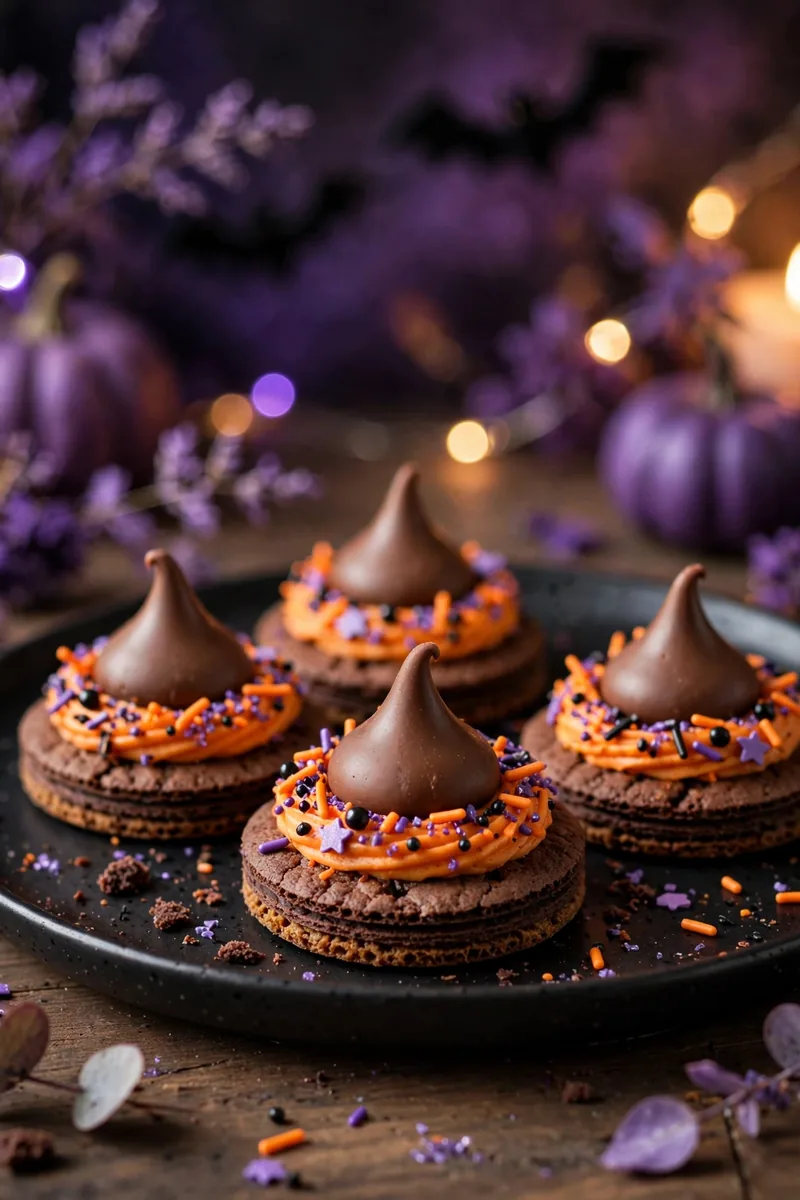
These pointy little hats are a Halloween classic for good reason — they're ridiculously cute and take about ten minutes to assemble. Chocolate wafer cookies get topped with a Hershey's kiss and a ring of orange frosting, instantly transforming into miniature witch hats. Line them up on a black platter and watch them vanish before the party even really starts.
Ingredients
- 24 chocolate wafer cookies
- 24 milk chocolate kisses, unwrapped
- 1/2 cup orange frosting
- 1 tablespoon black decorating gel
- 2 tablespoons orange sprinkles
- 1 piping bag with small round tip
Instructions
- Pipe a small ring of orange frosting around the edge of each chocolate wafer cookie.
- Press a chocolate kiss firmly into the center of each frosting ring so it stands upright like a witch hat.
- Use the black decorating gel to draw a thin band where the kiss meets the cookie for a hat band detail.
- Sprinkle orange sprinkles over the frosting rings while they're still tacky.
- Let the cookies sit at room temperature for 20 minutes so the frosting firms up and holds the kisses in place.
- Arrange on a dark platter for maximum spooky contrast and serve.
Tip: I always buy a few extra kisses because somehow a handful always disappear into my mouth during assembly — quality control is important!
Frankenstein Rice Treats
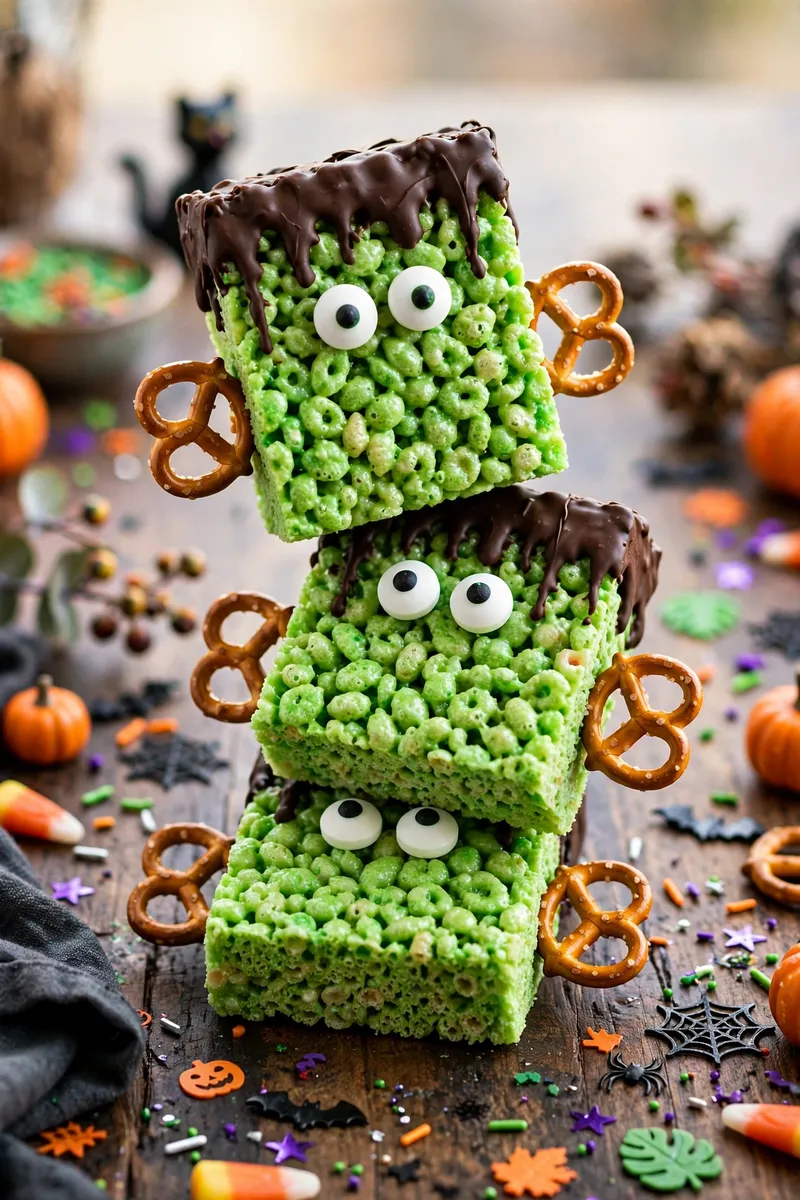
Cereal treats get a monster makeover with green-tinted marshmallow and a chocolate hairline. These Frankenstein heads are chewy, gooey, and endlessly fun to decorate with candy eyes and pretzel bolts. The whole batch comes together in one pot — just cut into rectangles and let everyone add their own monster face.
Ingredients
- 6 cups crispy rice cereal
- 1 bag (10 oz) mini marshmallows
- 4 tablespoons butter
- Green gel food coloring
- 1/2 cup chocolate chips, melted
- 24 candy eyeballs
- 12 mini pretzel sticks, broken in half
Instructions
- Melt the butter in a large pot over low heat, add the mini marshmallows, and stir until completely melted and smooth.
- Stir in green gel food coloring a few drops at a time until you reach a bright Frankenstein green.
- Remove from heat and fold in the crispy rice cereal until every piece is evenly coated.
- Press the mixture firmly into a greased 9×13 inch pan and let cool for 30 minutes.
- Cut into 12 rectangles and dip the top edge of each into melted chocolate to create Frankenstein's hair.
- Press two candy eyeballs onto each treat and stick a pretzel half into each side as neck bolts.
Graveyard Dirt Cups

Dig into these creepy cups layered with chocolate pudding, crushed cookies, and gummy worms rising from the "dirt." A Milano cookie stuck upright becomes the perfect tombstone for each miniature graveyard. They're a nostalgic throwback for kids and adults alike, and they can be assembled hours ahead and chilled until guests arrive.
Ingredients
- 2 boxes (3.9 oz each) instant chocolate pudding mix
- 4 cups cold whole milk
- 1 container (8 oz) whipped topping, thawed
- 2 cups crushed chocolate sandwich cookies
- 12 Milano cookies
- 24 gummy worms
- 12 clear plastic cups (9 oz)
- Black decorating gel
Instructions
- Whisk both boxes of pudding mix with the cold milk for 2 minutes until thickened, then fold in the whipped topping.
- Spoon 2 tablespoons of crushed cookies into the bottom of each cup as the first dirt layer.
- Add a thick layer of the chocolate pudding mixture over the cookie crumbs in each cup.
- Top with another generous layer of crushed cookies to look like freshly dug graveyard dirt.
- Write RIP on each Milano cookie with black decorating gel and stick one upright into each cup as a tombstone.
- Poke two gummy worms halfway into the dirt of each cup so they look like they're crawling out, then chill for 1 hour.
Eyeball Cake Pops
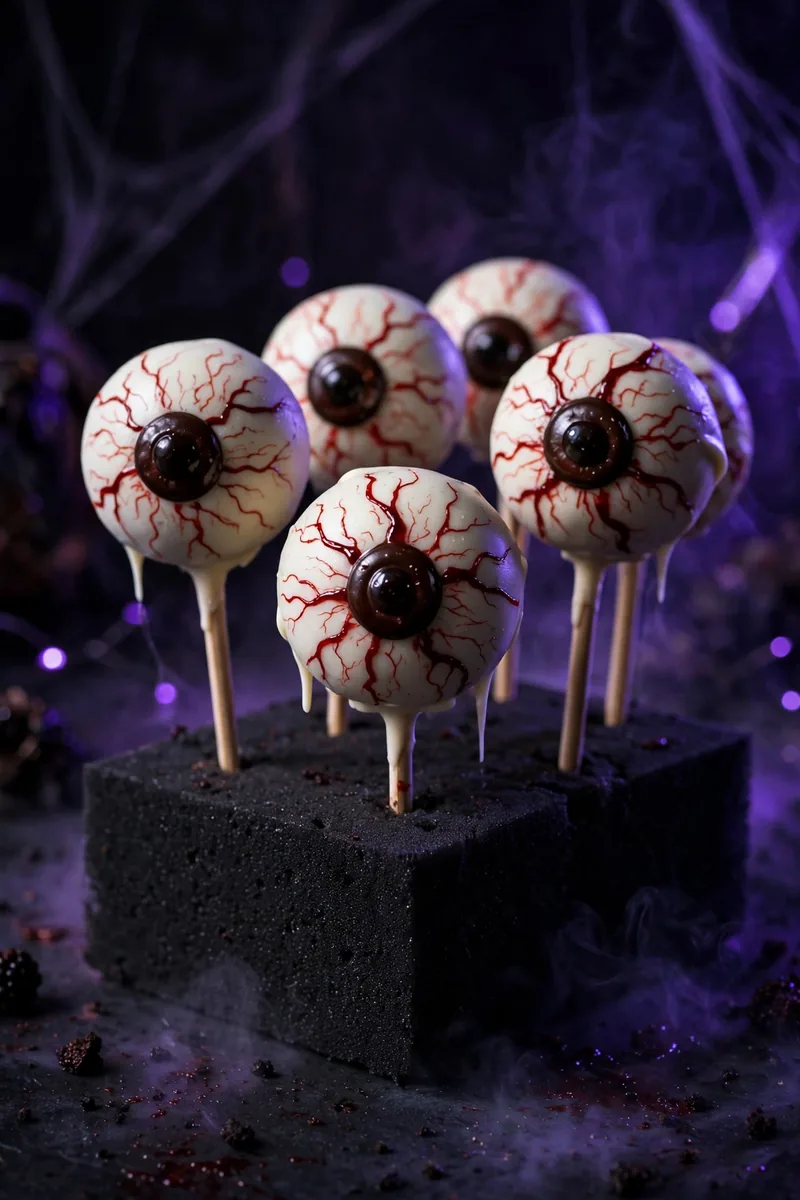
These bloodshot eyeballs are the creepiest treat on the table, and nobody will believe they started as a box of cake mix. Moist cake crumbs blended with frosting get rolled into balls, dipped in white candy coating, and decorated with eerie edible eyes. Arrange them on a bed of black licorice for a display that gets gasps.
Ingredients
- 1 box white cake mix, baked and cooled
- 1/2 cup vanilla frosting
- 2 cups white candy melts
- 1 tablespoon coconut oil
- 24 edible candy eyeballs, large
- Red decorating gel
- 24 lollipop sticks
- Styrofoam block for standing
Instructions
- Crumble the cooled cake into fine crumbs in a large bowl and mix with the vanilla frosting until it holds together like dough.
- Roll the mixture into 24 smooth balls about 1 inch across and insert a lollipop stick into each.
- Freeze the cake balls on a lined baking sheet for 30 minutes so they're firm for dipping.
- Melt the white candy melts with the coconut oil until smooth, then dip each cake pop, tapping off the excess.
- While the coating is wet, press one large candy eyeball onto the front of each pop.
- Once set, draw squiggly red veins around the eyeball with red decorating gel and stand upright in a foam block to dry.
Bat Wing Oreo Bites
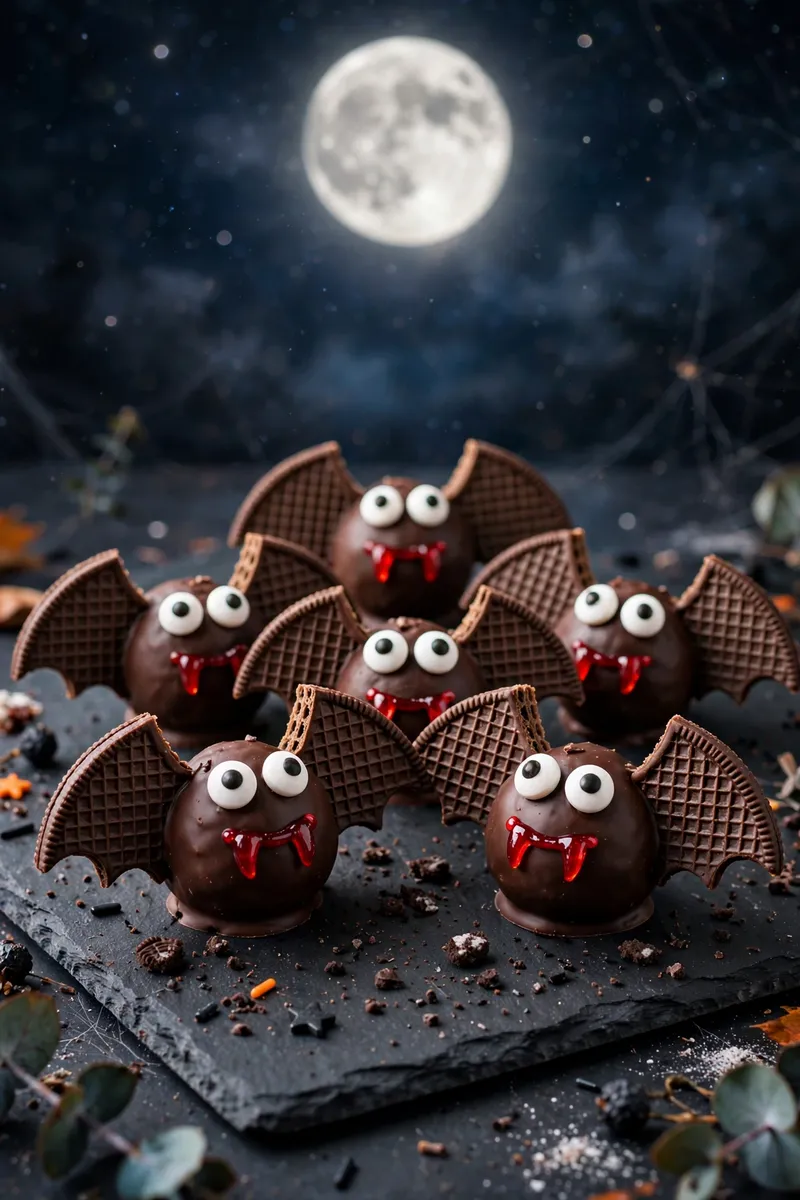
With chocolate wings spread wide, these little bats look ready to take flight off the dessert table. Oreo truffles form the bat bodies, and halved chocolate wafers become the wings. A pair of candy eyes gives each bat its personality. They're rich, chocolatey, and surprisingly simple since the truffle base is just two ingredients mixed together.
Ingredients
- 1 package (14 oz) chocolate sandwich cookies
- 8 oz cream cheese, softened
- 12 chocolate wafer cookies, halved
- 2 cups dark chocolate chips, melted
- 24 mini candy eyeballs
- 1 tablespoon red decorating gel
- Wax paper for lining
Instructions
- Crush the entire package of sandwich cookies into fine crumbs using a food processor.
- Beat the cookie crumbs with the softened cream cheese until a thick dough forms.
- Roll the dough into 12 oval-shaped bodies and place them on a wax paper lined baking sheet.
- Dip each body in melted dark chocolate, then press a halved wafer cookie into each side as wings before the chocolate sets.
- Attach two mini candy eyeballs to the front of each bat with a dab of melted chocolate.
- Draw tiny fangs below the eyes with red decorating gel, chill for 30 minutes, and serve.
Tip: I freeze the truffle bodies for 15 minutes before dipping — it makes the chocolate coating go on so much smoother and neater.
Mummy Oreo Truffles
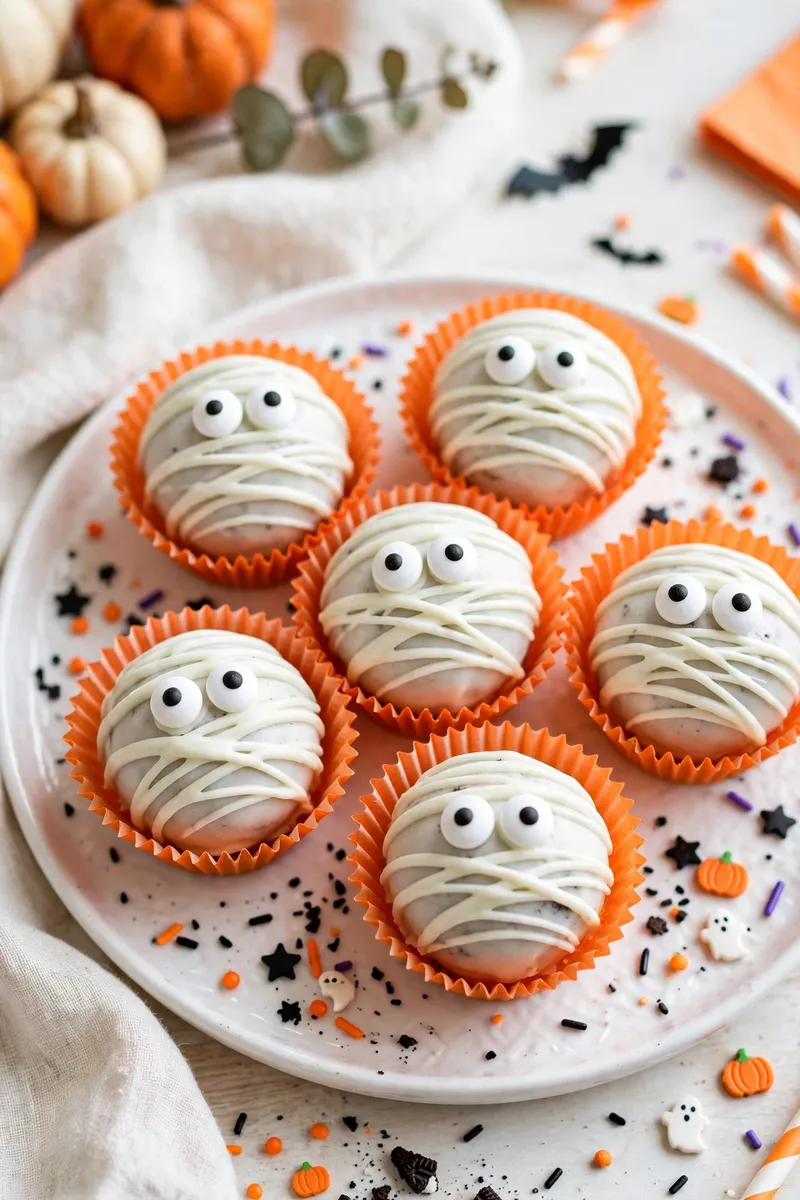
These bite-size mummies are pure chocolate indulgence wrapped in white chocolate bandages. The truffle centers are rich and fudgy, while the drizzled coating and candy eyes give them their adorable mummy look. They taste like they came from a fancy chocolate shop. Pop them in mini liners for easy grab-and-go treats.
Ingredients
- 1 package (14 oz) chocolate sandwich cookies
- 8 oz cream cheese, softened
- 2 cups white chocolate chips
- 1 tablespoon vegetable shortening
- 24 candy eyeballs
- 24 mini cupcake liners
- Wax paper for lining
Instructions
- Process the sandwich cookies into fine crumbs and beat with the softened cream cheese until a smooth dough forms.
- Roll into 24 one-inch balls, place on a wax paper lined baking sheet, and freeze for 20 minutes.
- Melt the white chocolate chips with the shortening, stirring until completely smooth and pourable.
- Dip each frozen truffle in the white chocolate, letting excess drip off, and return to the lined sheet.
- Drizzle additional white chocolate back and forth over each truffle to create mummy bandage stripes.
- Press two candy eyeballs onto each truffle while the drizzle is wet, let set for 20 minutes, and place in mini liners.
Pumpkin Patch Trifle
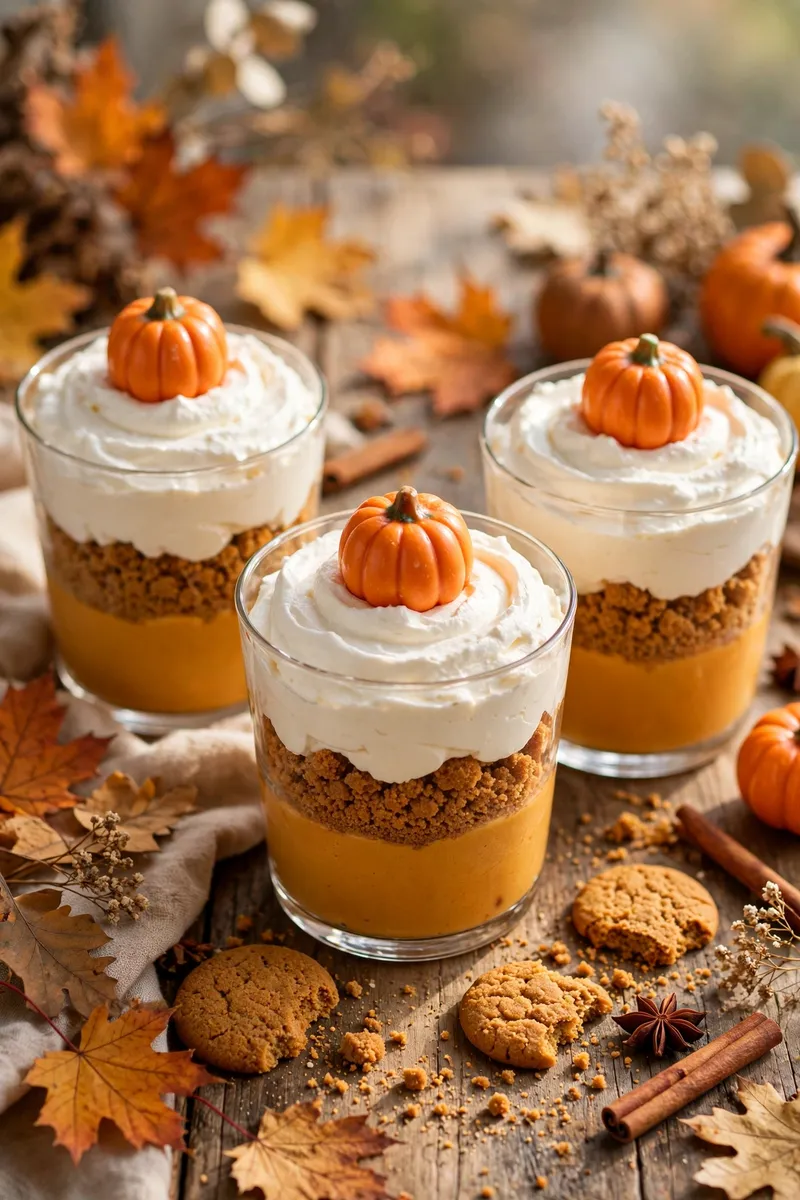
Layers of pumpkin mousse, crushed gingersnaps, and whipped cream stack up into a dessert that tastes like fall in a glass. Served in individual cups or one big trifle bowl, the orange and cream stripes look stunning. A candy pumpkin on top turns each serving into its own little pumpkin patch. It's creamy, spiced, and completely irresistible to pumpkin lovers.
Ingredients
- 1 can (15 oz) pumpkin puree
- 1 box (3.4 oz) instant vanilla pudding mix
- 2 cups cold milk
- 1 teaspoon pumpkin pie spice
- 2 cups whipped topping, divided
- 2 cups crushed gingersnap cookies
- 12 candy pumpkins
- 12 clear plastic cups (9 oz)
Instructions
- Whisk the vanilla pudding mix with the cold milk for 2 minutes until thickened.
- Fold in the pumpkin puree, pumpkin pie spice, and 1 cup of the whipped topping until smooth and fluffy.
- Spoon 2 tablespoons of crushed gingersnaps into the bottom of each cup.
- Layer the pumpkin mousse over the crumbs, filling each cup about two-thirds full.
- Top with another spoonful of crushed gingersnaps and a generous dollop of the remaining whipped topping.
- Crown each trifle with a candy pumpkin and chill for at least 1 hour before serving.
Spider Donut Holes

Glazed donut holes sprout pretzel legs and candy eyes to become the cutest spiders you've ever seen. This is the ultimate last-minute treat — it takes store-bought donut holes and about five minutes of assembly. Kids love sticking the legs in themselves, and the spiders look fantastic crawling across a dessert board. Sweet, simple, and spooky in the best way.
Ingredients
- 24 glazed donut holes
- 48 thin pretzel sticks
- 2 tablespoons chocolate frosting
- 48 mini candy eyeballs
- 1/4 cup chocolate sprinkles
- Wax paper for lining
- 1 piping bag or zip-top bag
Instructions
- Line a baking sheet with wax paper and arrange the glazed donut holes with space between them.
- Break each pretzel stick in half and insert four halves into each side of every donut hole to make eight spider legs.
- Bend the outer ends of the pretzel legs slightly downward so the spiders look like they're standing.
- Dab a tiny bit of chocolate frosting on the back of each candy eyeball and stick two eyes on the front of every spider.
- Sprinkle chocolate sprinkles over the spiders while the frosting is tacky for extra texture.
- Let sit for 10 minutes so the eyes adhere firmly, then arrange on a platter to serve.
Ghost Meringue Kisses
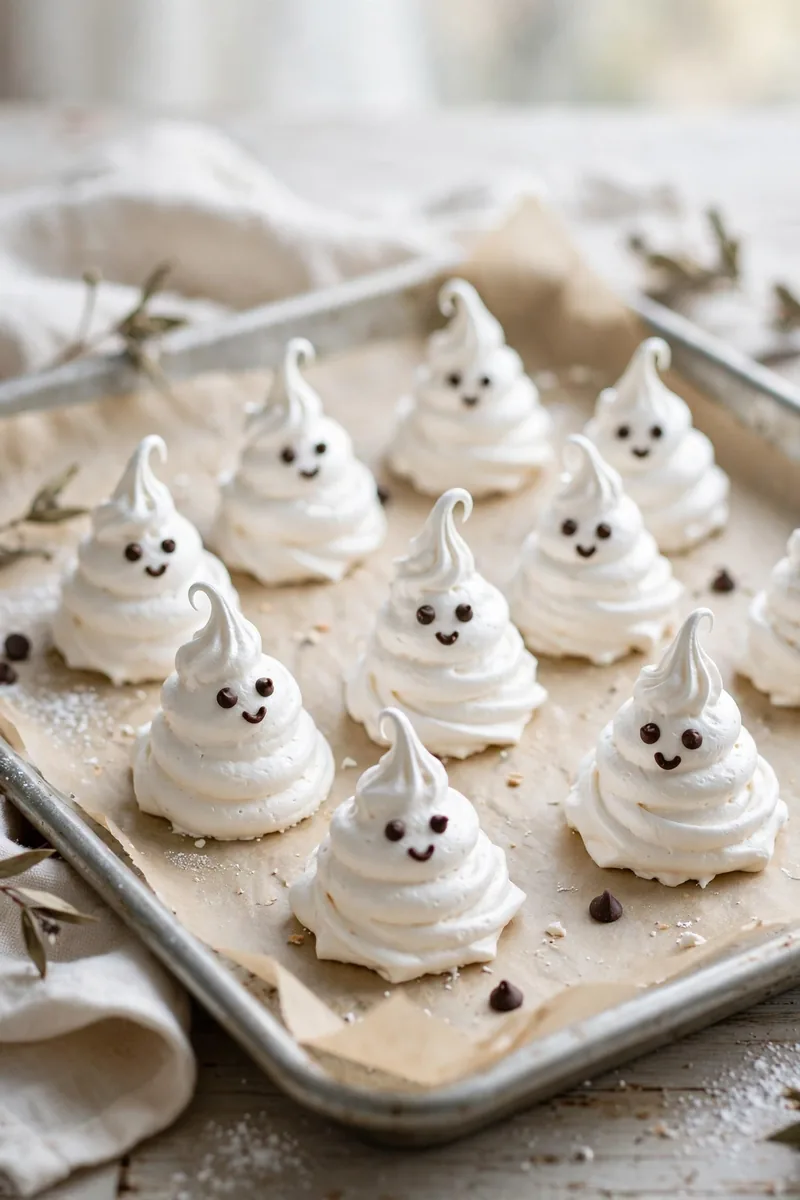
Light as air and hauntingly cute, these little meringue ghosts melt in your mouth. Whipped egg whites get piped into ghostly shapes and baked at the lowest oven temperature — technically the only heat involved is barely any at all. Dots of chocolate become their spooky faces. They make a beautiful, elegant addition to a Halloween dessert spread.
Ingredients
- 3 large egg whites, room temperature
- 3/4 cup granulated sugar
- 1/4 teaspoon cream of tartar
- 1/2 teaspoon vanilla extract
- 1/4 cup mini chocolate chips, melted
- Parchment paper
- 1 piping bag with large round tip
Instructions
- Beat the egg whites with the cream of tartar on high speed until soft peaks form.
- Gradually add the sugar one tablespoon at a time, beating until stiff, glossy peaks hold their shape.
- Beat in the vanilla extract until just combined.
- Pipe tall ghost shapes onto a parchment lined baking sheet, pulling up at the top for a wispy peak.
- Dot two eyes and a round mouth on each ghost using the melted chocolate and a toothpick.
- Let the meringues dry at room temperature for 6 hours or overnight until completely crisp, then store in an airtight container.
Tip: I learned the hard way that any humidity makes these sticky — I always make them on a dry day and store them with a silica packet in the container.
Caramel Monster Popcorn
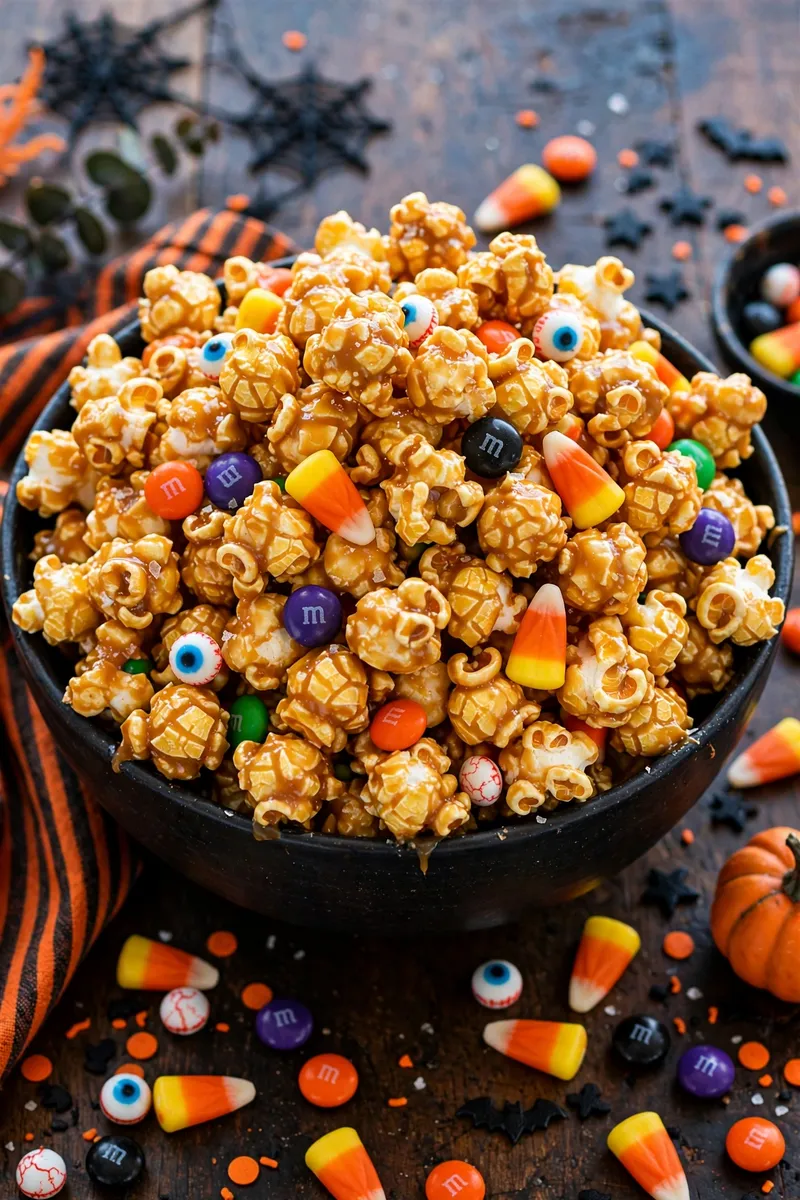
Sweet caramel corn gets a monster mash-up with candy eyes and colorful drizzle. The homemade caramel coating is buttery and crisp, shattering perfectly with every bite. Tossed with Halloween candies and googly eyes, it becomes a snack mix that guests can't stop grabbing by the handful. Pile it high in a big bowl and watch it disappear within minutes.
Ingredients
- 12 cups popped popcorn
- 1 cup butter
- 1 cup brown sugar
- 1/4 cup light corn syrup
- 1/2 teaspoon baking soda
- 1 teaspoon vanilla extract
- 1 cup candy corn
- 1 cup Halloween M&M's
- 36 candy eyeballs
Instructions
- Place the popped popcorn in a very large bowl, removing any unpopped kernels.
- Melt the butter with the brown sugar and corn syrup in a saucepan, bringing it to a boil for 4 minutes without stirring.
- Remove from heat and stir in the baking soda and vanilla — the mixture will foam up dramatically.
- Pour the hot caramel over the popcorn and toss quickly with two spoons until every kernel is coated.
- Spread the coated popcorn on lined baking sheets and let cool completely until crisp, about 30 minutes.
- Break into clusters and toss with the candy corn, M&M's, and candy eyeballs before piling into a serving bowl.
Witches Brew Punch
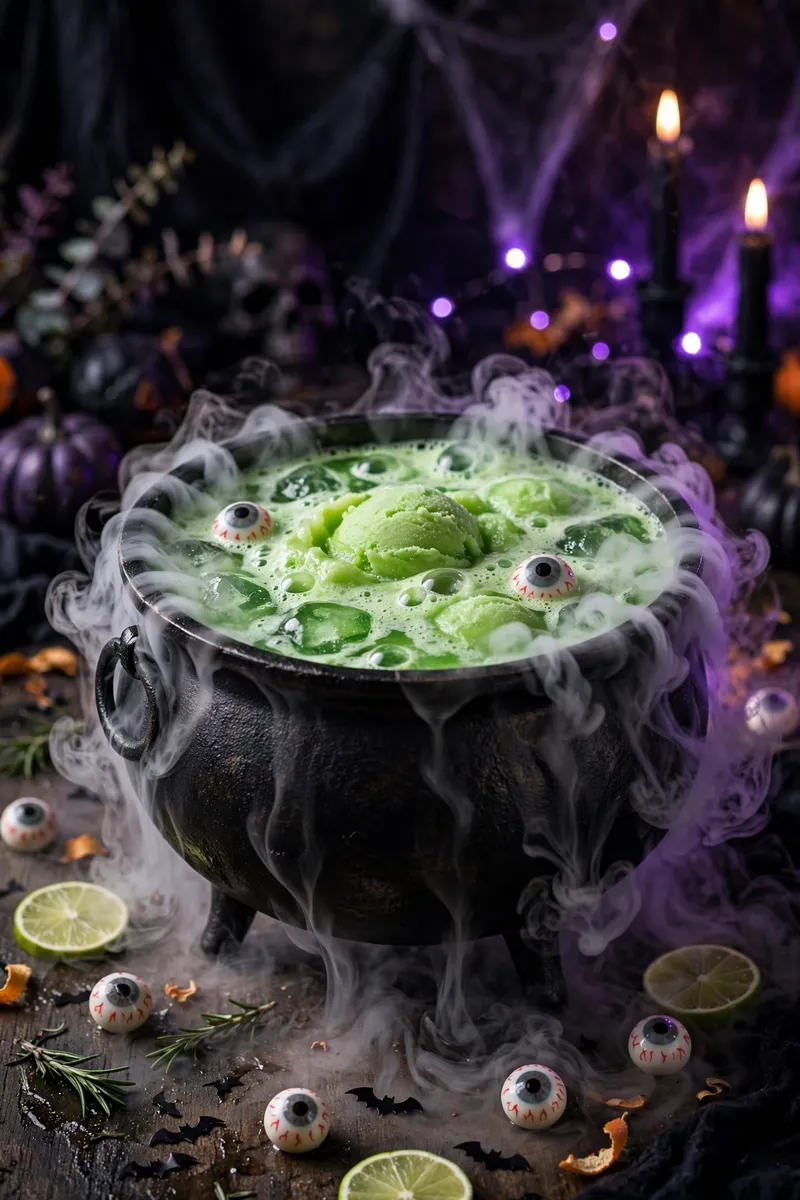
This bubbling green punch is the centerpiece every Halloween party table needs. Lime sherbet and lemon-lime soda create a frothy, fizzy brew that looks like it came straight from a witch's cauldron. Dry ice adds dramatic fog for extra effect, though it's totally optional. Kids love watching it bubble, and the sweet-tart flavor keeps everyone coming back for refills.
Ingredients
- 1 half gallon lime sherbet
- 2 liters lemon-lime soda, chilled
- 4 cups pineapple juice, chilled
- 1 cup gummy eyeballs
- Green food coloring, optional
- 1 large punch bowl or cauldron
- Dry ice for fog effect, optional
Instructions
- Scoop the lime sherbet into the bottom of a large punch bowl or plastic cauldron about 30 minutes before serving.
- Pour the chilled pineapple juice over the sherbet and stir gently to start it melting.
- Add a few drops of green food coloring if you want a more vivid witchy green color.
- Slowly pour in the chilled lemon-lime soda, which will foam up dramatically on contact with the sherbet.
- Float the gummy eyeballs on top of the punch so they bob around eerily.
- If using dry ice, place a small piece in a separate inner container with warm water behind the punch bowl for fog, never directly in the drink.
Chocolate Tombstone Bark
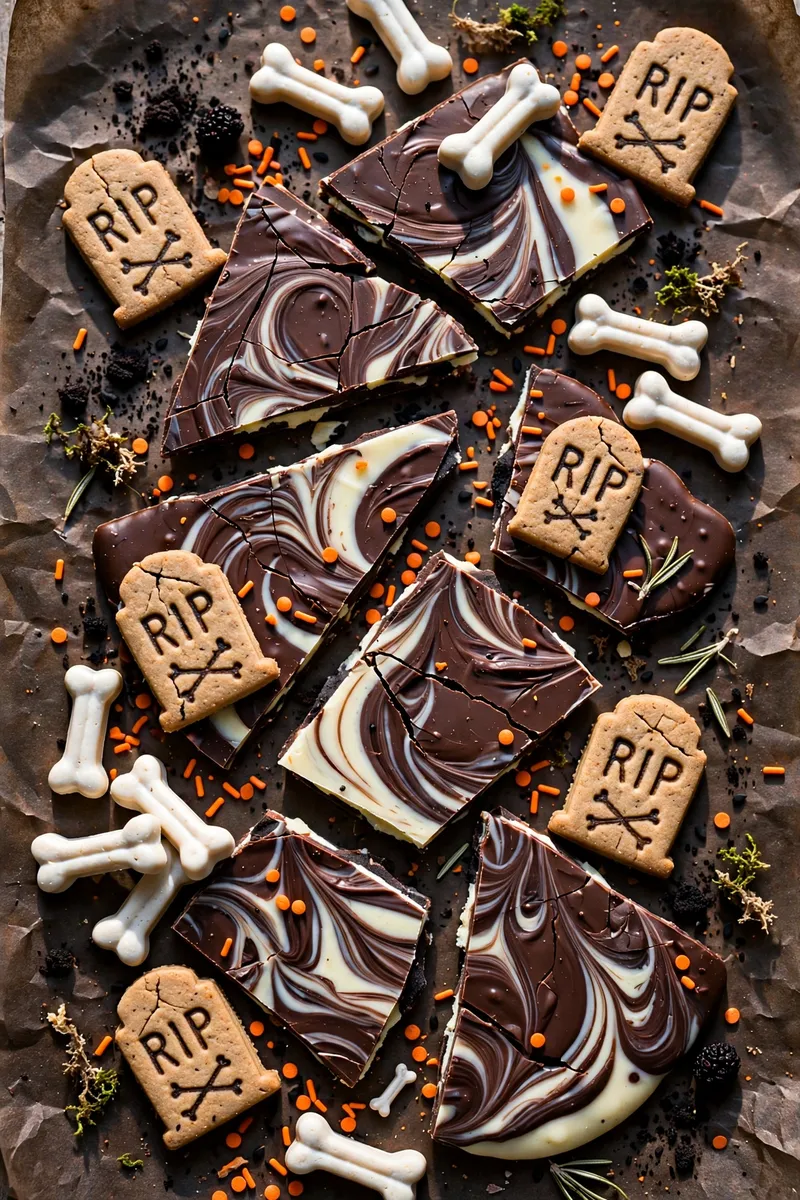
Broken into jagged pieces, this chocolate bark looks like chunks of a haunted graveyard. Swirls of white and dark chocolate create a marbled effect, while cookie tombstones and candy bones press into the surface. It's dramatic, delicious, and incredibly easy since it all sets in one pan. Bag it up in cellophane for a party favor guests will actually want.
Ingredients
- 2 cups dark chocolate chips
- 1 cup white chocolate chips
- 1 tablespoon coconut oil, divided
- 8 rectangular butter cookies
- Black decorating gel
- 1/2 cup candy bones
- 1/4 cup orange sprinkles
- Parchment paper
Instructions
- Line a rimmed baking sheet with parchment paper and set it aside.
- Melt the dark chocolate chips with half the coconut oil until smooth, then spread evenly over the prepared baking sheet.
- Melt the white chocolate chips with the remaining coconut oil and drizzle it over the dark chocolate in zigzag lines.
- Drag a toothpick through both chocolates to create a marbled tombstone effect.
- Write RIP on each butter cookie with black decorating gel and press them upright into the wet chocolate along with the candy bones.
- Sprinkle with orange sprinkles, refrigerate for 1 hour until firm, then break into jagged pieces.
Caramel Apple Slices

All the joy of a caramel apple without the jaw-breaking whole fruit. Thin apple slices get a drizzle of warm caramel and a shower of toppings, making them easy to eat at a crowded party. Set up a toppings bar so guests can customize their own — it's interactive, delicious, and far less messy than traditional caramel apples.
Ingredients
- 4 large crisp apples
- 1 bag (11 oz) caramel bits
- 2 tablespoons heavy cream
- 1 tablespoon lemon juice
- 1/2 cup crushed chocolate cookies
- 1/4 cup Halloween sprinkles
- 1/4 cup mini chocolate chips
- 12 wooden skewers or popsicle sticks
Instructions
- Slice the apples into thick rounds about half an inch thick and toss them in lemon juice to prevent browning.
- Pat the apple slices completely dry with paper towels so the caramel adheres properly.
- Melt the caramel bits with the heavy cream in the microwave, stirring every 30 seconds until smooth and pourable.
- Insert a wooden skewer into each apple slice and drizzle generously with the warm caramel.
- While the caramel is still tacky, shower the slices with crushed cookies, sprinkles, and mini chocolate chips.
- Stand the finished slices upright in a foam block or lay flat on wax paper for 15 minutes until the caramel sets.
Tip: I warm the caramel just before guests arrive and let everyone drizzle their own — it doubles as a fun party activity and the caramel never gets too firm.
Monster Mash Dip

This lurid green dip is equal parts delicious and disgusting-looking, which is exactly the point. Creamy avocado and sour cream blend into a monstrous green mash that's perfect for scooping with tortilla chips. A sour cream spiderweb on top and olive spiders crawling across make it a true showpiece. It's the savory break your dessert table desperately needs.
Ingredients
- 3 ripe avocados
- 1 cup sour cream, divided
- 1/4 cup lime juice
- 1 packet taco seasoning
- 1/2 cup salsa verde
- 8 black olives
- 2 tablespoons chopped cilantro
- Tortilla chips for serving
Instructions
- Mash the avocados in a large bowl with the lime juice until mostly smooth with a few chunks remaining.
- Stir in 3/4 cup of the sour cream, the taco seasoning, and the salsa verde until uniformly green and creamy.
- Spread the dip into a shallow serving bowl and smooth the top with a spatula.
- Spoon the remaining 1/4 cup of sour cream into a zip-top bag, snip the corner, and pipe a spiderweb pattern on top.
- Slice the black olives into rings and arrange them as spider bodies with thin olive slivers as legs.
- Sprinkle with chopped cilantro and serve immediately with tortilla chips.
Candy Apple Nachos
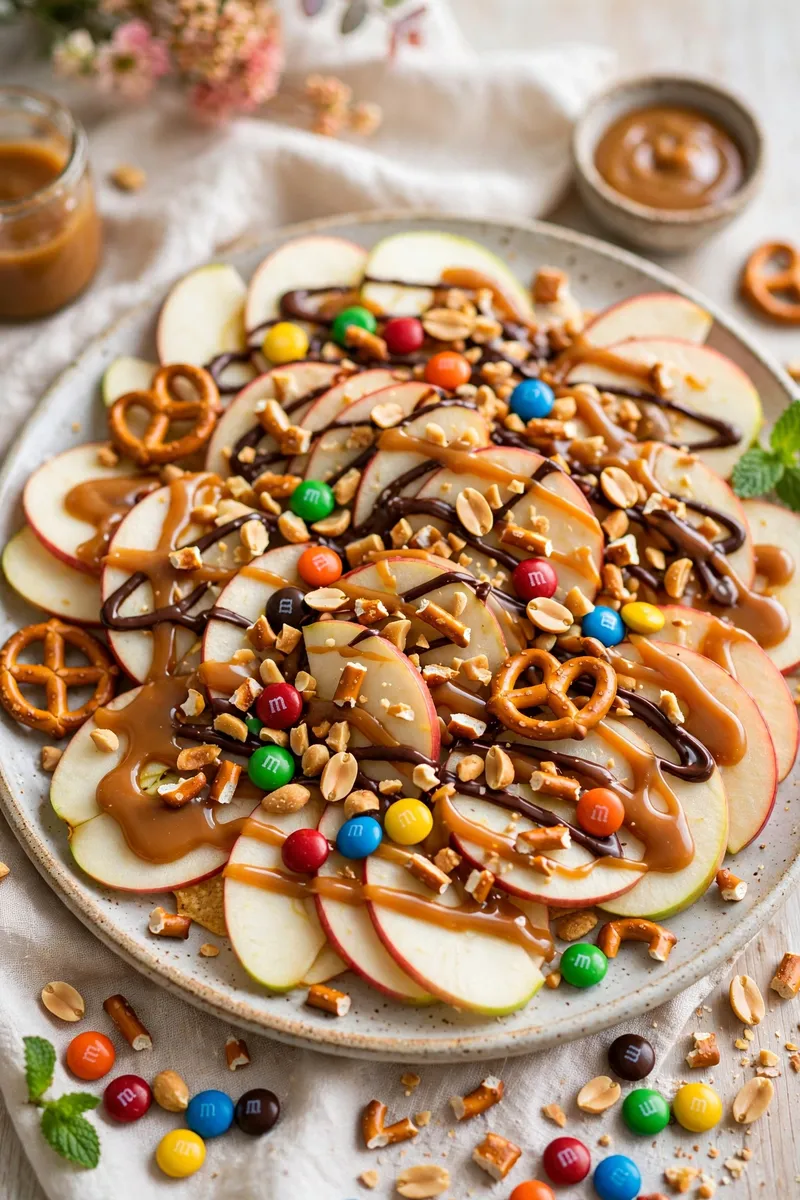
Deconstructed caramel apples meet party nachos in this genius shareable dessert. Crisp apple slices fan out on a platter and get loaded with warm caramel, chocolate drizzle, and every topping imaginable. Set it in the middle of the table for grazing — the combination of tart apple and sweet toppings is absolutely addictive.
Ingredients
- 5 large crisp apples, thinly sliced
- 1 bag (11 oz) caramel bits
- 2 tablespoons heavy cream
- 1/2 cup chocolate chips, melted
- 1/2 cup chopped peanuts
- 1/4 cup mini M&M's
- 1/4 cup crushed pretzels
- 2 tablespoons Halloween sprinkles
Instructions
- Arrange the thin apple slices in overlapping layers on a large round platter.
- Melt the caramel bits with the heavy cream until smooth, then drizzle generously over the apple slices.
- Drizzle the melted chocolate back and forth over the caramel in the opposite direction.
- Shower the nachos with chopped peanuts, mini M&M's, and crushed pretzels while the sauces are warm.
- Finish with a snowfall of Halloween sprinkles over the entire platter.
- Serve immediately with small plates and napkins, as the apples are best within an hour of assembly.
Spiderweb Cheesecake Bites
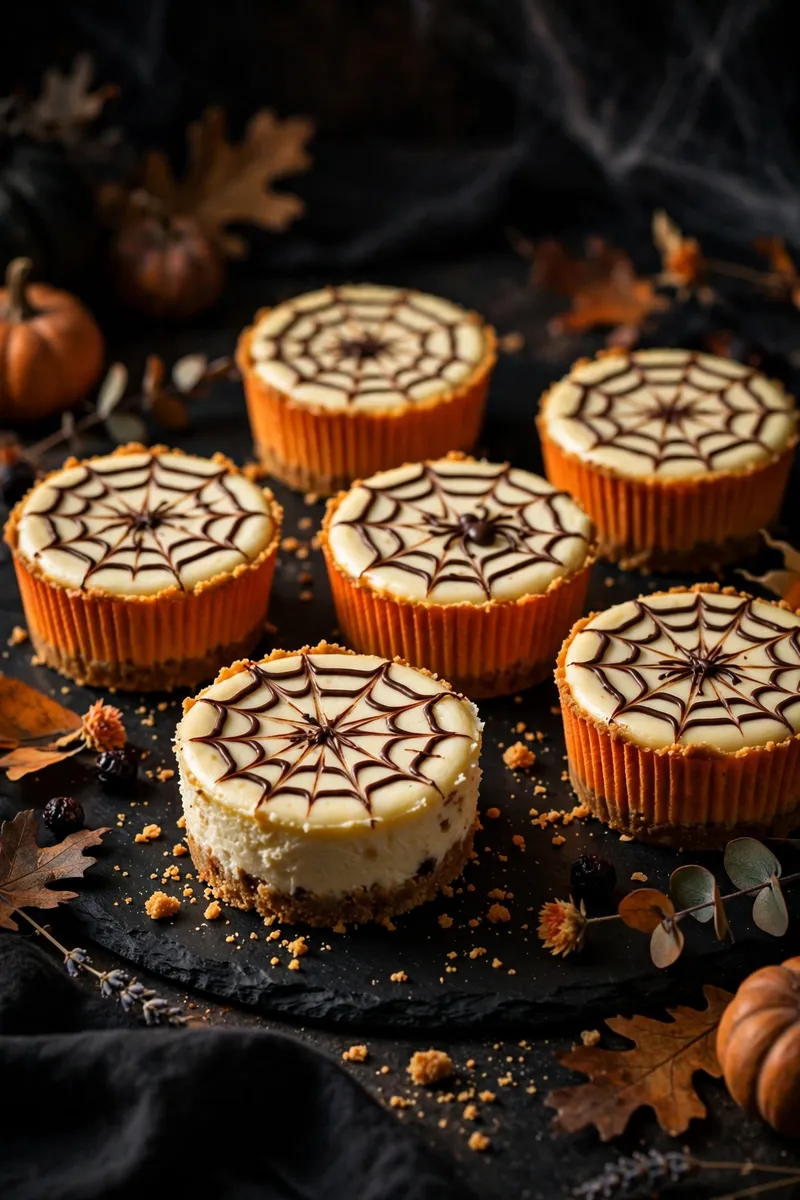
Mini cheesecakes get a spooky spiderweb topping that looks straight out of a haunted bakery. A buttery graham cracker crust supports a creamy no-bake cheesecake filling, and a chocolate web piped on top finishes the look. Made in a mini muffin tin, they're perfectly poppable and come together with just a bowl and a spoon.
Ingredients
- 2 cups graham cracker crumbs
- 1/2 cup butter, melted
- 16 oz cream cheese, softened
- 1 cup powdered sugar
- 1 teaspoon vanilla extract
- 1 cup whipped topping
- 1/4 cup chocolate chips, melted
- 24 mini cupcake liners
Instructions
- Mix the graham cracker crumbs with the melted butter and press a tablespoon firmly into the bottom of each mini liner.
- Beat the softened cream cheese with the powdered sugar and vanilla until completely smooth and fluffy.
- Fold in the whipped topping gently until the mixture is light and airy.
- Spoon or pipe the cheesecake filling over the crusts, filling each liner nearly to the top.
- Drizzle the melted chocolate in concentric circles on each bite, then drag a toothpick from center to edge to create webs.
- Refrigerate for at least 2 hours until firm, then serve chilled.
Haunted Brownie Bites
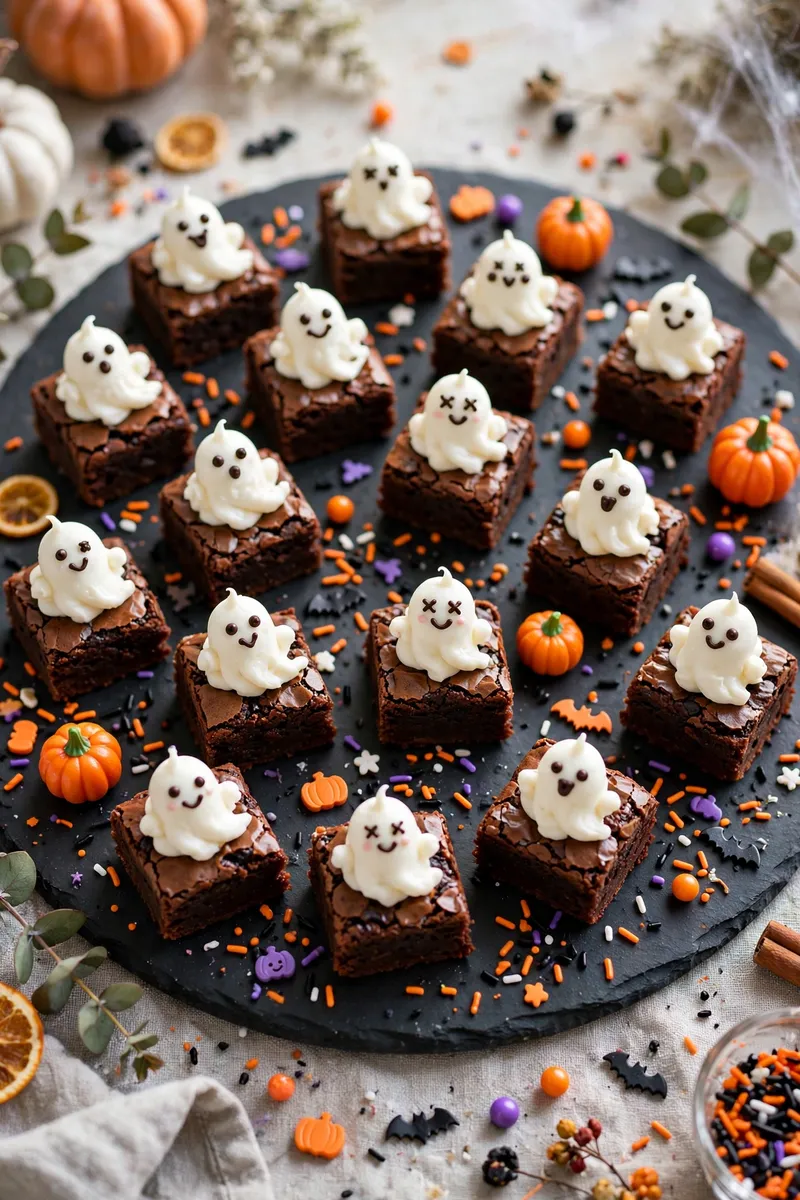
Fudgy store-bought brownie bites transform into a haunted house scene with frosting ghosts and candy decorations. This is the ultimate shortcut treat — no baking, no mixing, just decorating. Little ghosts piped from white frosting float across the chocolate tops, and candy pumpkins complete the graveyard. They're adorable, rich, and ready in about fifteen minutes flat.
Ingredients
- 24 mini store-bought brownie bites
- 1 cup white frosting
- 1/4 cup chocolate frosting
- 24 candy pumpkins
- 2 tablespoons Halloween sprinkles
- 1 piping bag with small round tip
- 1 toothpick for detailing
Instructions
- Arrange the mini brownie bites on a serving platter with space between them.
- Fill the piping bag with white frosting and pipe a tall ghost shape onto each brownie bite.
- Use the toothpick dipped in chocolate frosting to dot two eyes on each frosting ghost.
- Press a candy pumpkin next to each ghost on top of the brownie.
- Scatter Halloween sprinkles around the platter for a festive haunted ground effect.
- Serve immediately or cover loosely and keep at room temperature for up to 4 hours.
Tip: I buy the brownie bites from the bakery section rather than making them — honestly, nobody can tell the difference once they're decorated, and it saves me an hour.
Conclusion
You now have 23 chilling no bake Halloween treats for parties that prove spooky season doesn't require a single minute of oven time. From ghostly banana pops to haunted brownie bites, every recipe on this list comes together fast with simple ingredients. If you need more ideas to round out your Halloween menu, check out these easy Halloween dinners to pair with your dessert spread. Save this post to your Halloween Pinterest board now so it's ready when party planning starts, and share it with a friend who's hosting this year!