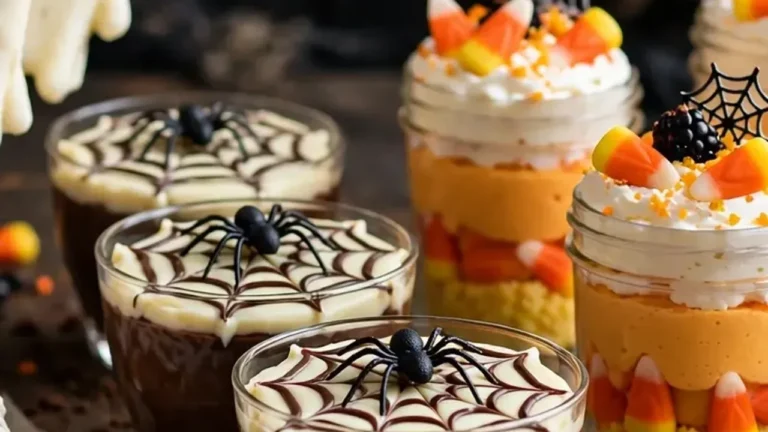
22 Foolproof Halloween Cookies for Beginner Bakers
If you are searching for easy Halloween cookies for beginners, you have landed in exactly the right spot. Baking spooky treats should be fun, not stressful, and every recipe in this collection was chosen because it looks impressive with very little decorating skill required. You will find ghosts, witches, mummies, spiders, and pumpkins made from simple doughs, store-bought shortcuts, and clever decorating tricks that anyone can master. Each cookie comes with a beginner-friendly ingredient list and clear step-by-step instructions, so even your very first batch will turn out great. Grab your mixing bowls, preheat the oven, and get ready to fill your Halloween party table with treats that taste as good as they look.
Witch Hat Cookies

These adorable witch hat cookies start with a chocolate cookie base topped with a chocolate kiss and a colorful frosting brim. Kids love helping decorate them, and they look impressive on any Halloween dessert table. They are simple to assemble with store-bought ingredients, making them perfect for busy October weekends when you want maximum spooky impact with minimum effort.
Ingredients
- 1 package chocolate sandwich cookies
- 24 milk chocolate kisses, unwrapped
- 1/2 cup orange frosting
- 1/4 cup black decorating gel
- 2 tablespoons Halloween sprinkles
- 1 tube purple writing icing
- 24 small gumdrops (optional)
- 1 tablespoon vegetable oil
Instructions
- Spread a small ring of orange frosting around the top edge of each chocolate sandwich cookie to act as glue.
- Press one unwrapped chocolate kiss into the center of each cookie to form the pointed hat.
- Pipe a thin line of purple writing icing around the base of each kiss for a hat band.
- Dot black decorating gel across the hat band to look like buckle details.
- Sprinkle colorful sprinkles around the cookie brim while the frosting is still wet.
- Let the cookies set at room temperature for 30 minutes before serving.
Ghost Sugar Cookies

These ghost sugar cookies are almost too cute to eat, with their white bodies and tiny chocolate chip faces. A simple sugar cookie dough gets rolled, cut, and baked, then a quick dip in white icing does all the decorating work. They are a great first decorating project for kids, since every wobbly face makes the ghosts look friendlier.
Ingredients
- 2 3/4 cups all-purpose flour
- 1 teaspoon baking soda
- 1/2 teaspoon baking powder
- 1 cup unsalted butter, softened
- 1 1/2 cups white sugar
- 1 egg
- 1 teaspoon vanilla extract
- 1 cup white candy melts
- 48 mini chocolate chips
Instructions
- Preheat the oven to 375°F and line two baking sheets with parchment paper.
- Whisk the flour, baking soda, and baking powder in a medium bowl.
- Beat the butter and sugar until fluffy, then mix in the egg and vanilla.
- Gradually add the dry ingredients until a soft dough forms, then roll and cut into rounds.
- Bake for 8 to 10 minutes until the edges are just set, then cool completely.
- Dip each cookie in melted white candy melts and press on mini chocolate chips for eyes and mouths.
Spider Web Cookies
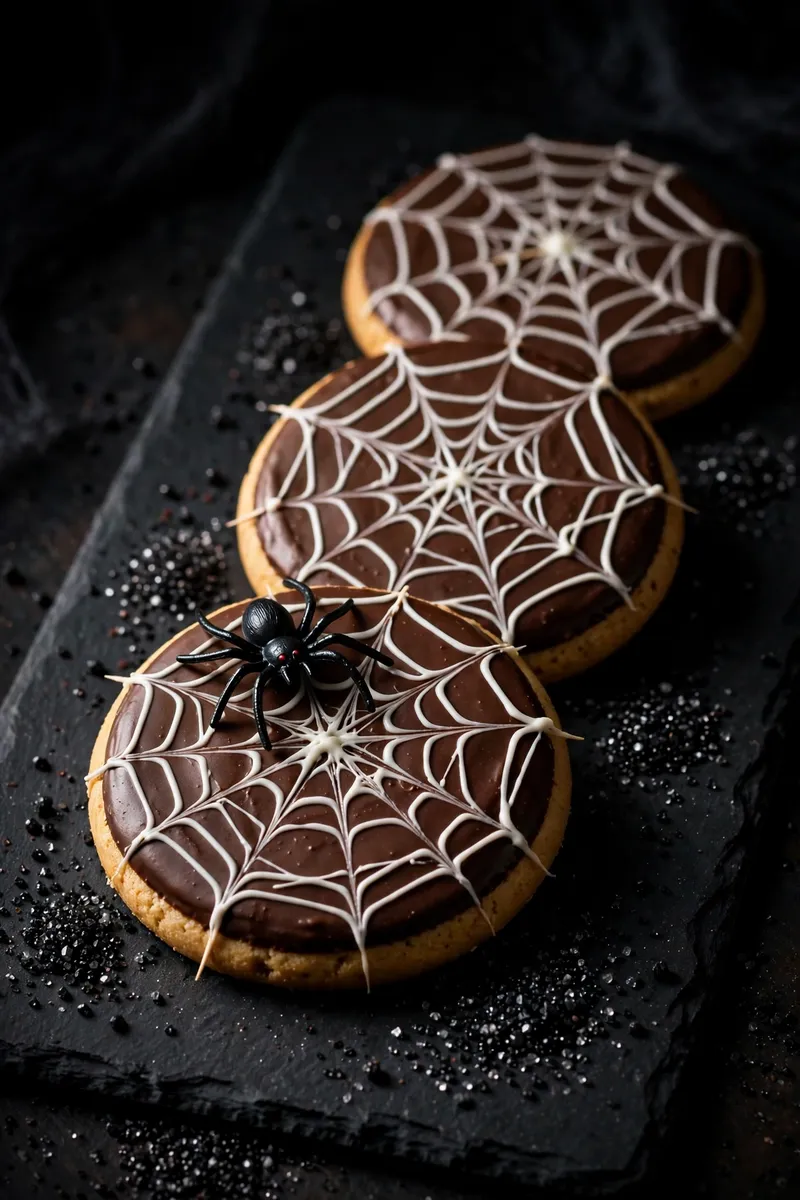
These striking spider web cookies look like professional bakery treats but start with plain round sugar cookies. A swirl of white icing over a chocolate base gets dragged into a web pattern with a single toothpick. They are the perfect make-ahead party cookie because the design actually improves as the icing sets and the lines sharpen.
Ingredients
- 24 round sugar cookies (store-bought or homemade)
- 1 cup chocolate frosting
- 1 cup white icing in a squeeze bottle
- 24 small plastic spider rings (optional)
- 1 tablespoon milk
- 1 teaspoon vanilla extract
- 1/4 cup black sanding sugar
- Toothpicks for dragging
Instructions
- Spread a smooth, even layer of chocolate frosting over the top of each round cookie.
- Starting at the center, pipe concentric circles of white icing over the chocolate layer.
- Drag a toothpick from the center outward through the circles to create the web effect.
- Wipe the toothpick clean between drags so the lines stay crisp and neat.
- Sprinkle black sanding sugar around the edges while the icing is still wet.
- Let the cookies set for 1 hour, then top with a plastic spider ring if desired.
Tip: I always make the webs right after frosting while everything is still wet — if the chocolate layer crusts over, the toothpick drags will crack instead of swirl.
Pumpkin Patch Cookies

These cheerful pumpkin patch cookies bring all the fall color to your cookie tray with bright orange icing and curly green vines. A soft pumpkin-spice cookie base keeps them seasonal from the inside out. They are wonderfully forgiving to decorate because pumpkins are supposed to look a little lumpy and handmade, so beginners can relax.
Ingredients
- 2 1/2 cups all-purpose flour
- 1 teaspoon baking soda
- 2 teaspoons pumpkin pie spice
- 1 cup unsalted butter, softened
- 1 cup brown sugar
- 1/2 cup canned pumpkin puree
- 1 egg
- 1 teaspoon vanilla extract
- 2 cups orange royal icing
- 1/4 cup green icing
Instructions
- Preheat the oven to 350°F and line baking sheets with parchment paper.
- Whisk the flour, baking soda, and pumpkin pie spice together in a bowl.
- Cream the butter and brown sugar, then beat in the pumpkin puree, egg, and vanilla.
- Fold in the dry ingredients until just combined, then scoop into rounded tablespoon balls.
- Flatten slightly and bake for 10 to 12 minutes until the edges are firm.
- Cool completely, then pipe orange icing in a pumpkin shape with a green curly vine on top.
Monster Eye Cookies
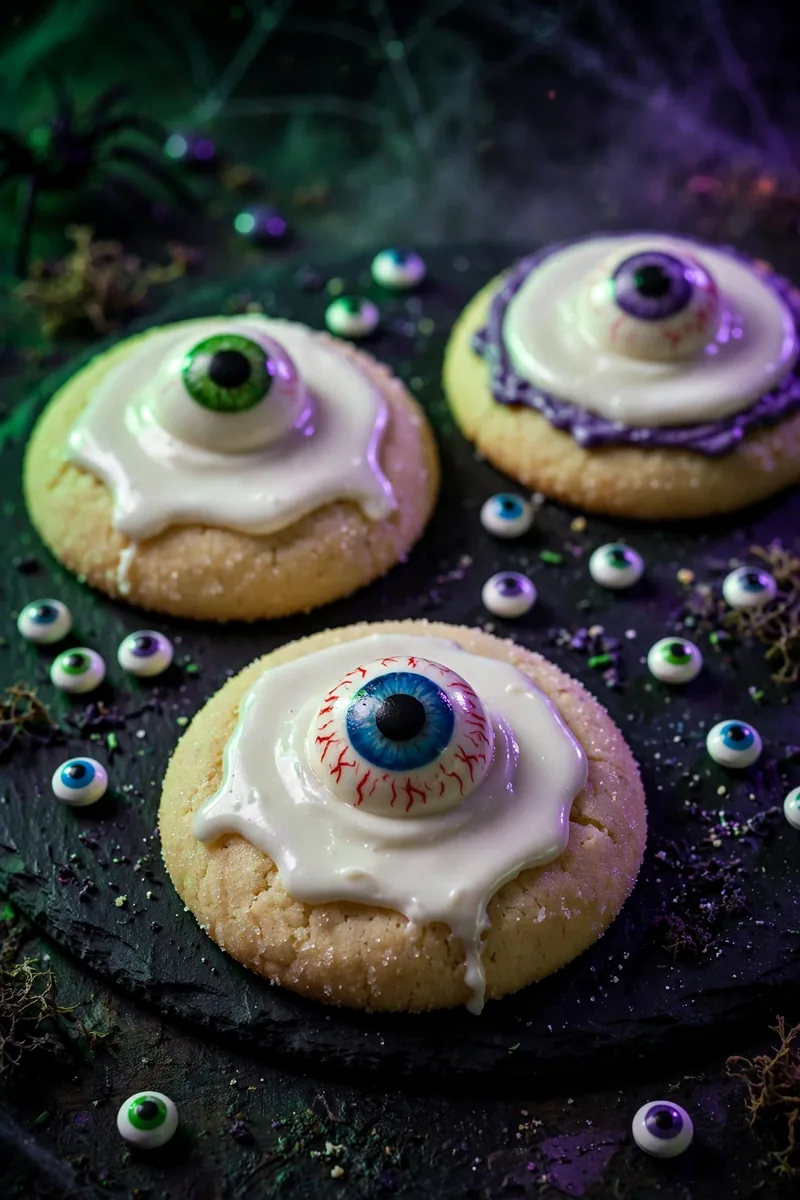
These silly monster eye cookies are guaranteed to make kids giggle, with wobbly candy eyeballs staring up from swirls of colorful frosting. The base can be any flavor you like, so use your favorite cookie dough or a store-bought mix. They are ideal for classroom parties because each monster looks different and there is no wrong way to decorate.
Ingredients
- 1 package sugar cookie mix
- 1/2 cup butter, softened
- 1 egg
- 1 cup vanilla frosting
- 4 drops each of green, purple, and blue food coloring
- 48 candy eyeballs in mixed sizes
- 2 tablespoons sprinkles
- 1/4 cup mini chocolate chips
Instructions
- Prepare the sugar cookie mix according to the package directions with the butter and egg.
- Roll the dough into 1-inch balls and place them 2 inches apart on lined baking sheets.
- Bake at 350°F for 9 to 11 minutes until the edges are lightly golden, then cool fully.
- Divide the frosting into bowls and tint each a different bright monster color.
- Swirl a generous dollop of frosting onto each cookie with the back of a spoon.
- Press one or two candy eyeballs into each cookie and finish with sprinkles.
Candy Corn Cookies
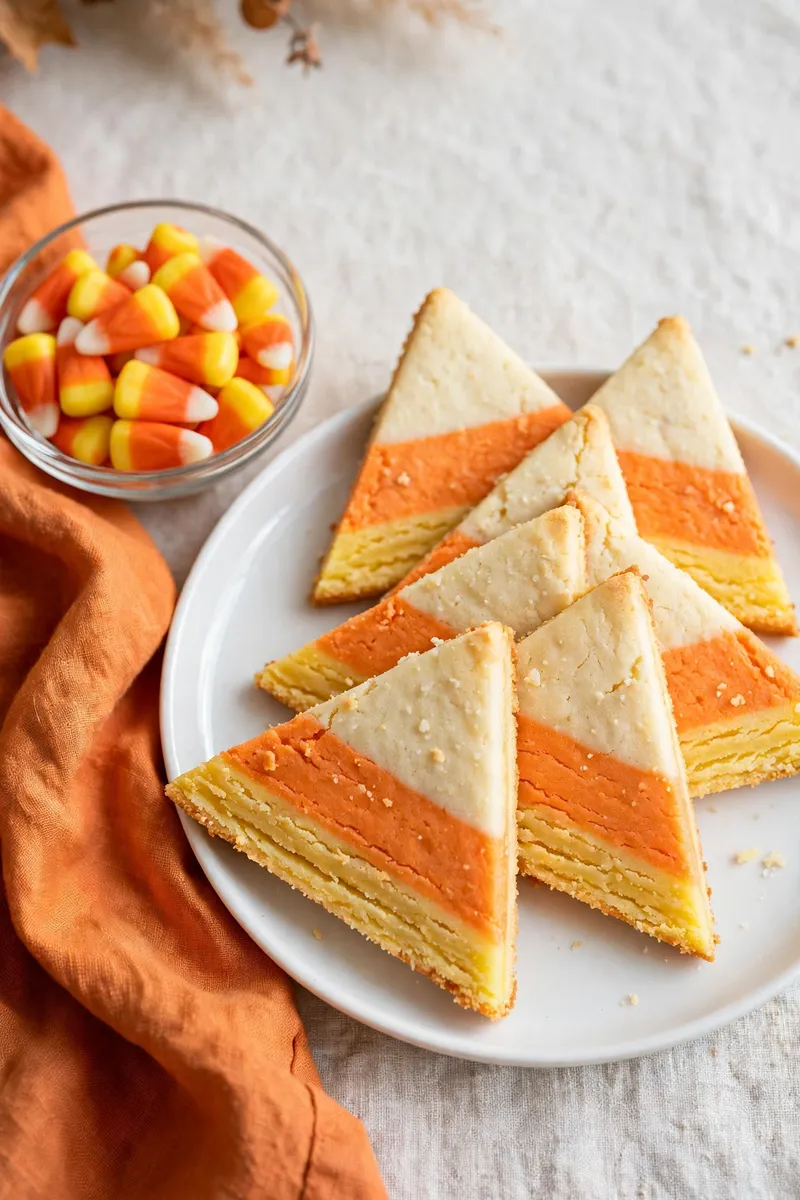
These festive candy corn cookies capture the classic Halloween candy look with simple layers of orange, yellow, and white dough. The slice-and-bake method does all the shaping work for you — just stack, chill, and slice. They are a fantastic introduction to layered dough techniques because the results look far more impressive than the effort involved.
Ingredients
- 2 1/2 cups all-purpose flour
- 1/2 teaspoon salt
- 1 cup unsalted butter, softened
- 3/4 cup powdered sugar
- 1 teaspoon vanilla extract
- Orange and yellow gel food coloring
- 1 egg white, lightly beaten
- 2 tablespoons coarse sugar for rolling
Instructions
- Mix the flour and salt, then cream the butter and powdered sugar until smooth.
- Beat in the vanilla, then gradually add the flour mixture to form a dough.
- Divide the dough into three parts; tint one orange, one yellow, and leave one plain.
- Shape each portion into a log, stack the logs, and press gently into a triangle loaf.
- Brush with egg white, roll in coarse sugar, and chill for 2 hours until firm.
- Slice into 1/4-inch triangles and bake at 350°F for 10 to 12 minutes.
Tip: I chill the stacked loaf overnight when I can — the firmer the dough, the cleaner your candy corn stripes will slice.
Chocolate Bat Cookies
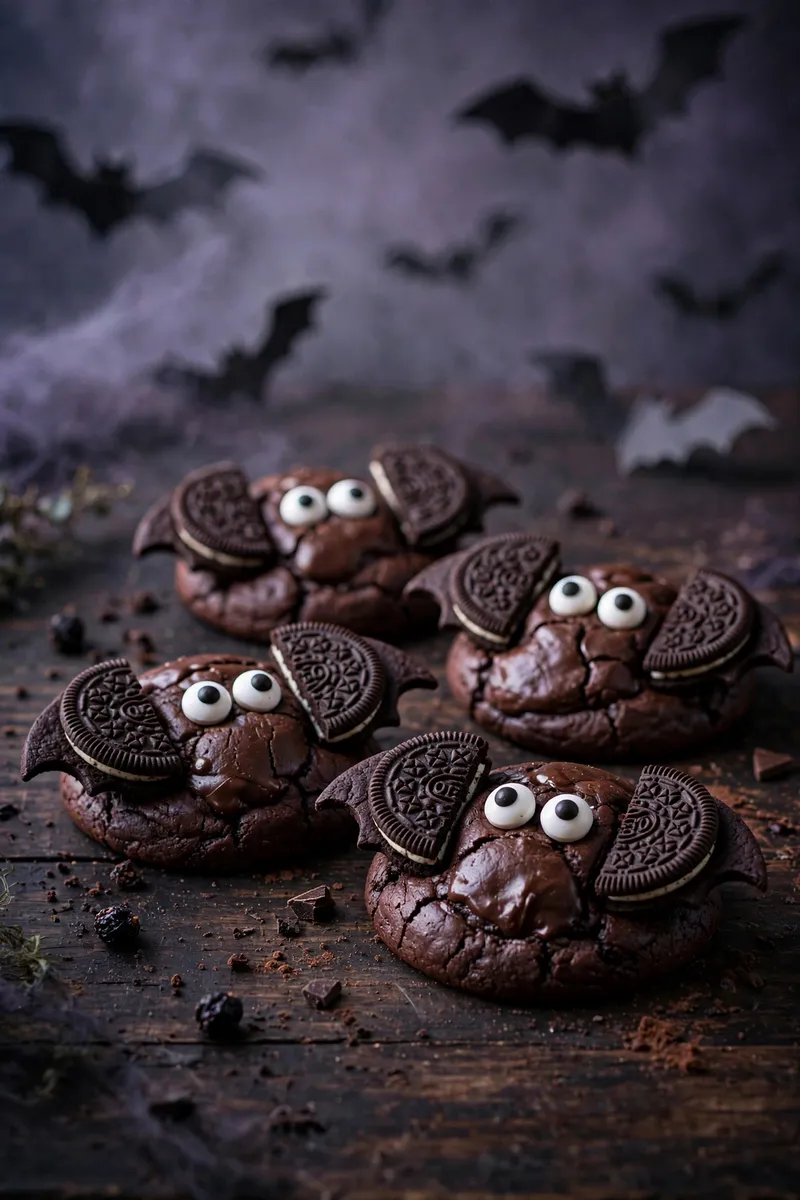
These chocolate bat cookies are rich, fudgy, and delightfully spooky with their spread wings made from halved sandwich cookies. A brownie-like cookie base keeps them soft in the middle with chewy edges. They are a great choice for chocolate lovers who want something more exciting than a plain chocolate cookie on the party table.
Ingredients
- 1 3/4 cups all-purpose flour
- 3/4 cup unsweetened cocoa powder
- 1 teaspoon baking soda
- 1/2 teaspoon salt
- 3/4 cup butter, softened
- 1 cup sugar
- 1/2 cup brown sugar
- 1 egg
- 24 chocolate sandwich cookies, halved
- 48 candy eyeballs
Instructions
- Preheat the oven to 350°F and line baking sheets with parchment paper.
- Whisk the flour, cocoa powder, baking soda, and salt in a medium bowl.
- Cream the butter with both sugars until light, then beat in the egg.
- Stir in the dry ingredients until a thick chocolate dough forms.
- Scoop 2-tablespoon balls onto the sheets and bake for 10 to 12 minutes.
- While warm, press two cookie halves into each cookie as wings and add candy eyeballs.
Frankenstein Mint Cookies
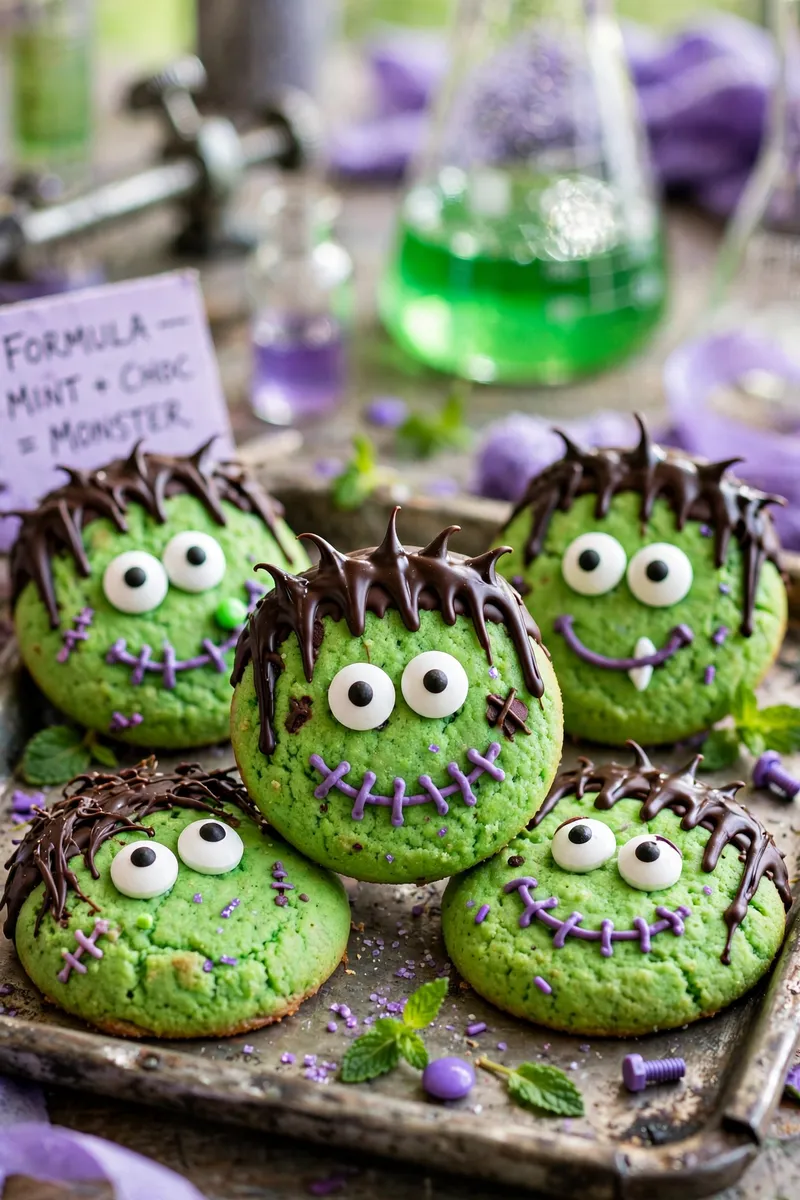
These fun Frankenstein mint cookies combine a cool mint flavor with the silliest green monster faces. A simple green-tinted dough gets baked, then chocolate hair and candy eyes bring each little monster to life. They are perfect for beginning decorators because the goofy faces are meant to look uneven and every cookie turns out uniquely charming.
Ingredients
- 2 1/4 cups all-purpose flour
- 1/2 teaspoon baking soda
- 1 cup butter, softened
- 3/4 cup sugar
- 1/2 cup brown sugar
- 1 teaspoon peppermint extract
- 2 eggs
- Green gel food coloring
- 1 cup chocolate chips, melted
- 48 candy eyeballs
Instructions
- Preheat the oven to 350°F and line baking sheets with parchment paper.
- Whisk the flour and baking soda, then cream the butter with both sugars.
- Beat in the eggs and peppermint extract, then tint the mixture bright green.
- Fold in the dry ingredients until just combined and scoop into 2-tablespoon balls.
- Bake for 10 to 12 minutes until set, then cool completely on the sheets.
- Dip the tops in melted chocolate for hair and add candy eyes.
Vampire Fang Cookies

These dramatic vampire fang cookies look like they are dripping with blood thanks to a swipe of red decorating gel. A soft red velvet cookie base keeps the spooky theme going from first bite to last. They are surprisingly simple to pull off — the messy drip effect means beginners can be gloriously imperfect and still nail the look.
Ingredients
- 1 box red velvet cake mix
- 1/2 cup vegetable oil
- 2 eggs
- 1 cup white chocolate chips
- 1/2 cup cream cheese frosting
- 1/4 cup red decorating gel
- 24 white candy fangs
- 2 tablespoons red sanding sugar
Instructions
- Preheat the oven to 350°F and line baking sheets with parchment paper.
- Stir the cake mix, oil, and eggs together until a thick dough forms.
- Fold in the white chocolate chips and scoop into 1 1/2-tablespoon balls.
- Bake for 9 to 11 minutes until the tops are crackled, then cool completely.
- Spread a thin layer of cream cheese frosting on each cookie.
- Press two candy fangs into the frosting and drizzle red gel below them like drips.
Jack-O-Lantern Cookies

These classic jack-o-lantern cookies never go out of style, with grinning faces piped onto bright orange rounds. A tender vanilla cookie base pairs perfectly with sweet royal icing. They are the quintessential Halloween cookie for beginners because triangle eyes and zigzag mouths are easy shapes that always read as a pumpkin face.
Ingredients
- 3 cups all-purpose flour
- 1 teaspoon baking powder
- 1/2 teaspoon salt
- 1 cup unsalted butter, softened
- 1 cup sugar
- 1 egg
- 2 teaspoons vanilla extract
- 2 cups orange royal icing
- 1/4 cup black royal icing
- 2 tablespoons green icing for stems
Instructions
- Whisk the flour, baking powder, and salt in a large bowl.
- Cream the butter and sugar until fluffy, then beat in the egg and vanilla.
- Gradually add the dry ingredients and mix until a smooth dough forms.
- Roll to 1/4-inch thickness, cut into rounds, and chill for 30 minutes.
- Bake at 350°F for 10 to 12 minutes until the edges are barely golden.
- Flood with orange icing, then pipe black triangle eyes, a nose, and a zigzag smile.
Tip: I draw the faces with a toothpick in the wet orange icing first — it works like a sketch you can smooth over before committing with the black icing.
Skeleton Bone Cookies
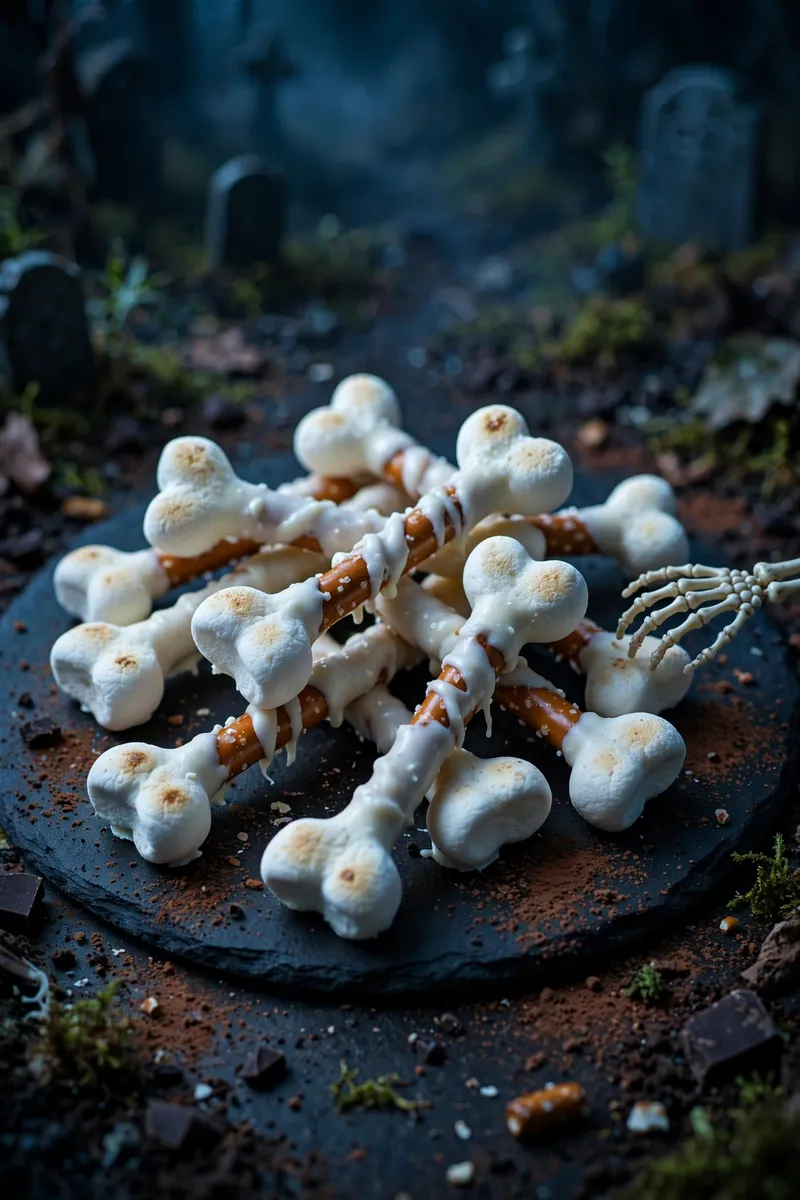
These clever skeleton bone cookies are made from simple pretzel-stick and marshmallow assemblies dipped in white chocolate. They look like tiny bones piled on a platter and take almost no baking at all. They are the ultimate last-minute Halloween treat for beginners who want something spooky without turning on the oven.
Ingredients
- 24 pretzel sticks
- 48 mini marshmallows
- 2 cups white candy melts
- 1 tablespoon coconut oil
- 1/4 cup black decorating gel
- 2 tablespoons white sprinkles
- 1 teaspoon vanilla extract
- Wax paper for setting
Instructions
- Push a mini marshmallow onto each end of every pretzel stick to form a bone shape.
- Melt the white candy melts with the coconut oil in 30-second microwave bursts.
- Stir in the vanilla extract until the coating is completely smooth.
- Dip each pretzel bone into the melted coating, letting the excess drip off.
- Set the bones on wax paper and let them harden for 20 minutes.
- Use black decorating gel to draw small knuckle lines on each marshmallow end.
Black Cat Cookies

These sleek black cat cookies are almost too elegant for Halloween, with glossy dark icing and bright candy eyes. A rich chocolate cookie base gives them their midnight color without any food coloring needed. They are a lovely choice for beginners who prefer chic over gory, and the simple round shape keeps the baking part completely stress-free.
Ingredients
- 1 3/4 cups all-purpose flour
- 3/4 cup dark cocoa powder
- 1 teaspoon baking soda
- 1/2 teaspoon salt
- 3/4 cup butter, softened
- 1 cup sugar
- 1 egg
- 1 1/2 cups black royal icing
- 48 yellow candy eyes
- 24 pink heart sprinkles for noses
Instructions
- Preheat the oven to 350°F and line baking sheets with parchment paper.
- Whisk the flour, dark cocoa, baking soda, and salt in a bowl.
- Cream the butter and sugar, then beat in the egg until smooth.
- Add the dry ingredients gradually until a dark, soft dough forms.
- Roll into balls, flatten slightly, and bake for 9 to 11 minutes.
- Flood cooled cookies with black icing, then add candy eyes and a pink heart nose.
Haunted House Cookies
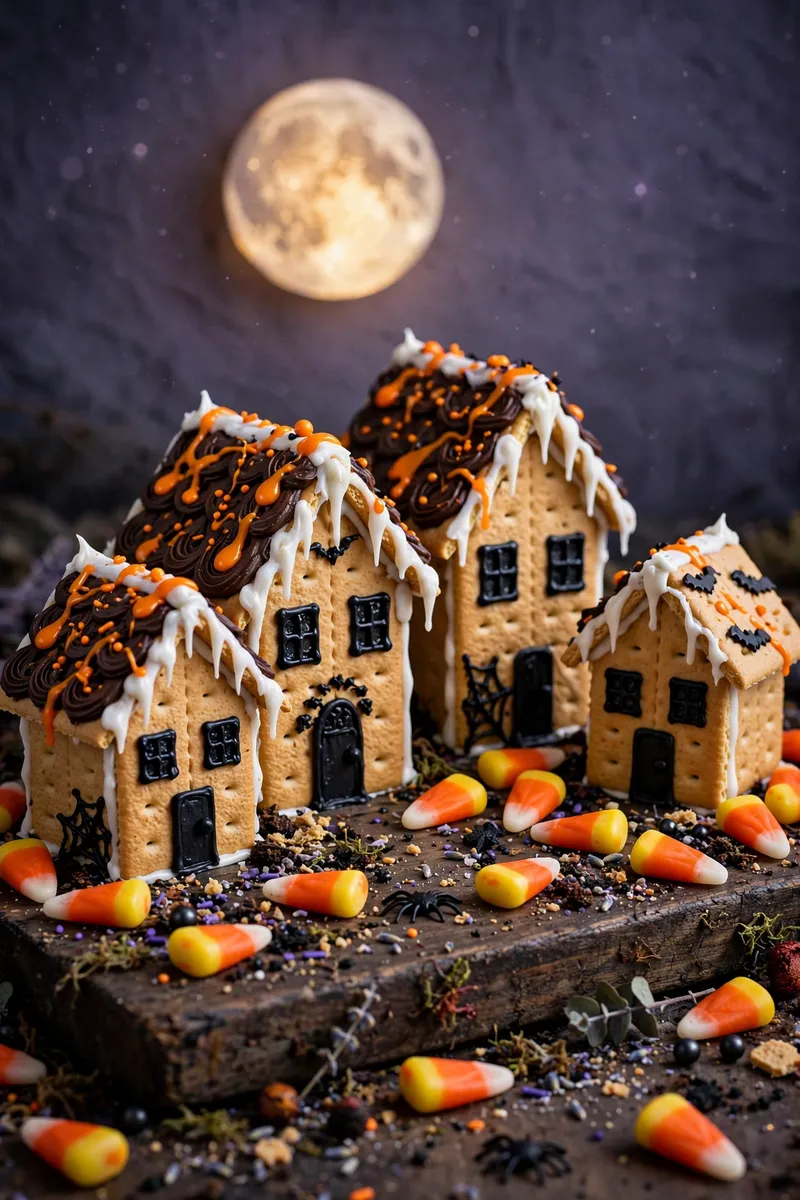
These impressive haunted house cookies look like a gingerbread project but start with simple graham crackers. A little royal icing acts as glue and decoration, holding the little houses together. They are fantastic for beginners because the rustic, crooked look is exactly what a haunted house should have — perfection would actually ruin the effect.
Ingredients
- 12 full graham cracker sheets
- 2 cups royal icing
- 1/2 cup chocolate frosting
- 1/4 cup orange candy melts, melted
- 24 candy corn pieces
- 1/4 cup black decorating gel
- 2 tablespoons purple sprinkles
- 1/2 cup crushed chocolate cookies for dirt
Instructions
- Cut the graham crackers into house shapes: squares with triangle roofs.
- Pipe thick lines of royal icing along the edges to glue the pieces together.
- Hold each house for 1 minute until the icing starts to set, then let dry fully.
- Spread chocolate frosting on the roofs and drizzle with melted orange candy.
- Pipe windows and doors with black decorating gel on each house front.
- Scatter candy corn and purple sprinkles around the base like a spooky yard.
Witch Finger Cookies
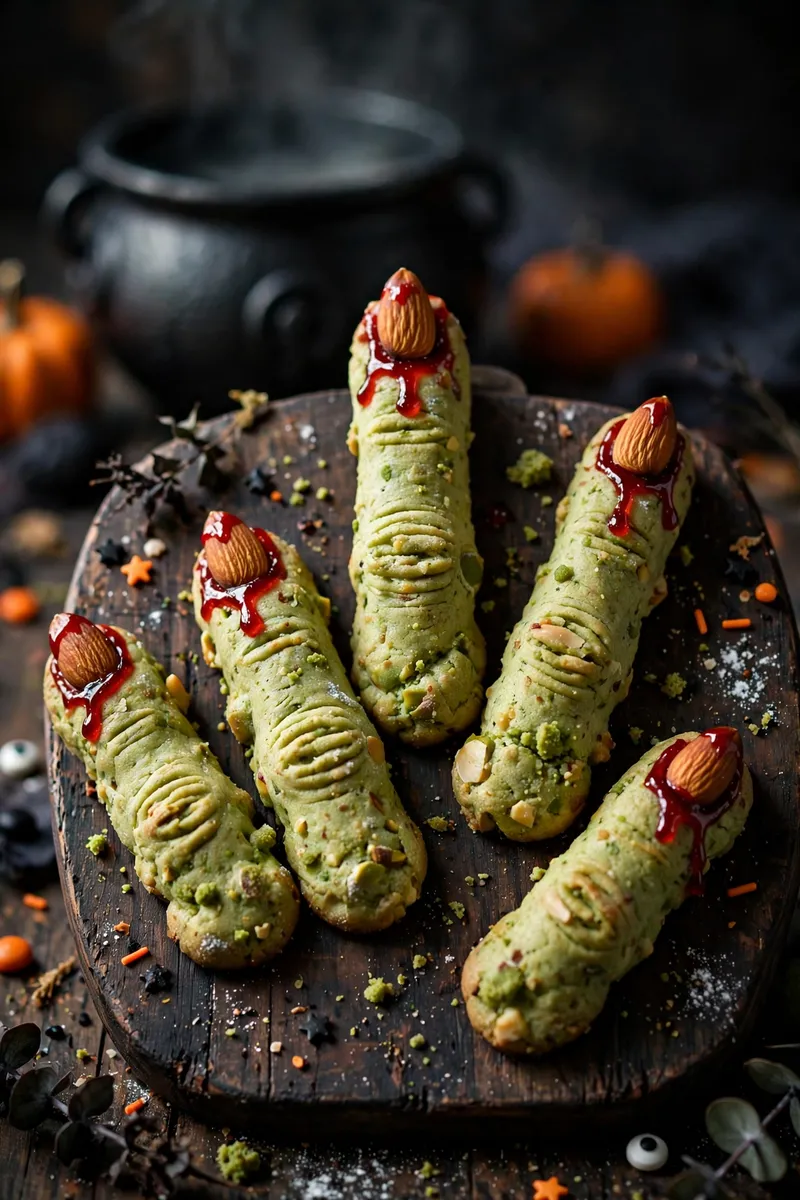
These creepy witch finger cookies are a Halloween classic, with knobby green fingers tipped by almond nails. A buttery shortbread dough tinted green bakes up crisp and golden at the edges. They are wonderfully simple for beginners because the uglier and more gnarled each finger looks, the more convincingly witchy the final result becomes.
Ingredients
- 2 1/2 cups all-purpose flour
- 1/2 teaspoon salt
- 1 cup unsalted butter, softened
- 1 cup powdered sugar
- 1 teaspoon almond extract
- 1 teaspoon vanilla extract
- Green gel food coloring
- 24 whole blanched almonds
- 1/4 cup red decorating gel
Instructions
- Preheat the oven to 325°F and line baking sheets with parchment paper.
- Whisk the flour and salt, then cream the butter and powdered sugar until smooth.
- Beat in both extracts and tint the dough a pale witchy green.
- Roll tablespoon portions into finger shapes with slightly tapered ends.
- Press an almond firmly into one end of each finger as the nail.
- Bake for 15 to 18 minutes until set, then add red gel around the nail beds.
Tip: I score two shallow knuckle lines on each finger with a butter knife before baking — the marks deepen in the oven and make the fingers look wonderfully gnarled.
Graveyard Dirt Cookies
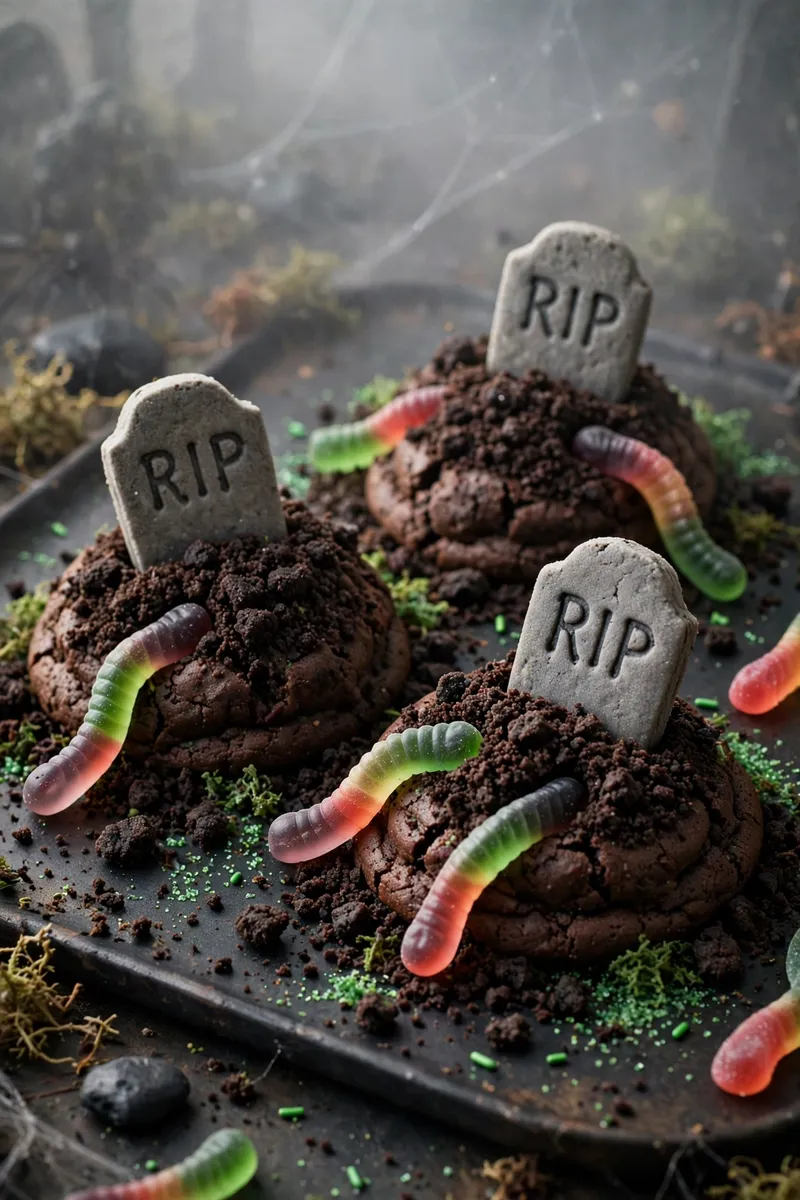
These spooky graveyard dirt cookies pile crushed chocolate cookies over soft chocolate mounds to look like fresh grave plots. Little cookie tombstones stuck into each mound complete the eerie scene. They are a delightfully easy beginner project because the whole point is a messy, crumbly texture — neatness is not required at all.
Ingredients
- 1 package chocolate cake mix
- 1/2 cup butter, melted
- 2 eggs
- 2 cups crushed chocolate sandwich cookies
- 12 rectangular butter cookies for tombstones
- 1/4 cup gray royal icing
- 1/4 cup black decorating gel
- 12 gummy worms
- 2 tablespoons green sprinkles for grass
Instructions
- Preheat the oven to 350°F and line baking sheets with parchment paper.
- Stir the cake mix, melted butter, and eggs into a thick dough.
- Scoop into 2-tablespoon mounds and bake for 10 to 12 minutes.
- While the cookies are still warm, press the tops into the crushed cookie crumbs.
- Pipe "RIP" on the rectangular cookies with gray icing and let them set.
- Stick a tombstone into each mound, add a gummy worm, and sprinkle green grass.
Eyeball Thumbprint Cookies
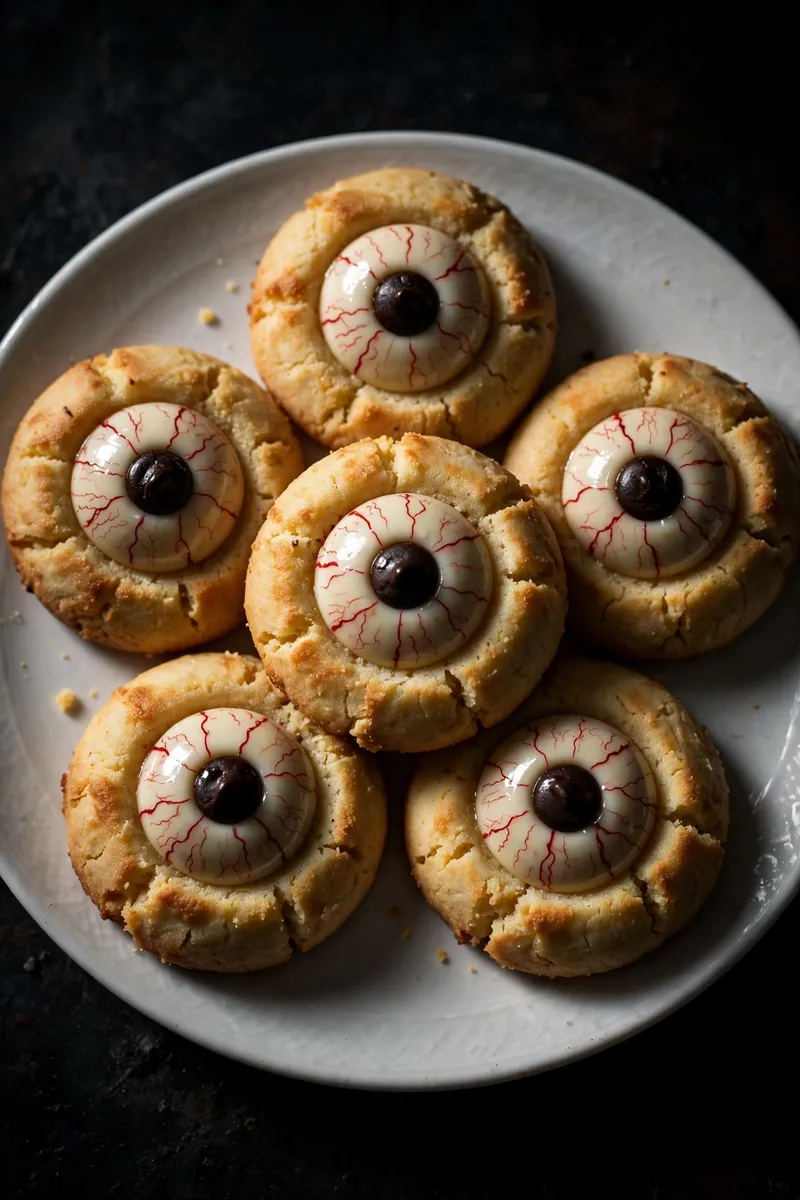
These startling eyeball thumbprint cookies stare right back at you with bloodshot whites and dark pupils. A classic buttery thumbprint cookie gets filled with white chocolate and finished with decorating gel details. They are a brilliant beginner choice because the thumbprint technique is foolproof and the spooky decorating takes just minutes per cookie.
Ingredients
- 2 cups all-purpose flour
- 1/2 teaspoon salt
- 1 cup unsalted butter, softened
- 2/3 cup sugar
- 2 egg yolks
- 2 teaspoons vanilla extract
- 1 cup white chocolate chips, melted
- 24 dark chocolate chips
- 1 tube red decorating gel
Instructions
- Preheat the oven to 350°F and line baking sheets with parchment paper.
- Whisk the flour and salt, then cream the butter and sugar until fluffy.
- Beat in the egg yolks and vanilla, then gradually add the flour mixture.
- Roll into 1-inch balls and press a deep thumbprint into the center of each.
- Bake for 12 to 14 minutes until the edges are lightly golden, then cool.
- Fill each print with melted white chocolate, add a dark chip pupil, and draw red veins.
Caramel Apple Cookies

These cozy caramel apple cookies taste like fall in every bite, with chewy centers and a sweet caramel drizzle. Bits of dried apple folded into a spiced dough keep them moist and flavorful. They are perfect for beginners who want a Halloween cookie that leans more autumn harvest than haunted house, and the caramel drizzle hides any imperfect shapes.
Ingredients
- 2 1/4 cups all-purpose flour
- 1 teaspoon baking soda
- 1 teaspoon cinnamon
- 1/2 teaspoon nutmeg
- 1 cup butter, softened
- 3/4 cup brown sugar
- 2 eggs
- 2 teaspoons vanilla extract
- 1 cup chopped dried apples
- 1/2 cup caramel sauce
Instructions
- Preheat the oven to 350°F and line baking sheets with parchment paper.
- Whisk the flour, baking soda, cinnamon, and nutmeg in a medium bowl.
- Cream the butter with the brown sugar until light, then beat in the eggs and vanilla.
- Fold in the dry ingredients, then stir in the chopped dried apples.
- Scoop 2-tablespoon balls onto the sheets and bake for 11 to 13 minutes.
- Drizzle warm cookies with caramel sauce.
Tip: I warm the caramel sauce for 15 seconds in the microwave before drizzling — it flows in thin, pretty lines instead of thick blobs.
Bloody Jam Cookies

These dramatic bloody jam cookies ooze bright red raspberry filling from their centers like something from a vampire movie. A tender shortbread cookie provides the perfect buttery contrast to the tart jam. They are wonderfully simple for beginners because the jam does all the visual work — just fill generously and let it bubble over the edges.
Ingredients
- 2 1/2 cups all-purpose flour
- 1/4 teaspoon salt
- 1 cup unsalted butter, softened
- 3/4 cup powdered sugar
- 2 teaspoons vanilla extract
- 3/4 cup seedless raspberry jam
- 1 tablespoon lemon juice
- 2 tablespoons powdered sugar for dusting
Instructions
- Preheat the oven to 350°F and line baking sheets with parchment paper.
- Whisk the flour and salt, then cream the butter and powdered sugar until smooth.
- Beat in the vanilla, then gradually add the flour mixture to form a dough.
- Roll into 1-inch balls, place on the sheets, and press a deep well in each.
- Stir the jam with the lemon juice and spoon generously into every well.
- Bake for 13 to 15 minutes until the edges are set and the jam is bubbling.
Mummy Cookie Bars
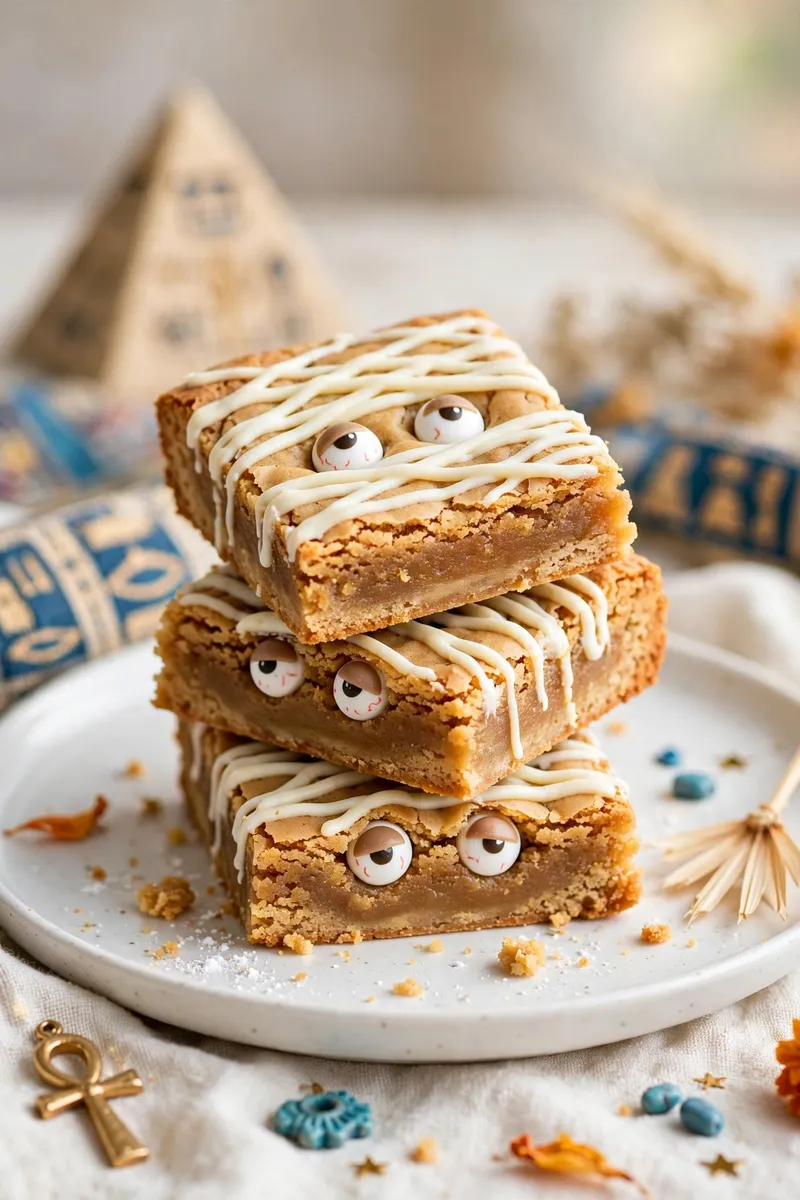
These adorable mummy cookie bars are chewy blondies wrapped in zigzag stripes of white chocolate. Candy eyeballs peeking through the wrappings give each bar its own sleepy personality. They are ideal for beginners because bars are far easier than individual cookies — one pan, one bake, and the drizzle decorating is completely forgiving.
Ingredients
- 2 1/4 cups all-purpose flour
- 1 teaspoon baking powder
- 1/2 teaspoon salt
- 3/4 cup butter, melted
- 1 1/2 cups brown sugar
- 2 eggs
- 2 teaspoons vanilla extract
- 1 cup white chocolate chips
- 1 1/2 cups white candy melts, melted
- 24 candy eyeballs
Instructions
- Preheat the oven to 350°F and line a 9×13-inch pan with parchment paper.
- Whisk the flour, baking powder, and salt in a medium bowl.
- Stir the melted butter and brown sugar, then beat in the eggs and vanilla.
- Fold in the dry ingredients and white chocolate chips, then spread in the pan.
- Bake for 22 to 25 minutes until golden at the edges, then cool completely.
- Drizzle melted candy in zigzag mummy wraps and press on candy eyeballs.
Orange Creamsicle Cookies

These bright orange creamsicle cookies taste like the classic frozen treat in soft cookie form. Orange zest and white chocolate chips create that nostalgic citrus-cream flavor everyone loves. They are a cheerful addition to any Halloween spread for beginners who want color and fun without any decorating at all — the vibrant dough is the decoration.
Ingredients
- 2 1/2 cups all-purpose flour
- 1 teaspoon baking soda
- 1/2 teaspoon salt
- 1 cup butter, softened
- 3/4 cup sugar
- 1/2 cup brown sugar
- 1 package orange gelatin mix
- 2 eggs
- 2 tablespoons orange zest
- 1 1/2 cups white chocolate chips
Instructions
- Preheat the oven to 350°F and line baking sheets with parchment paper.
- Whisk the flour, baking soda, and salt in a medium bowl.
- Cream the butter, both sugars, and the gelatin mix until fluffy and bright.
- Beat in the eggs and orange zest until the dough is evenly tinted.
- Fold in the white chocolate chips and scoop into 2-tablespoon balls.
- Bake for 10 to 12 minutes until the edges are set but centers look soft.
Tip: I slightly underbake these on purpose — pulling them when the centers still look soft keeps them chewy for days instead of turning crisp.
Peanut Butter Ghosts
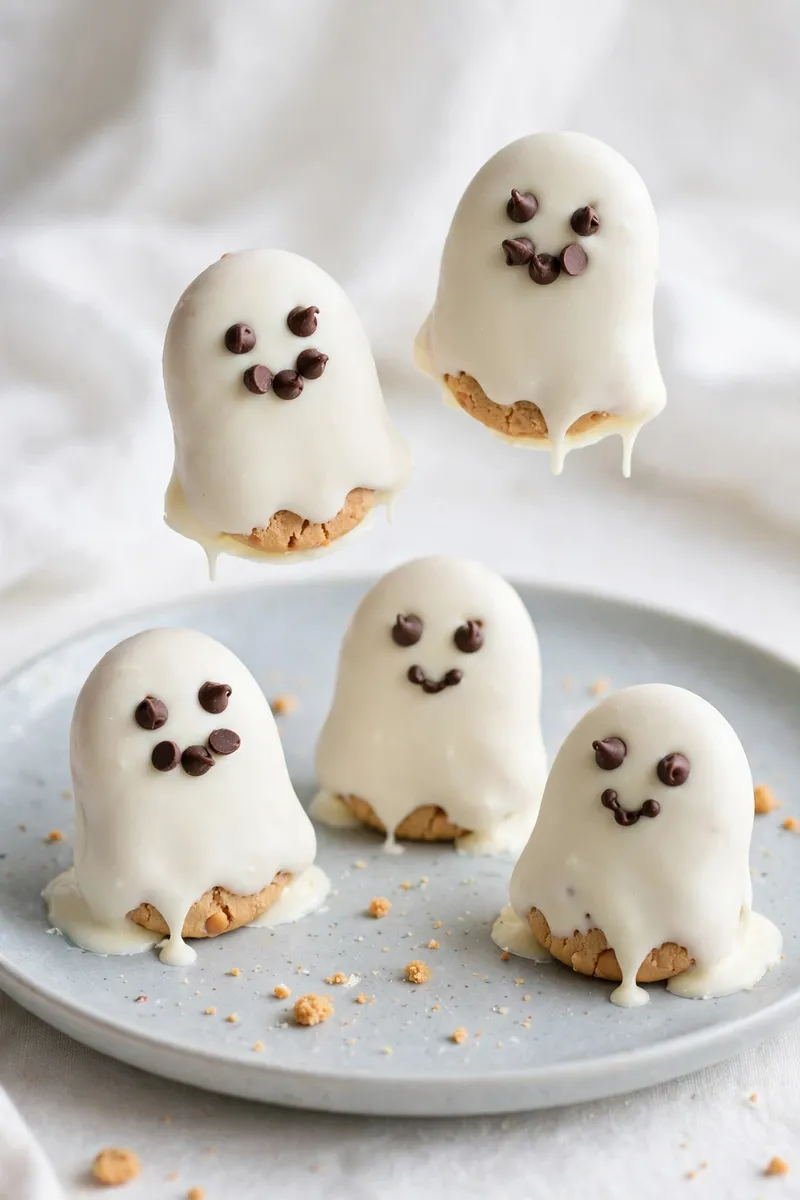
These sweet peanut butter ghosts combine the beloved peanut-chocolate pairing with the cutest little ghost shapes. A classic peanut butter cookie gets dipped in white chocolate and finished with mini chip faces. They are a wonderful beginner project because the familiar flavors guarantee they will disappear fast, no matter how wobbly the ghost faces turn out.
Ingredients
- 1 3/4 cups all-purpose flour
- 1 teaspoon baking soda
- 1/2 teaspoon salt
- 1/2 cup butter, softened
- 1/2 cup creamy peanut butter
- 1/2 cup sugar
- 1/2 cup brown sugar
- 1 egg
- 2 cups white candy melts
- 48 mini chocolate chips
Instructions
- Preheat the oven to 375°F and line baking sheets with parchment paper.
- Whisk the flour, baking soda, and salt in a medium bowl.
- Cream the butter, peanut butter, and both sugars until light and fluffy.
- Beat in the egg, then gradually add the flour mixture.
- Shape into 2-inch ovals, flatten slightly, and bake for 9 to 11 minutes.
- Dip cooled cookies in melted candy, then press on mini chips for the faces.
Chocolate Chip Mummies
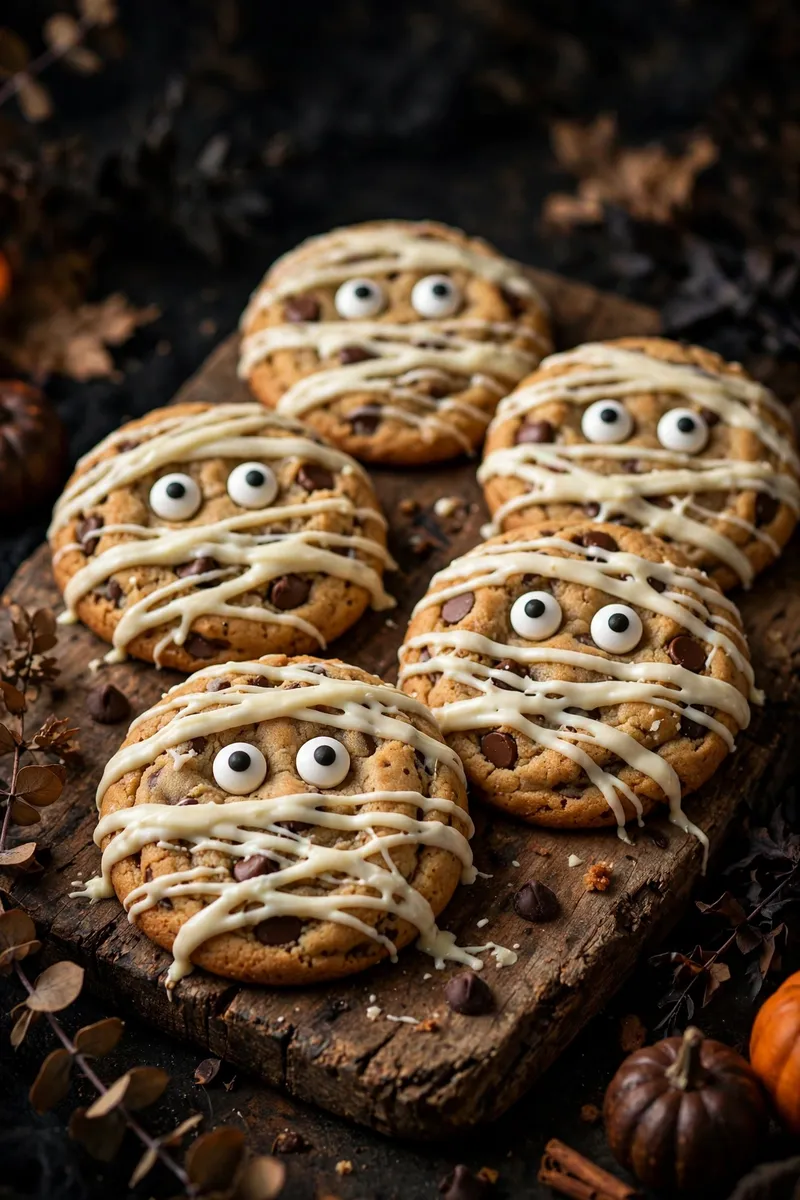
These clever chocolate chip mummies take the world's most familiar cookie and dress it up for Halloween. Warm white chocolate drizzled in uneven stripes transforms each cookie into a wrapped little mummy. They are the perfect beginner shortcut — start with your favorite chocolate chip cookie recipe and let the five-minute mummy makeover do all the spooky work.
Ingredients
- 2 1/4 cups all-purpose flour
- 1 teaspoon baking soda
- 1 teaspoon salt
- 1 cup butter, softened
- 3/4 cup sugar
- 3/4 cup brown sugar
- 2 eggs
- 2 cups chocolate chips
- 1 1/2 cups white candy melts
- 48 candy eyeballs
Instructions
- Preheat the oven to 375°F and line baking sheets with parchment paper.
- Whisk the flour, baking soda, and salt in a medium bowl.
- Cream the butter with both sugars, then beat in the eggs.
- Fold in the dry ingredients and chocolate chips until just combined.
- Scoop 2-tablespoon balls onto the sheets and bake for 9 to 11 minutes.
- Drizzle cooled cookies with melted white candy and add two candy eyeballs each.
Conclusion
You now have 22 easy Halloween cookies for beginners that prove spooky baking does not require professional skills. From googly-eyed monsters to dripping vampire fangs, every recipe on this list was designed to look impressive with simple techniques and easy-to-find ingredients. Pick a few favorites, invite the kids into the kitchen, and make an afternoon of decorating together. For more party inspiration, check out these easy Halloween recipes to round out your spread. Save this collection to your Halloween Pinterest board so you can find it again next October, and share it with a friend who needs beginner-friendly baking wins.